


There are many techniques to achieve a peeling paint effect and I’m still learning. Let that be known now!

My most recent efforts, however, yielded my best results to date, so I thought I’d share to save some of your sweat and tears by sharing them.
First things first, I used a few techniques in this above image so let’s first look at the one I used for —

4. Apply it in globs using the applicator brush. It’s better if it goes on too thick than too thin. You should have patches of the stuff here and there:
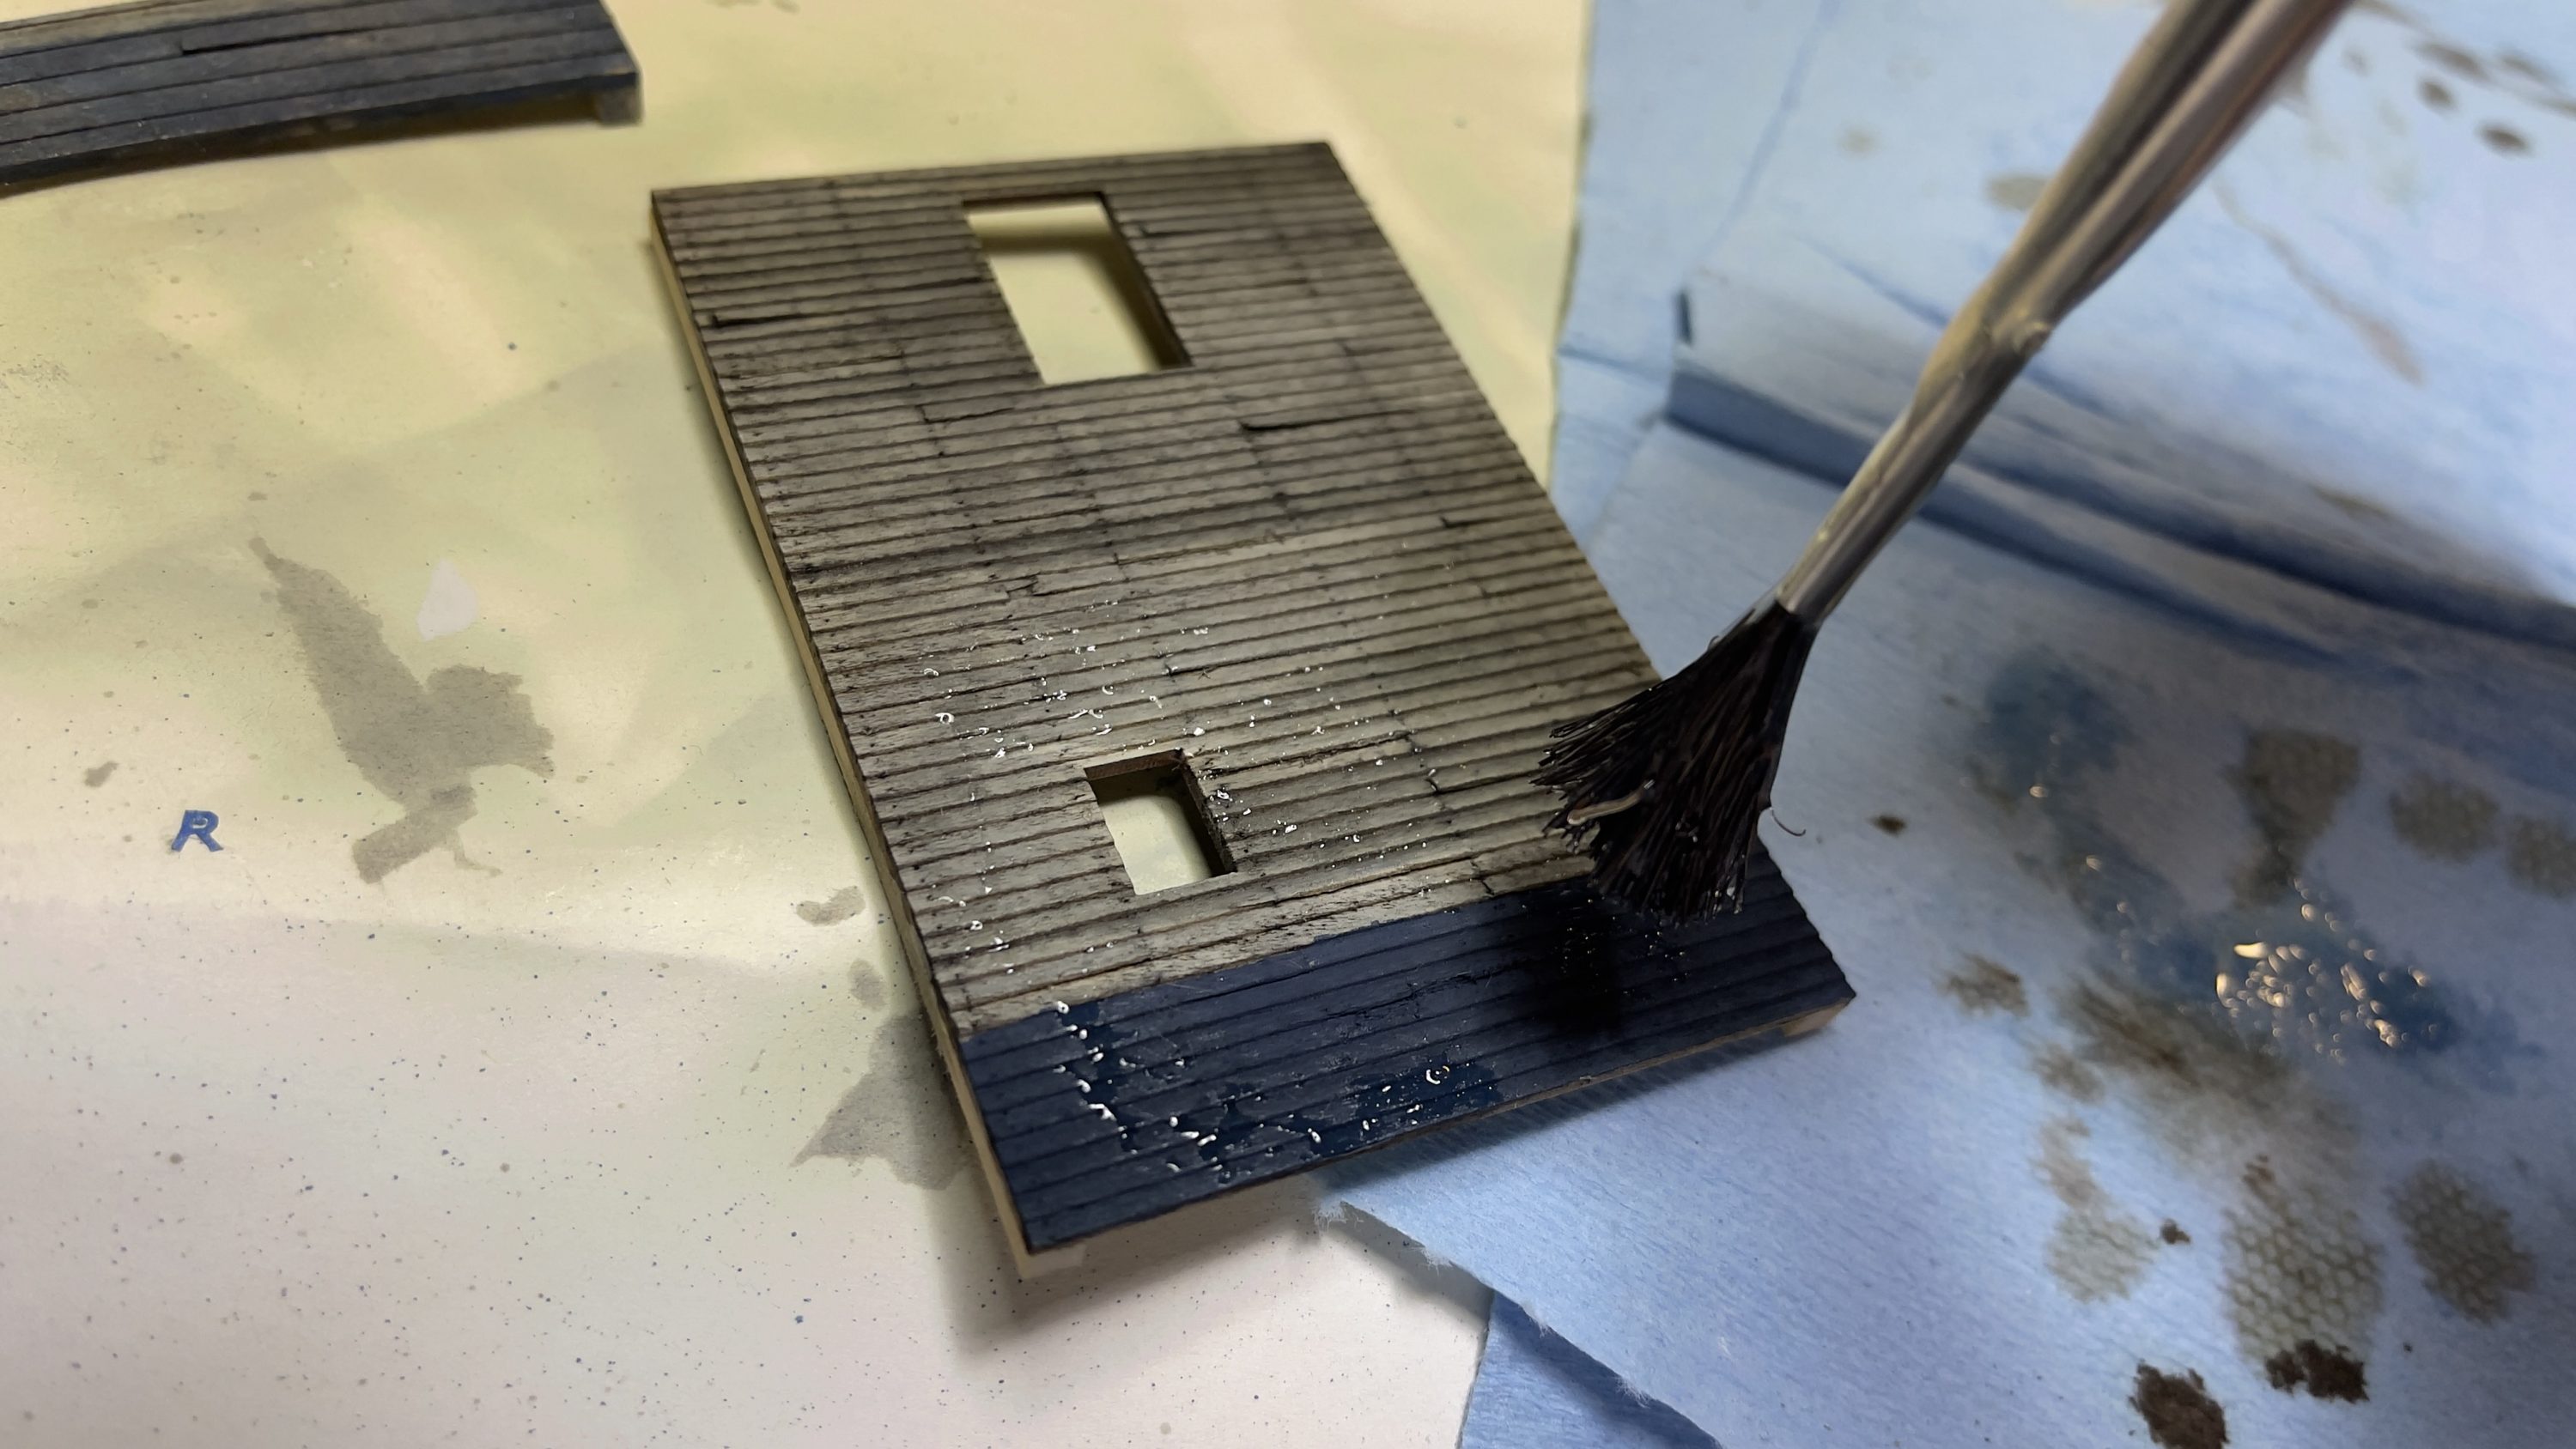

5. After the cement has dried, paint your wood/walls.
6. After everything is dry, simply roll your thumb over the areas you covered with the rubber cement. You’ll see the rubber cement comes away super easily, leaving you a wonderful peeling paint effect. You can also use a toothpick (lightly) to pick at specific areas.
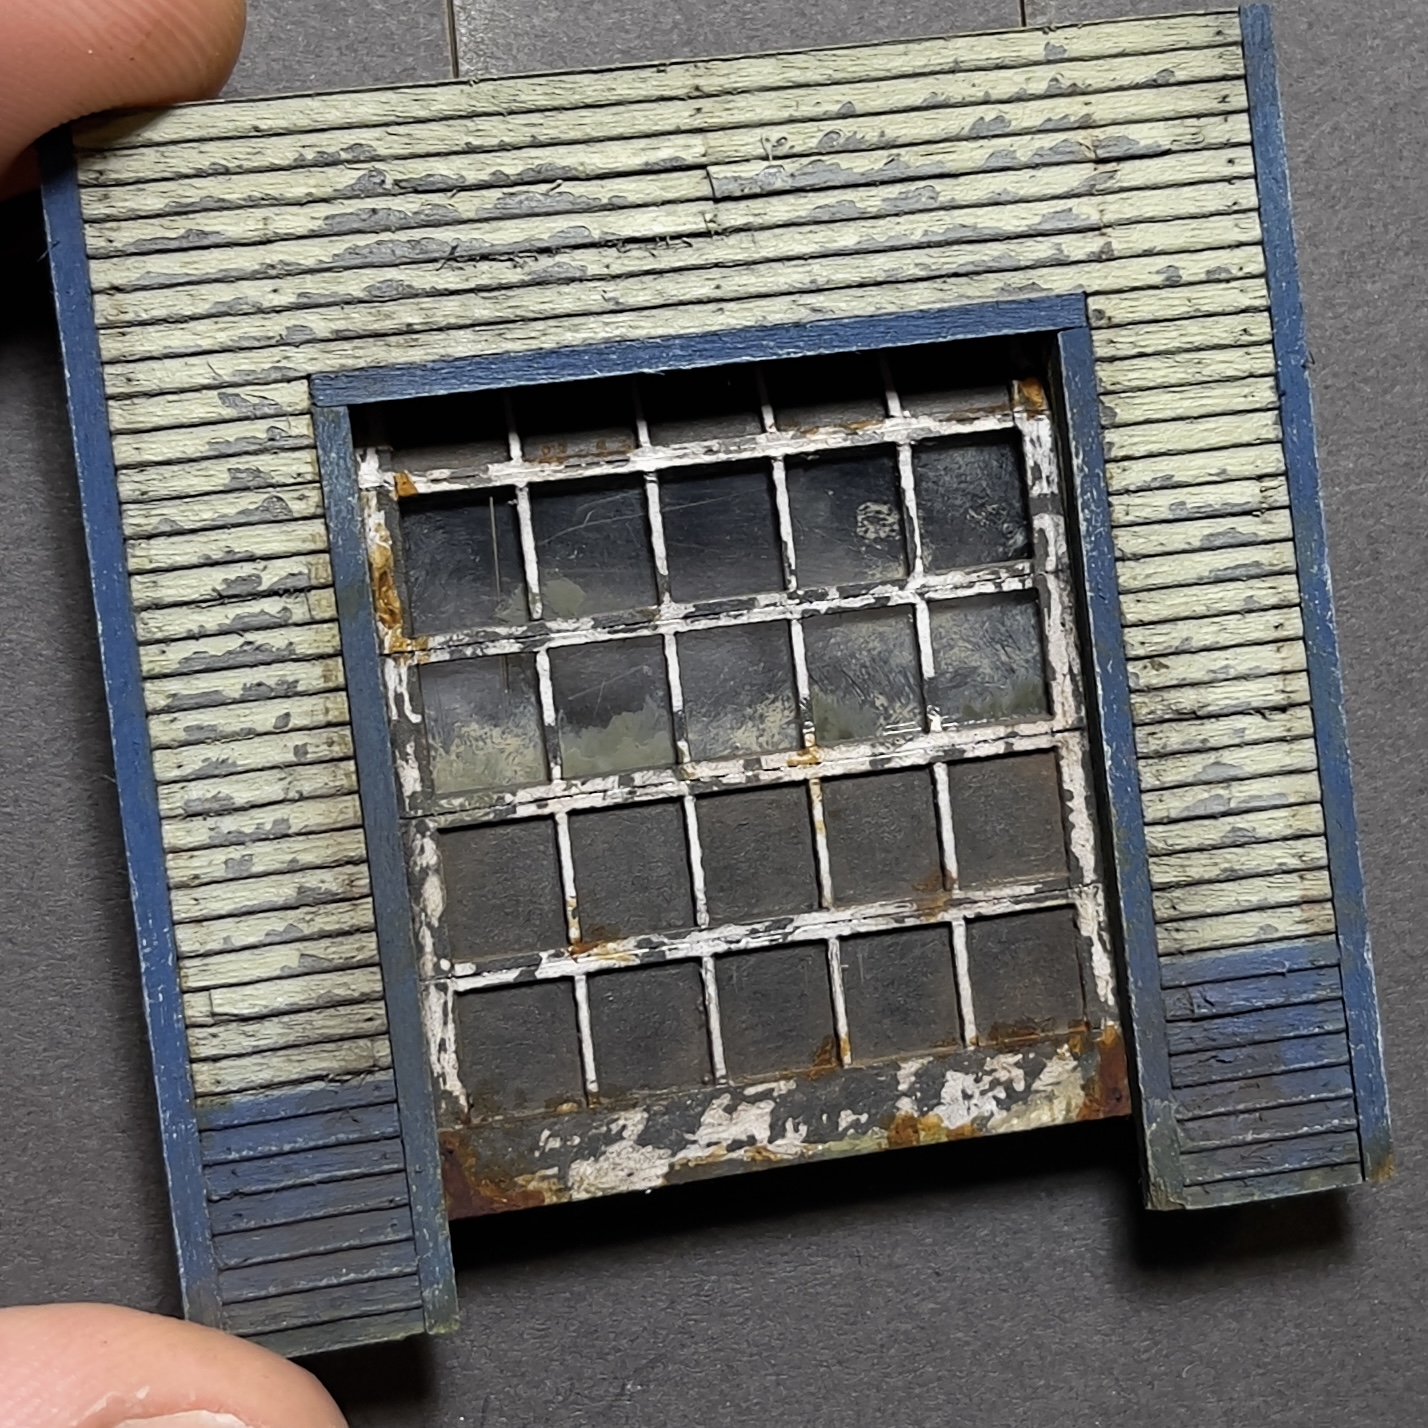
The peeling paint on this garage door was created using a different technique. It’s actually the same technique I used for the plastic doors and windows. So, I guess we should now talk about —

Unlike wood, you obviously don’t stain plastic. You paint it. So where do we start? It’s actually very simple.
If you are painting a white finish… there’s something else…

5. Buy one of these:
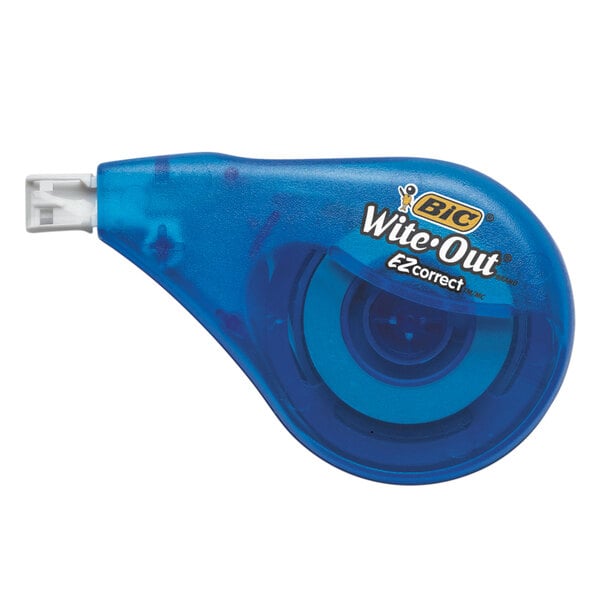
6. Instead of both the rubber cement and painting, simply use the Wite-Out tape (Tipp-Ex Mouse, for those in the UK) to “paint” your windows and doors. It goes on easier than you think and sticks more than you expect! I accidentally discovered this stuff peels when I was trying to use it for it’s proper purpose — and failed! Go figure!
7. The vinyl-like finish of the tape makes it a perfect candidate to peel and pick at, create a easy-to-achieve peeling effect (how I achieved the above windows and doors)
8. You don’t need to seal afterwards, but feel free to!
And that’s it, folks. Don’t forget to weather with chalks and other things like oils and enamels for that extra worn look.
As always, Keep it Rusty!
by on October 14, 2021, filed: How to's

All content, pictures and documentation(s) are copyright of Keep It Rusty Ltd, a UK registered company.
© 2011 -
If in doubt, always get permission


