


With the recent completion of my third diorama, “Who Goes There?” one of the more consistent comments in feedback was about the photography and how it pulled people into the diorama, “kicking it up a notch”. So it got me thinking about making a blog post about it.
The following is mostly in regard to dioramas/vignettes, which have a story to tell – as opposed to a single model, which is about presence.
I have a passion for film. I’m a filmmaker by nature and I work in the film industry too. Combining my love for the medium here was just a natural step that I never even thought about until people started pointing out how cinematic it was.
What equipment do I use? Nothing fancy, is the answer. I use a Canon 450D with the Canon 18-55mm lens (and sometimes a Canon 50mm prime). A DSLR is recommended – allowing maximum control over depth, focus and exposure. This all helps with the story, drawing the viewer’s eye to where you want it to go.
No tripod, everything is shot handheld. With the light I give it and working with a 1/50 shutter, ISO800 and 5.6 – 6.3 f/stop, handheld produces sharp images. Even in very detailed close ups.
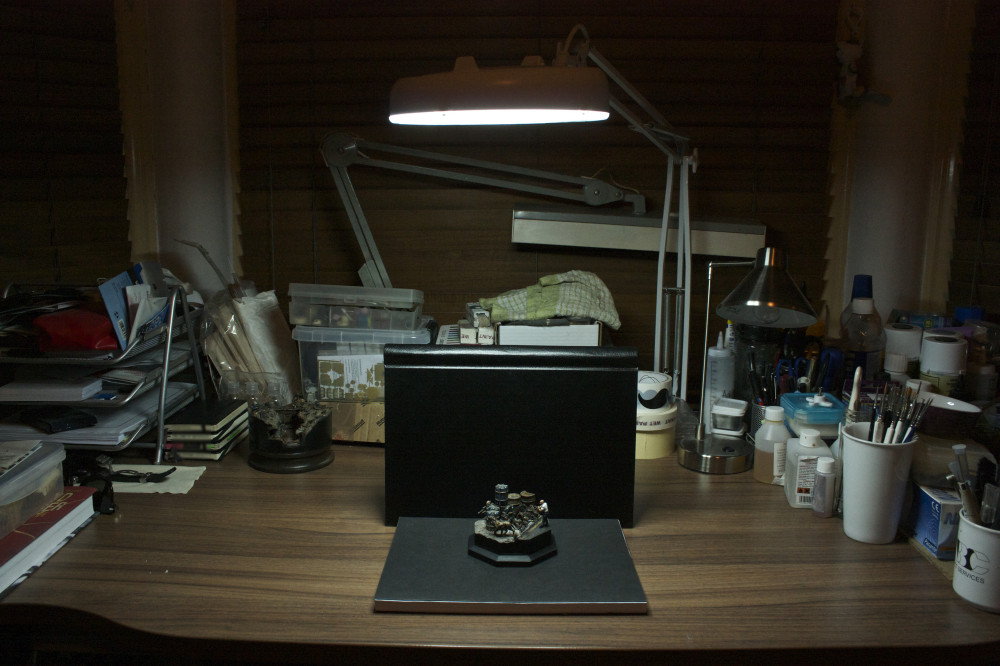
Speaking of which, for a studio, I use my standard daylight hobby light with a springback folder and some black paper as backing:
Lets begin.
I use a four part ‘narrative’, if you will.
1. Close-ups
2. Character reveal
3. Situation reveal
4. Wides (overall)
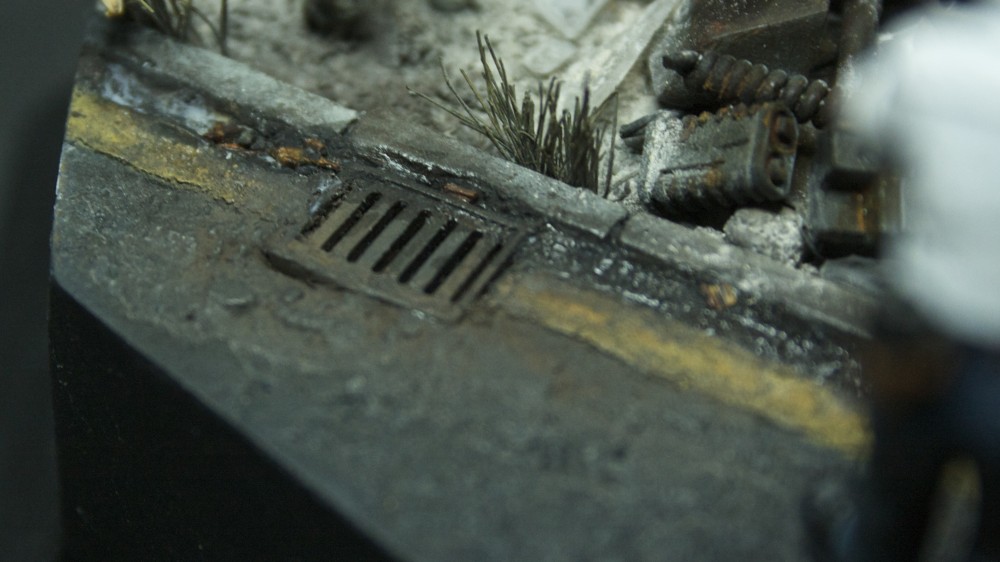
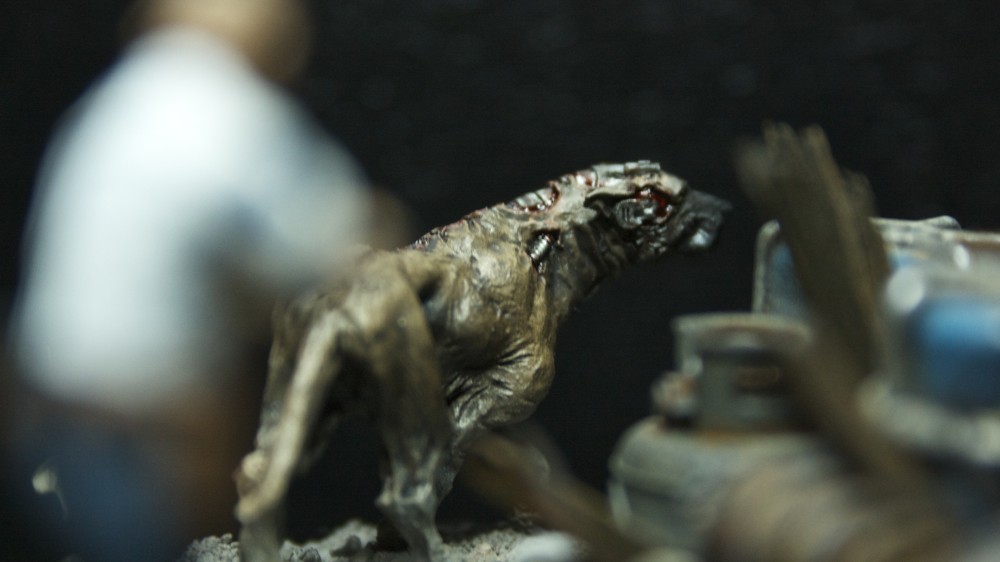
I always start with the details. Close-ups. I try to create a mood, feeling and texture. Once established, it’s easier for the story to take hold because the viewer has already been lulled into an environment. Example:
Once that’s done, I keep the depth and move on to introducing characters. Making sure to hold back the reveal of the situation in the diorama for the next part. Here is an example:
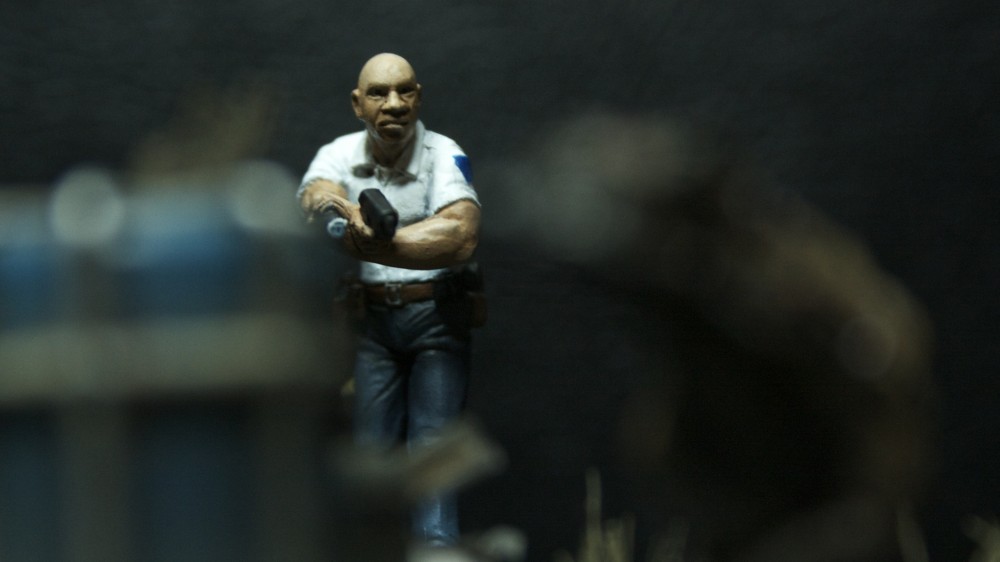
I’ve revealed two of three character’s here without revealing the situation of the diorama. They are clearly hunting and searching for something. (In “I am two bullets” the two snipers are revealed, whilst the assassin is revealed in the next step)
These two photos are the typical “over-the-shoulder” type shots. I’m conscious of creating a geography in the viewer’s mind (hence the out of focus characters in the foreground) whilst drawing their eye to the next subject (characters in focus in the background). The shots are dynamic because of it, which is all helping to bring the inanimate diorama to life.
Next up, the situation:
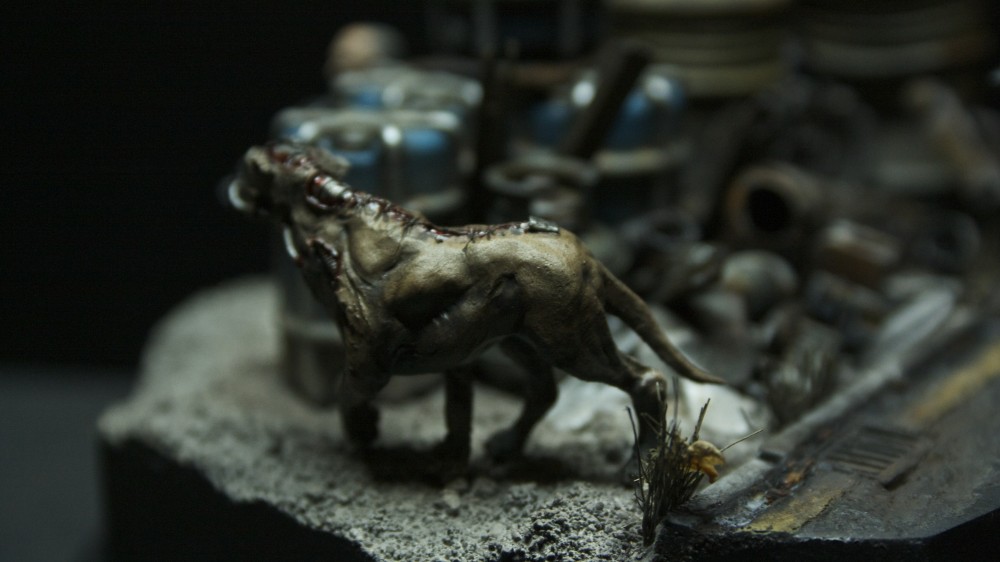

In these four photos of the situation reveal, they each perform a different task. The first photo provides a subtle hint. You can just see the soldier’s head from behind the barrels. I’ve deliberately not focussed the camera here, because this isn’t the focus just yet. I’m still creating the geography and showing the Dog from another angle.
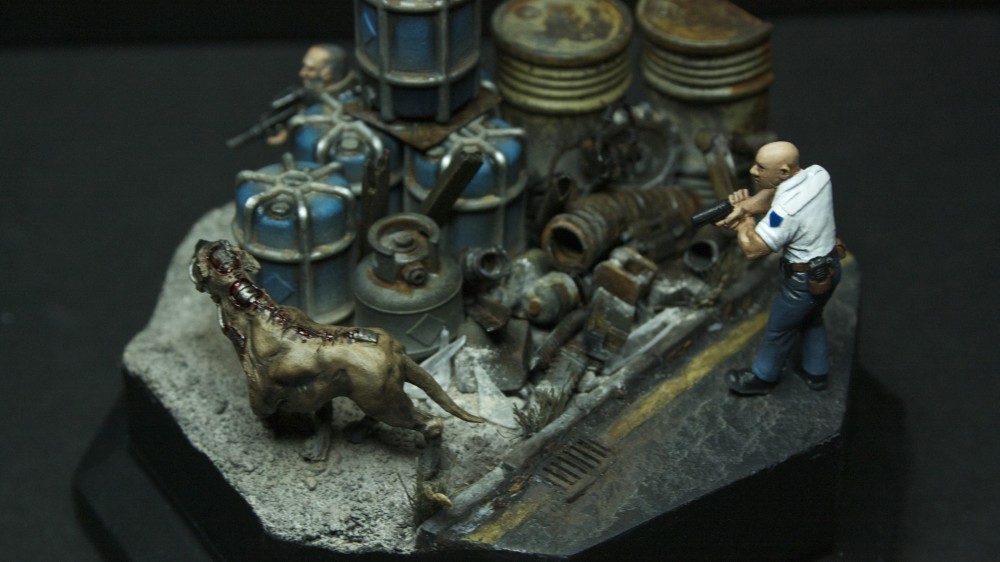
Second photo is about geography again, this time for all three characters. The situation is starting to become clear here: the soldier’s cover has been compromised and about to be exposed by the Dog and Guard.
Third photo is about the drama of the situation and the reveal of the final character. All three characters are finally presented and the drama should reach it’s peak here as the diorama’s story is clear.
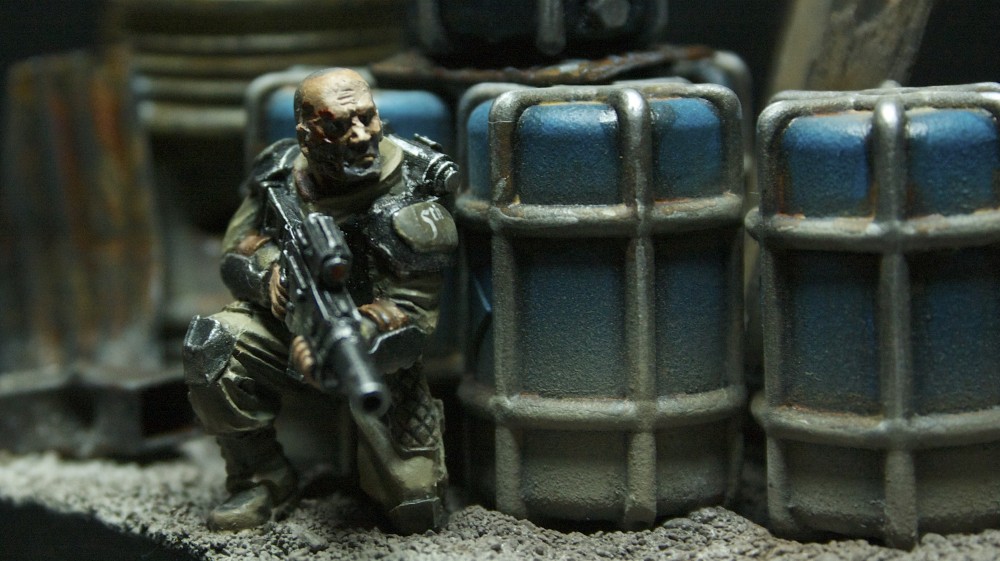
Fourth photo, the final photo of this section (situation reveal), is the detailed coverage of the final character. As we’ve had for the previous characters, he needs his close up too!
Finally, the last part of the photographic narrative: the wides – or the overall shots:
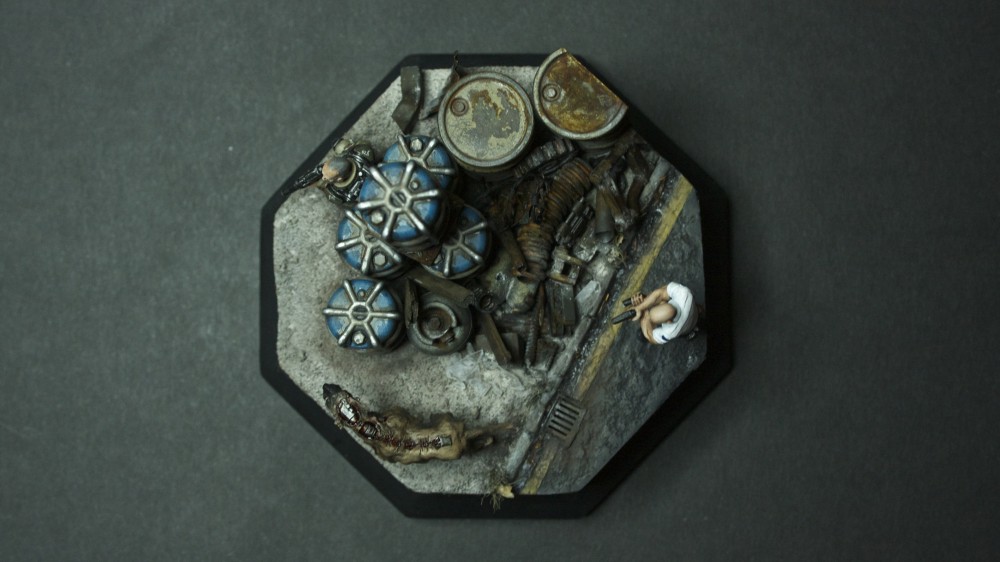
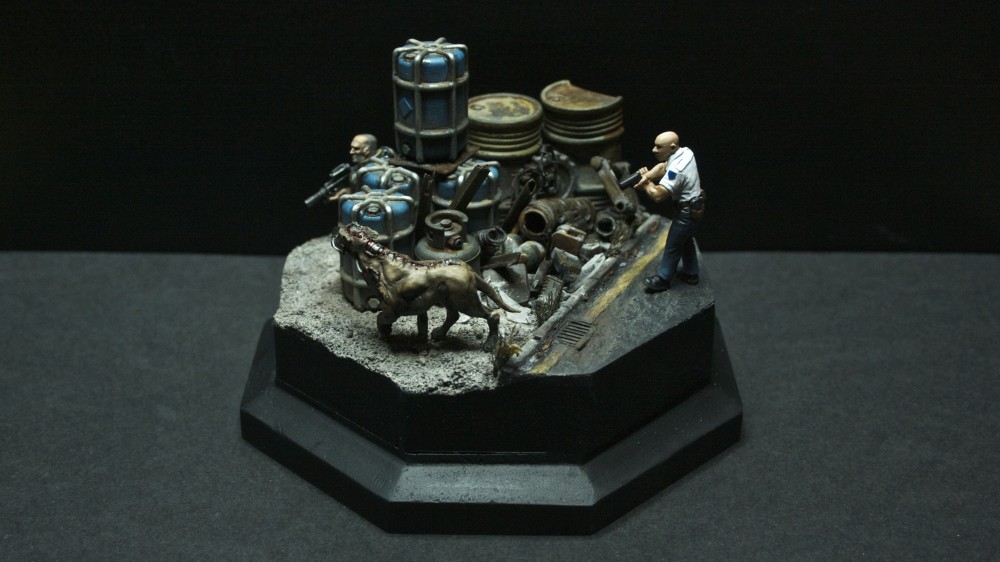
I have a whole bunch of these usually, but will thin them down to just a few for forums and sites like Cool Mini or Not. These photos show the overall diorama, allowing the viewer to take it all in. Base, size, shape etc… It’s the establishing shot. The one that reminds us that it’s a diorama. Everything is on display and it’s a neat way to tie off the photographic narrative that’s so far been played through close ups and reveals. Overhead shots are always great and I highly recommend them.
So that’s it. This is by no way a be-all-end-all way of photographing a diorama. It’s just how I do it and how I find it best works for me. I follow each four parts of the narrative, taking and using many photos for each, to create that story. Sometimes a character reveal only needs two photos and the overall shots need five. Sometimes it’s the other way around. It doesn’t matter as long as I follow each section respectively. Close-ups, character reveal, situation reveal, wides.
It’s about having fun. For me, I have yet to put any of my dioramas into competitions, so these photos are the only way they live and breathe. It’s the only way they are eternalised online, which is a big reason I put so much effort into the photography.
Give it a go. It’s not as hard as it seems and everything comes to life, improving all your hard effort tenfold.
by on June 24, 2014


