


New technology. Two words scary enough on their own but even more terrifying when combined — at least for some. Everyday there’s something new, something more affordable. For instance, right now, I’m debating between an Ultrasonic Knife or a Laser Cutter. Read that sentence again and tell me it doesn’t read like it’s been lifted from a pulpy, sci-fi paperback.
Bootstrapping these new tools to an old hobby like scale modeling can be daunting and the learning curve can look far too steep from the outside to even try — and the king at the top of this list? 3-D printing, of course. Well, today, I’m hoping to shed some light into the processes and steps from turning a design to a physical object sat on your workbench, ready for painting.
Assuming you’ve already done your own research on printers and picked out one you like (I chose the ever-reliable Anycubic Photon and also bought their Wash & Cure Machine), let’s move to the very first — and most important — part of this journey: 3-D modeling. I know, I know. Even that idea is daunting and challenge in itself. Good news though, you have a few options at your immediate disposal that can make the whole thing as easy as just hitting “download”, should you so choose.
Let’s not cut corners right outta the gate though, so let’s talk quickly about Tinkercad. It’s a free, online 3-D modeling tool that’s almost like what MS Paint was to Windows.That’s an undersell if there ever is one, but the point is it’s very intuitive. It works by dragging and dropping basic shapes into a work-plane, and then adding or subtracting those shapes to make a custom designs. Here, let me quickly demonstrate:
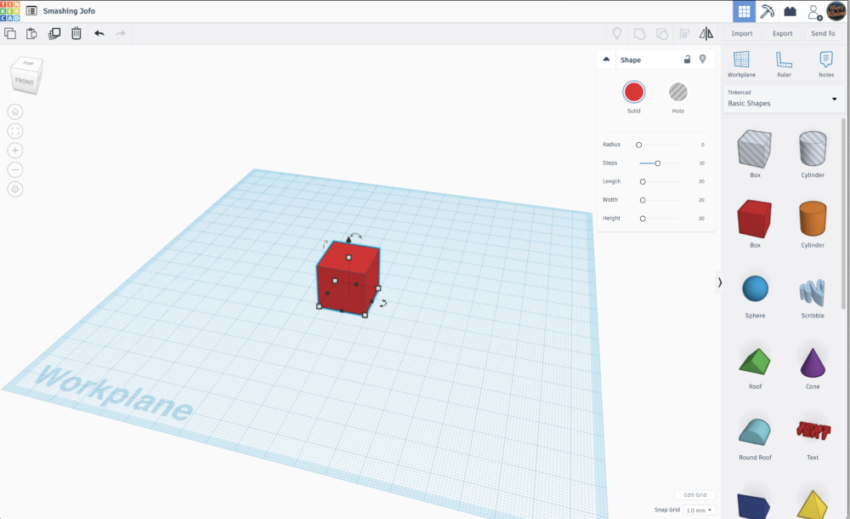
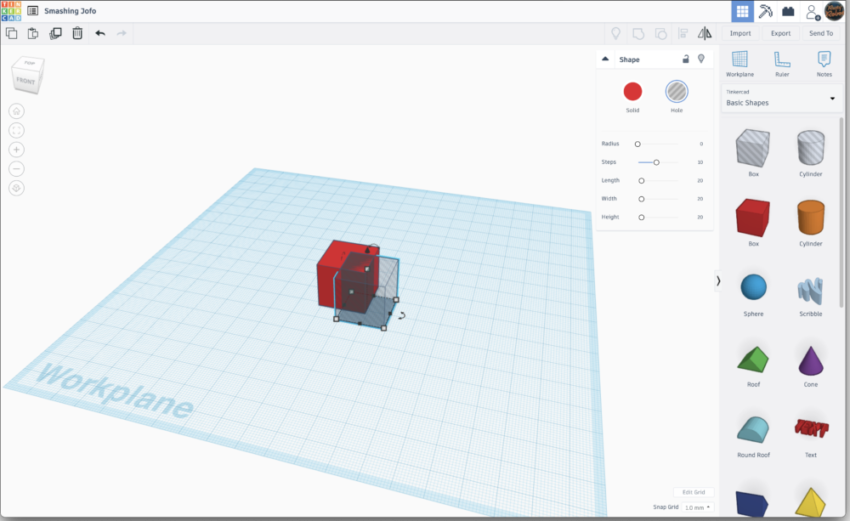
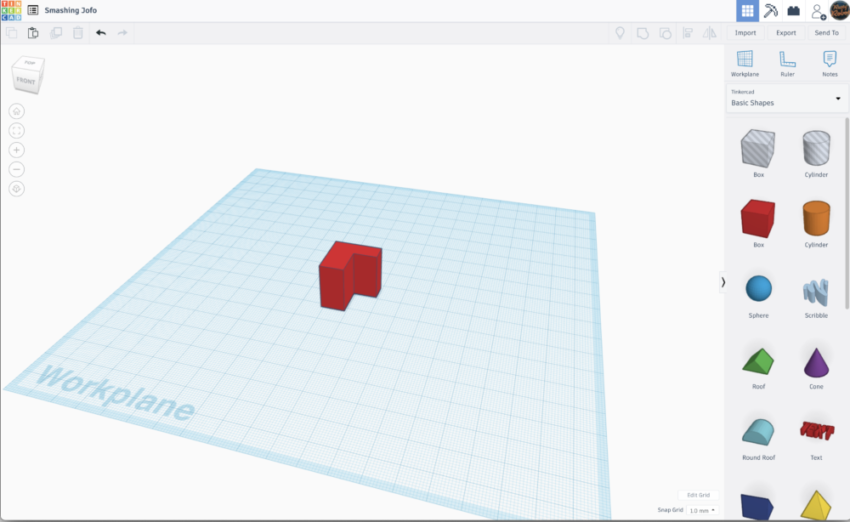
Armed with Tinkercad’s library of basic shapes, this simple method allows you to design anything you want. Tinkercad deals in millimeters, so that’s easy peasy breezy. The only thing you have to remember — you are working in 3-D. So remember you have 3-axis to deal with when creating. In other words, keep rotating around and checking everything looks good.
If that’s too daunting, you can always use Thingiverse — an amazing (and completely free!) repository stacked to the gunnels with designs uploaded by users around the world. Two things to bare in mind with Thingiverse or other repositories like it: 1) Not everything is in HO scale. In fact, some things could be in 1:1 scale. So resizing is a step to bare in mind and we’ll come to that later. 2) You won’t always find everything that you’re looking for. That’s why it’s so great to learn some basic 3-D modeling — you’ll fish and feed yourself forever more.
Despite the title of this post “… for scale modeling”, the only thing you have to do differently when 3D printing for scale models is keeping an eye on sizing. The software we are about to look at can do re-sizing of an object for you. But let’s not get too far ahead right now.
So, you’ve created or downloaded a design and it’s sat as an OBJ or an STL file on your Desktop. Ready to print, right? Not quite. There’s another step in-between that we need to do so your printer can understand how to print the object. This is a step called Slicing — and it’s the only part that’s a little tricky to get your head around.
First, let me just explain how a resin SLA printer works. From a build plate that rises incrementally on a z-axis, ultraviolet images displayed on an LCD screen cure those images onto the build plate, layer by layer, making up your design when it’s all done. These layers are called “Slices” and this is the language your printer understands. Slicing software does this translation for you automatically, but the software also does something else very important: it allows you to add Supports. A necessary step, for some/most, objects to print correctly. Essentially, because you are printing in layers, if part of your object is overhanging it may needs supports. Lets pretend you are printing the following:

The printer starts at the shoulder, printing through the bicep in layers, working toward the elbow. At which point, drawing a horizontal line through the model, means the thumb would start to print too.
But this is the problem. That thumb isn’t connected to anything yet. The hand hasn’t started printing as it’s working bottom to top. With the thumb suspended in “thin air”, the print will fail and the probably come out missing the hand entirely. These areas are known as Islands and is the exact reason supports are needed — without them, you’ll be scraping up half-printed nonsense stuck to the bottom of your printer’s vat. Not fun (but don’t stress if this happens. It’s part of the learning process!)
Okay, give yourself 5 minutes here. If you are starting to feel a little overwhelmed, it’s understandable. As words on a screen, this can seem a little much. It’s really not when put into practice, so keep that in mind. If you’ve had a coffee, let’s keep going…
The Slicing software I use isn’t the one that shipped with my printer, it’s a free alternative called CHITUBOX. You don’t have to use this software, but it works very well for most brands, featuring a wide range of preset profiles. Here is a video I prepared showing you our Tinkercad object above getting supports.
Play this video a few times if you feel it moves a little fast.
For re-sizing, ChituBox has a “Scale” feature that presents you with millimeter sizes and a percent size. By using millimeters you can very accurately size an object to fit to any scale, be it HO, O, 1/35th etc… In real world terms, I use a digital caliper to take a measurement and re-sizing (or design) accordingly. The only note, do any and all re-sizing before you add supports. Slicers don’t do the other way around and if you try, all your supports will be removed and you have to start again.
Once I have a sliced file, and for me it’s a .photon file, I put that on my USB drive and plug it into my printer and hit “Print”.
Whilst the printer does the rest of the work, you still need to deal with the prints. Washing, curing, cleaning the machine. What about leveling the build plate? What does that even mean? What’s a vat?
I’ll let you take a breath. We’ve covered enough for this post, but I’ll cover some of these next phases in another post soon.
by on December 17, 2020


