


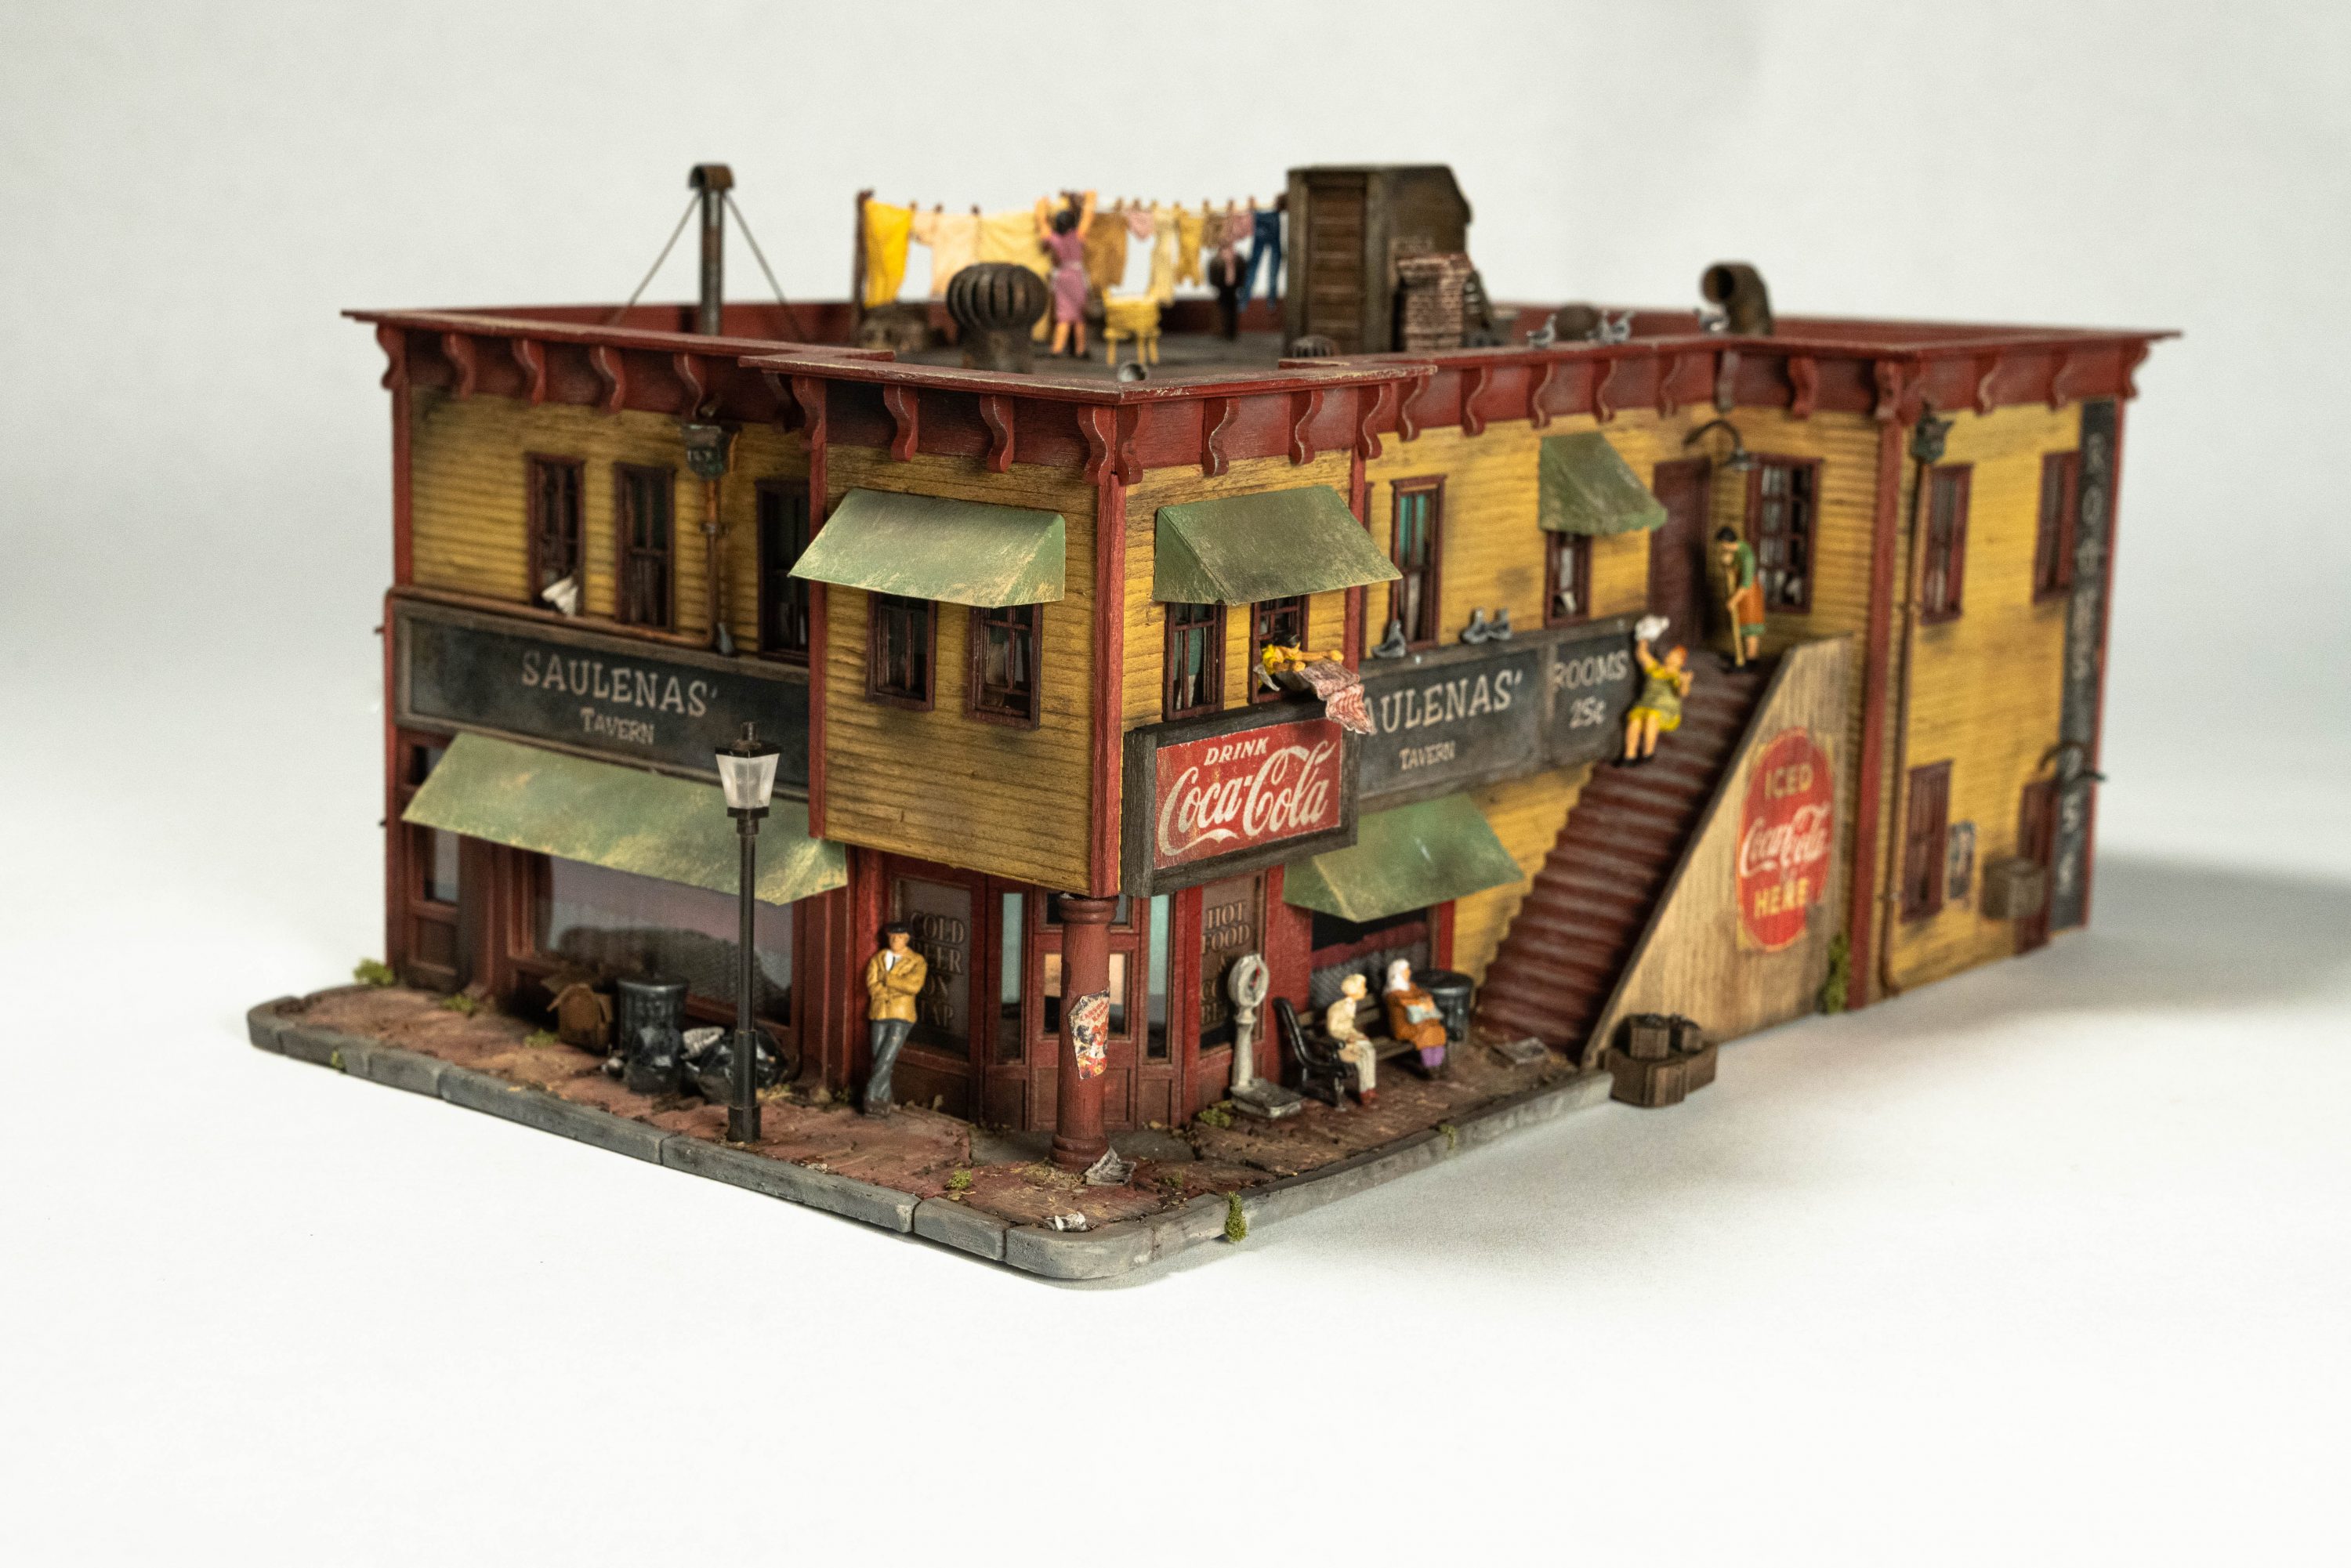
Over the past week I’ve been pretty busy with work and life, especially as we’re on the runway to/from Christmas. That being said, I’ve found time where I could to bring my scratch-built Saulenas’ Tavern across the finish line. I began this build on November 22, so it’s taken me exactly one month to complete (I write this on December 22nd) — a timeline I’m very happy with.
As this post will be fairly long with detail of the build process, I am posting the completed photos first for those that don’t wish to go any further than that. Regardless, I hope you enjoy this as much as I have building it.


So, let’s pick up where we left off.
MAIN STRUCTURE
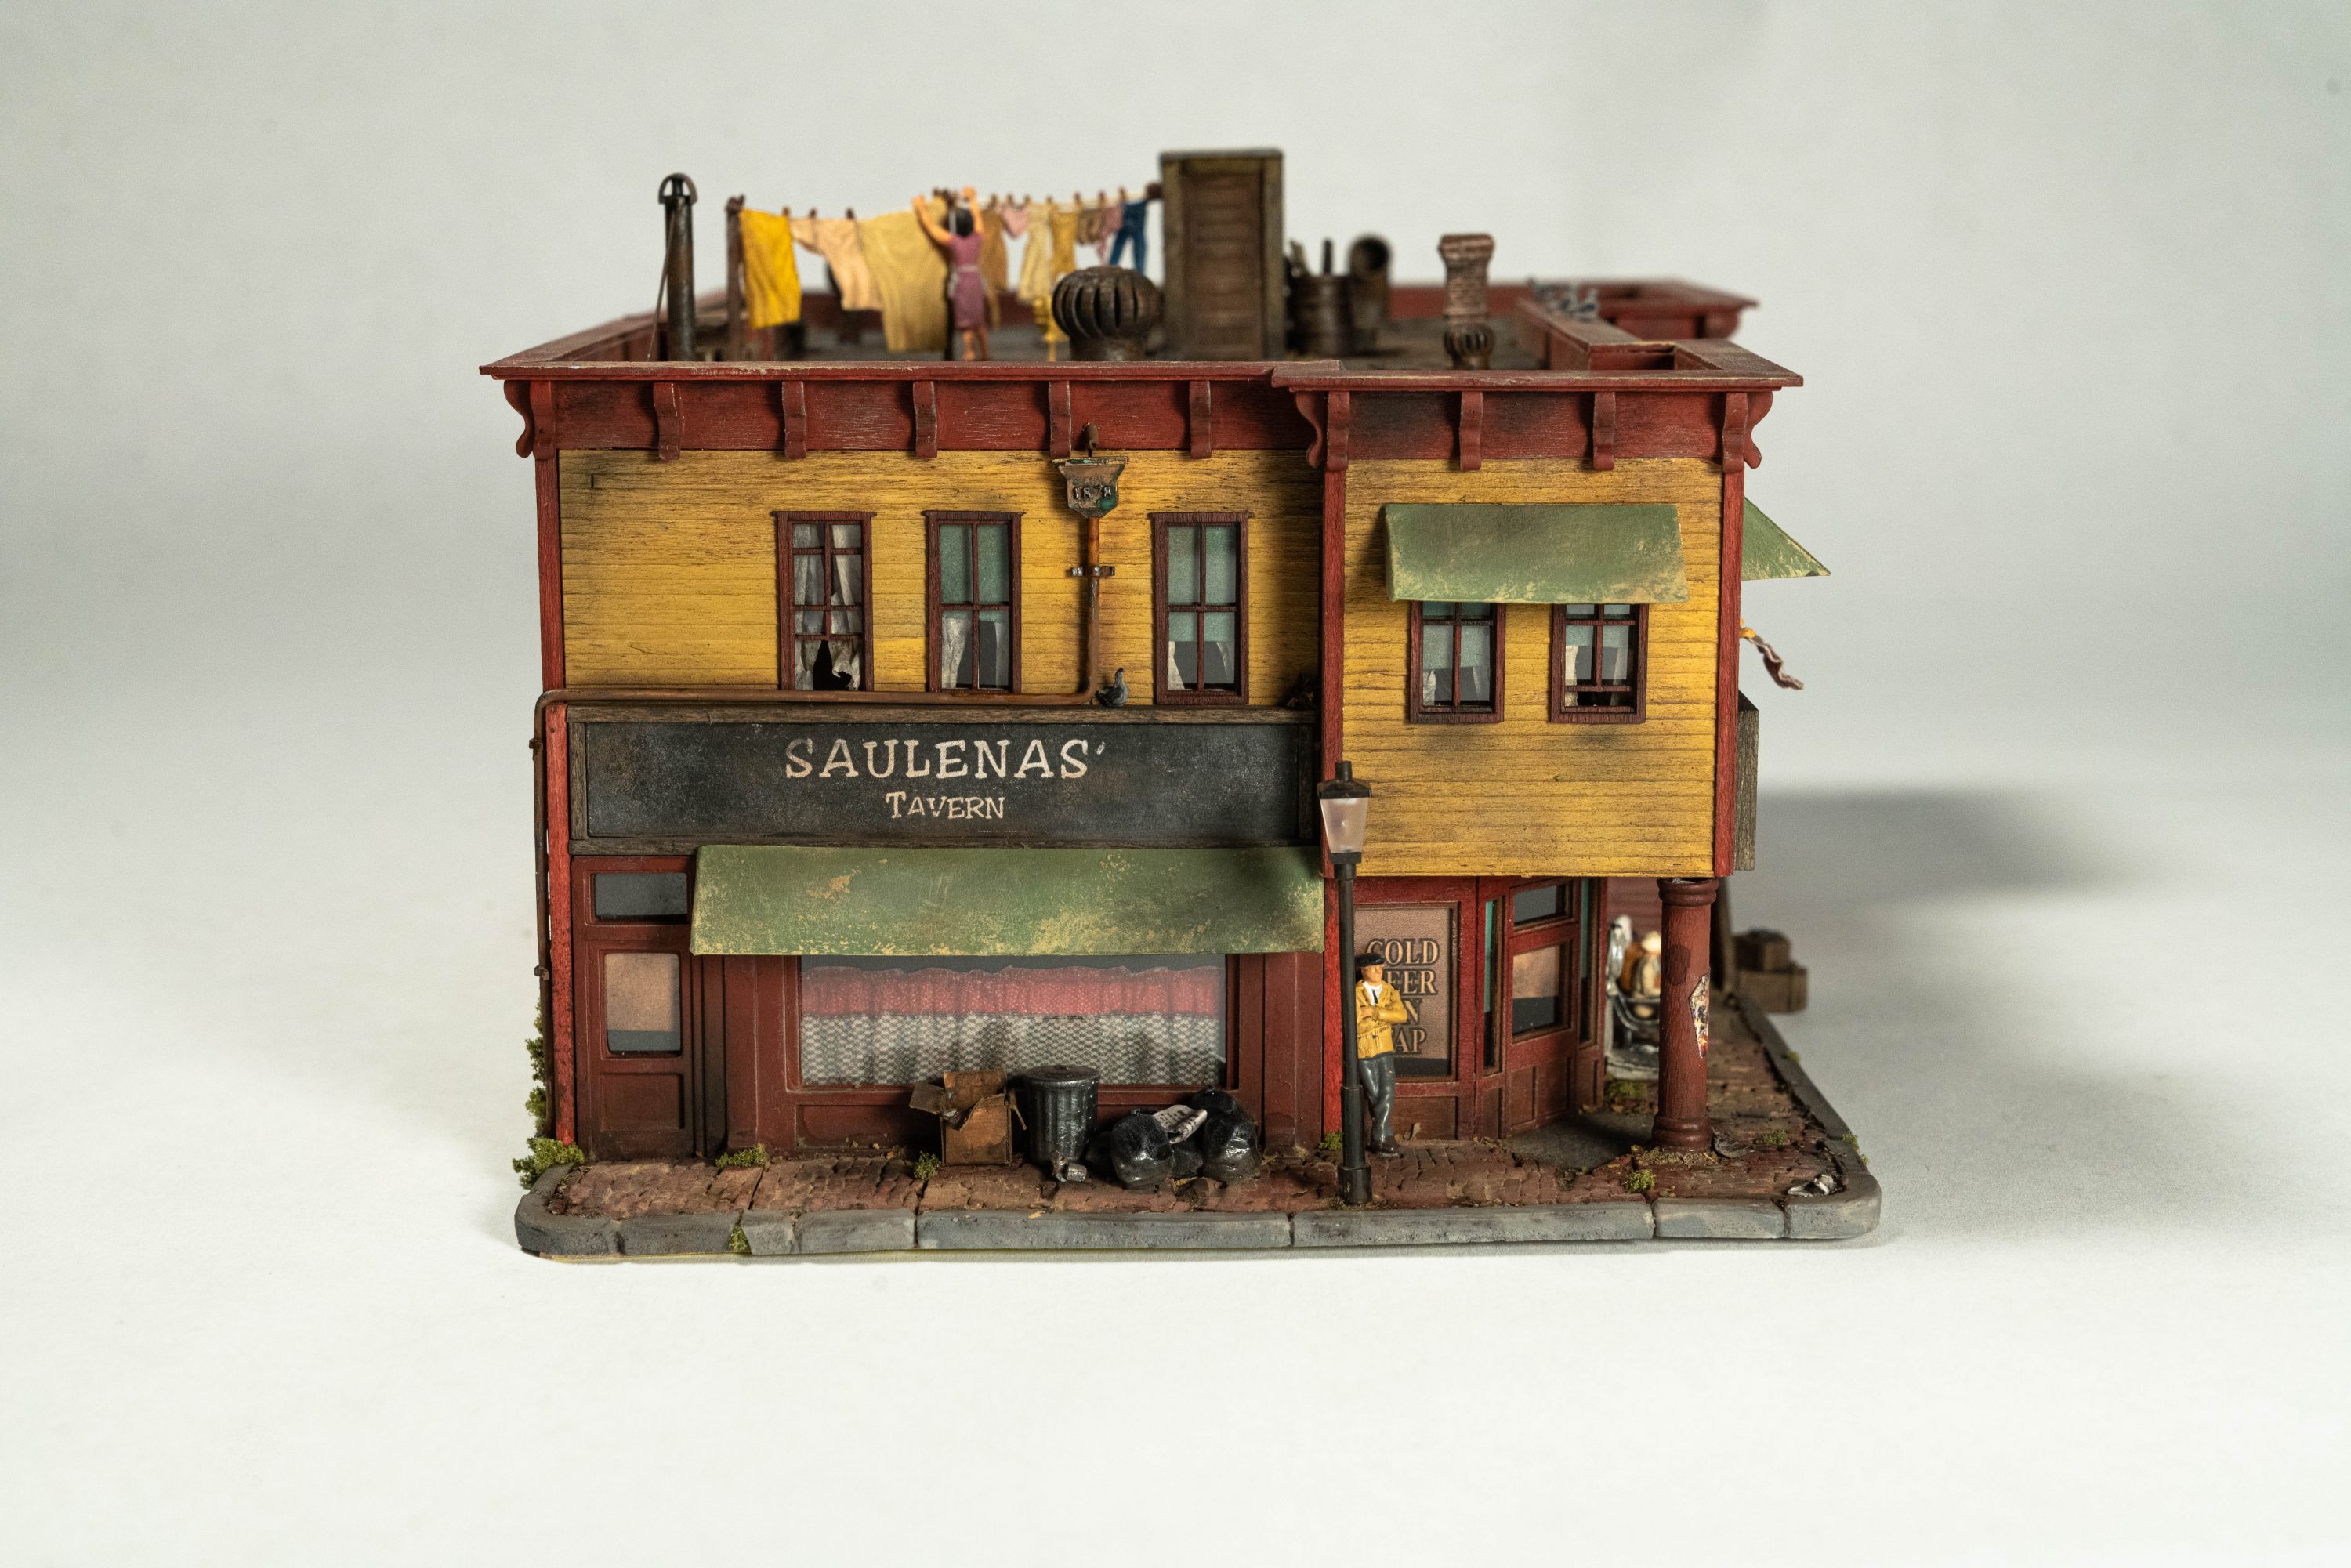
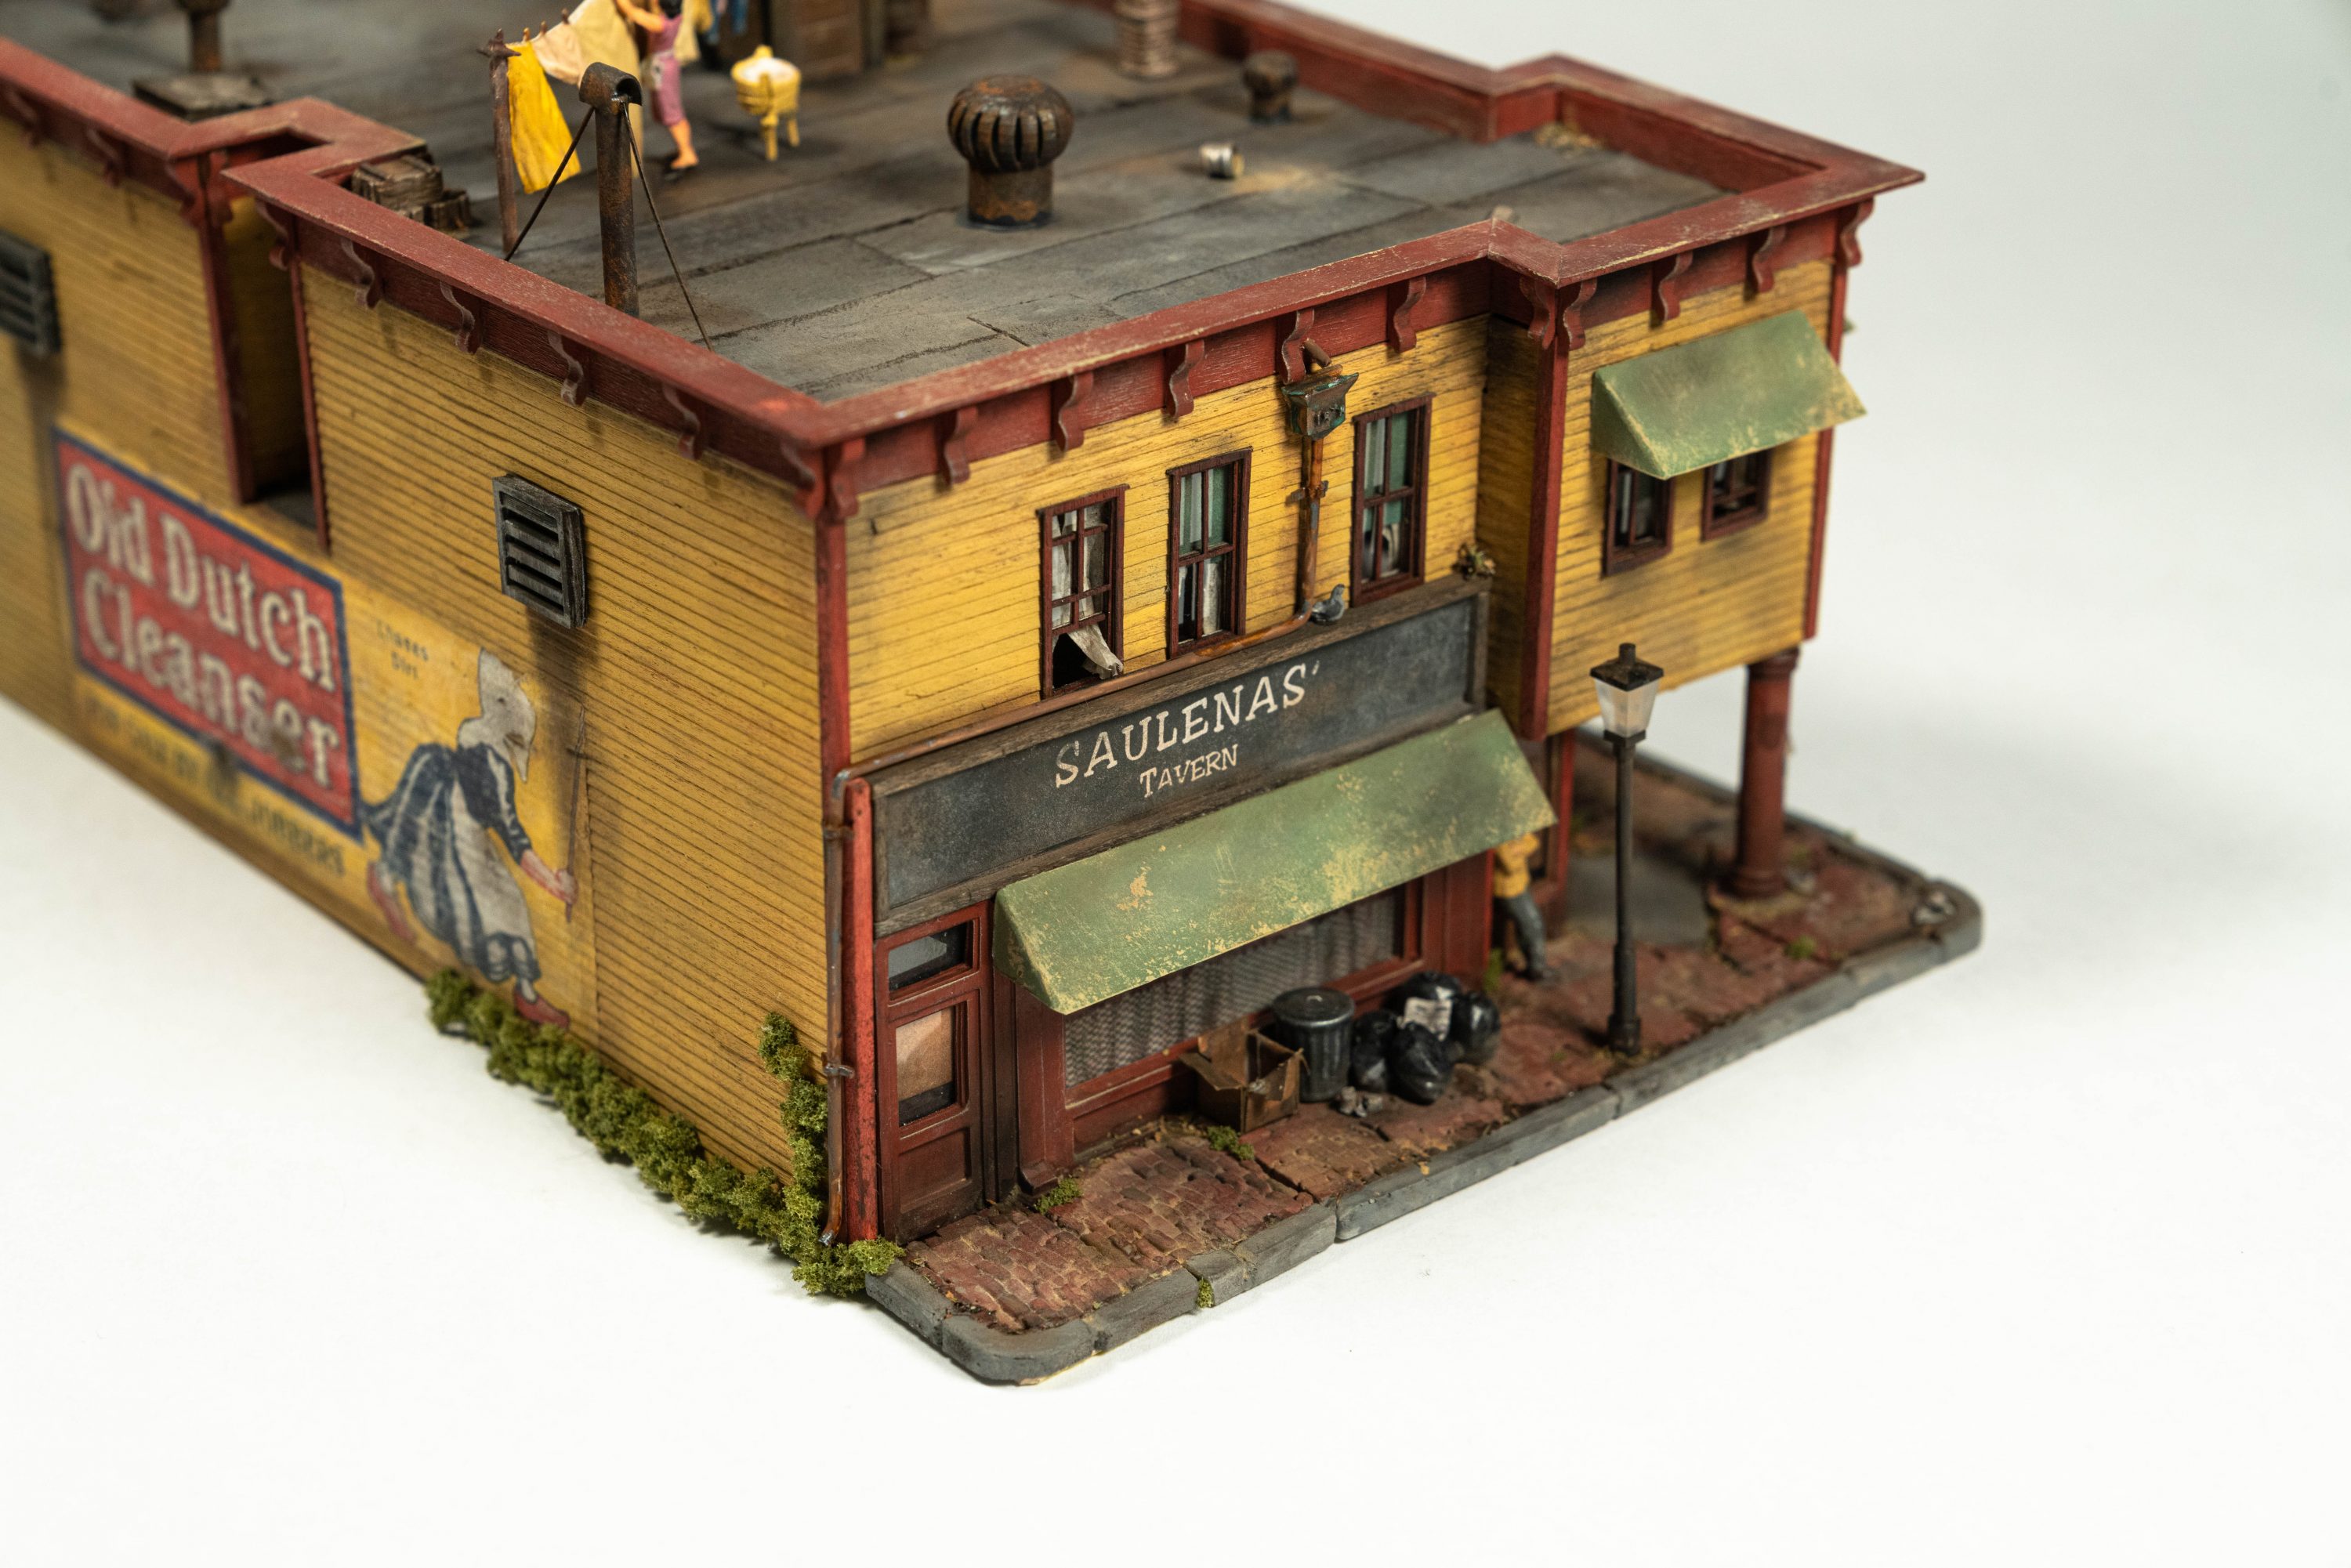
I started by finishing the windows, shades & curtains. I continued using the “Fall Spice” cardstock I purchased from Hobby Lobby for the shades and for the curtains, I used the thin backing paper from the acetate of the Bar Mills kit. Using some light stains, I muddied the paper so it added variation, making the curtains appear aged and well used. Nothing is new in my world.
The finished effect can be seen in the completed build photos above.
Up next, the awnings. It wasn’t necessary to make a design as Mr Sellios had already done it for me. I pulled my Fine Scale Miniature’s Emporium Seafood Co kit off the shelf and scanned the template inside (the template can also be found in many other FSM kits). On a sheet of green cardstock from my “Fall Spice” pack, I printed a copy of the awnings. I did this because I knew my awnings were going to be green (like the prototype) and having that as a base color is a good start.
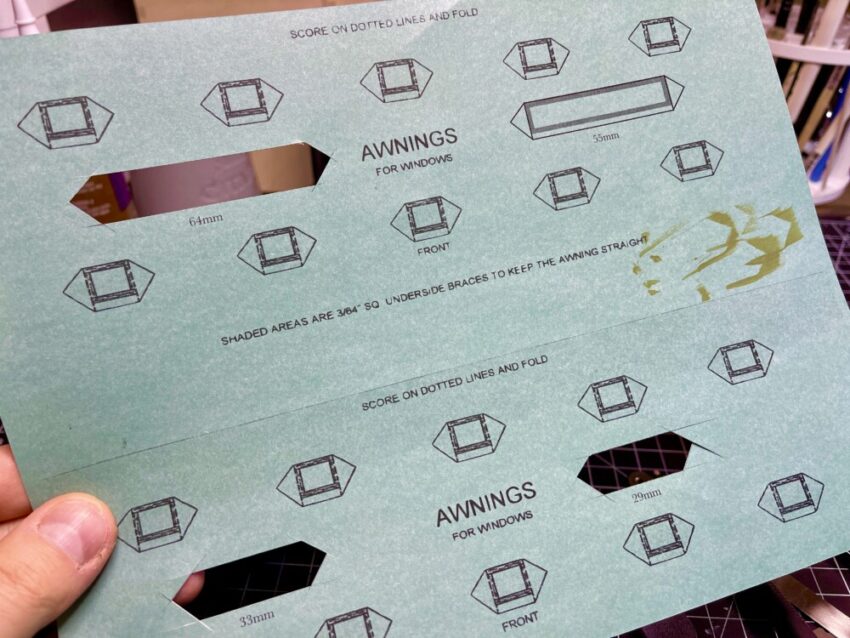
They were printed at a 1:1 scale, so it was simply a matter of carefully cutting them out and assembling with thin strip wood. (George recommends 3/32 sq strip wood, but I had none to hand so I used scale 2×4 instead)
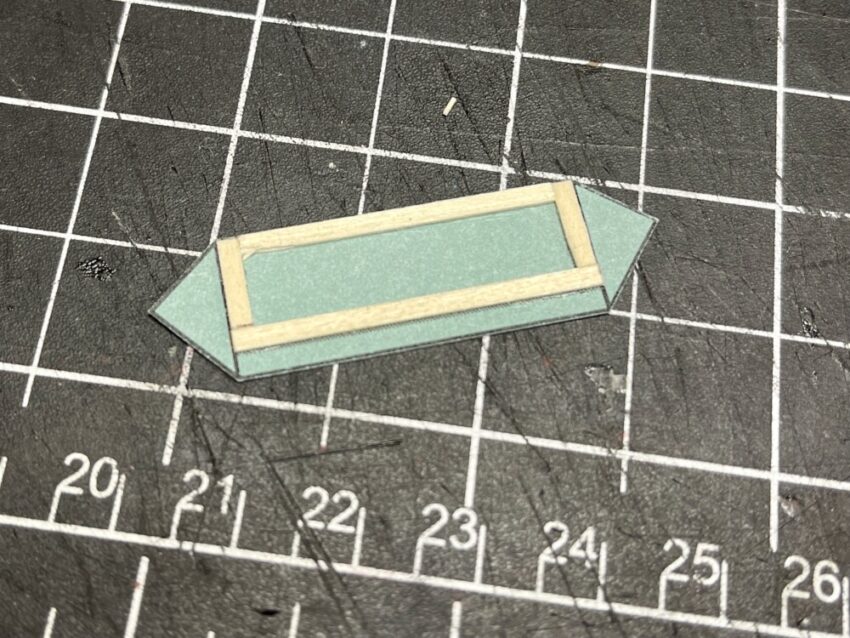
The awnings were folded, painted (a flat yellow/green), weathered (beige dry brush and pastels) and finally glued in place with CA glue. On one small awning, I used a pair of pinking shears with a scalloped 3mm blade. This can also be seen in the completed photos.
I then started to finely detail the walls, starting with printed details like the scupper:
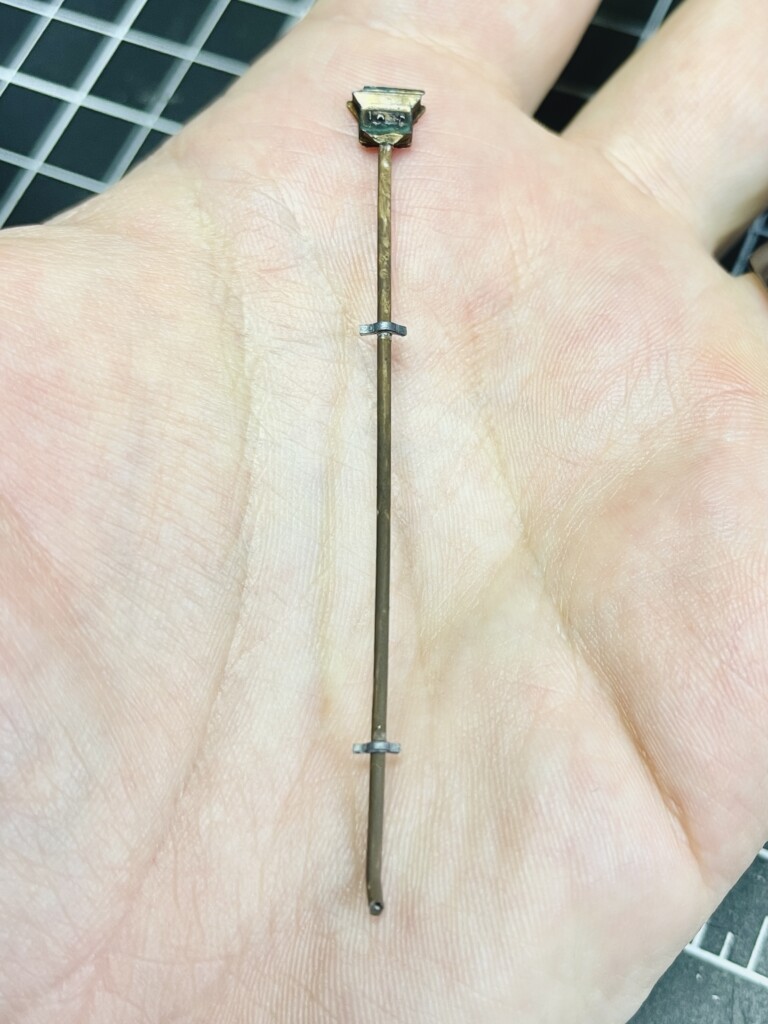
Whilst the scupper was printed, the downspout itself is 1.2mm Evergreen rod. Styrene rod bends nicely and holds it shape, so right at the bottom I was able to curve it out to make a drainage spout. I drilled a small 0.8mm hole in the end to carry the illusion upon close inspection. The tiny brackets were made from lead sheeting. I like using lead sheets because it’s extremely versatile, cuts easily and is nice to shape. Some may be concerned using lead like this, but unless you are eating it or licking your fingers clean, it’s no issue.
Pigeons (also from Fine Scale Miniatures) were added to the top of the signs and capping, Preiser figures (originally modeled with her hands in the air) was positioned to look as if she is leaning out of the window, dusting a rug. The rug design was printed and folds added for greater effect.
Finally, I added some gooseneck lamps (bent 1mm wire and Tichy Train Group shades), posters, a wall mailbox and a few other details, including two more Preisers on the stairs — then the main structure walls were done. Next up…
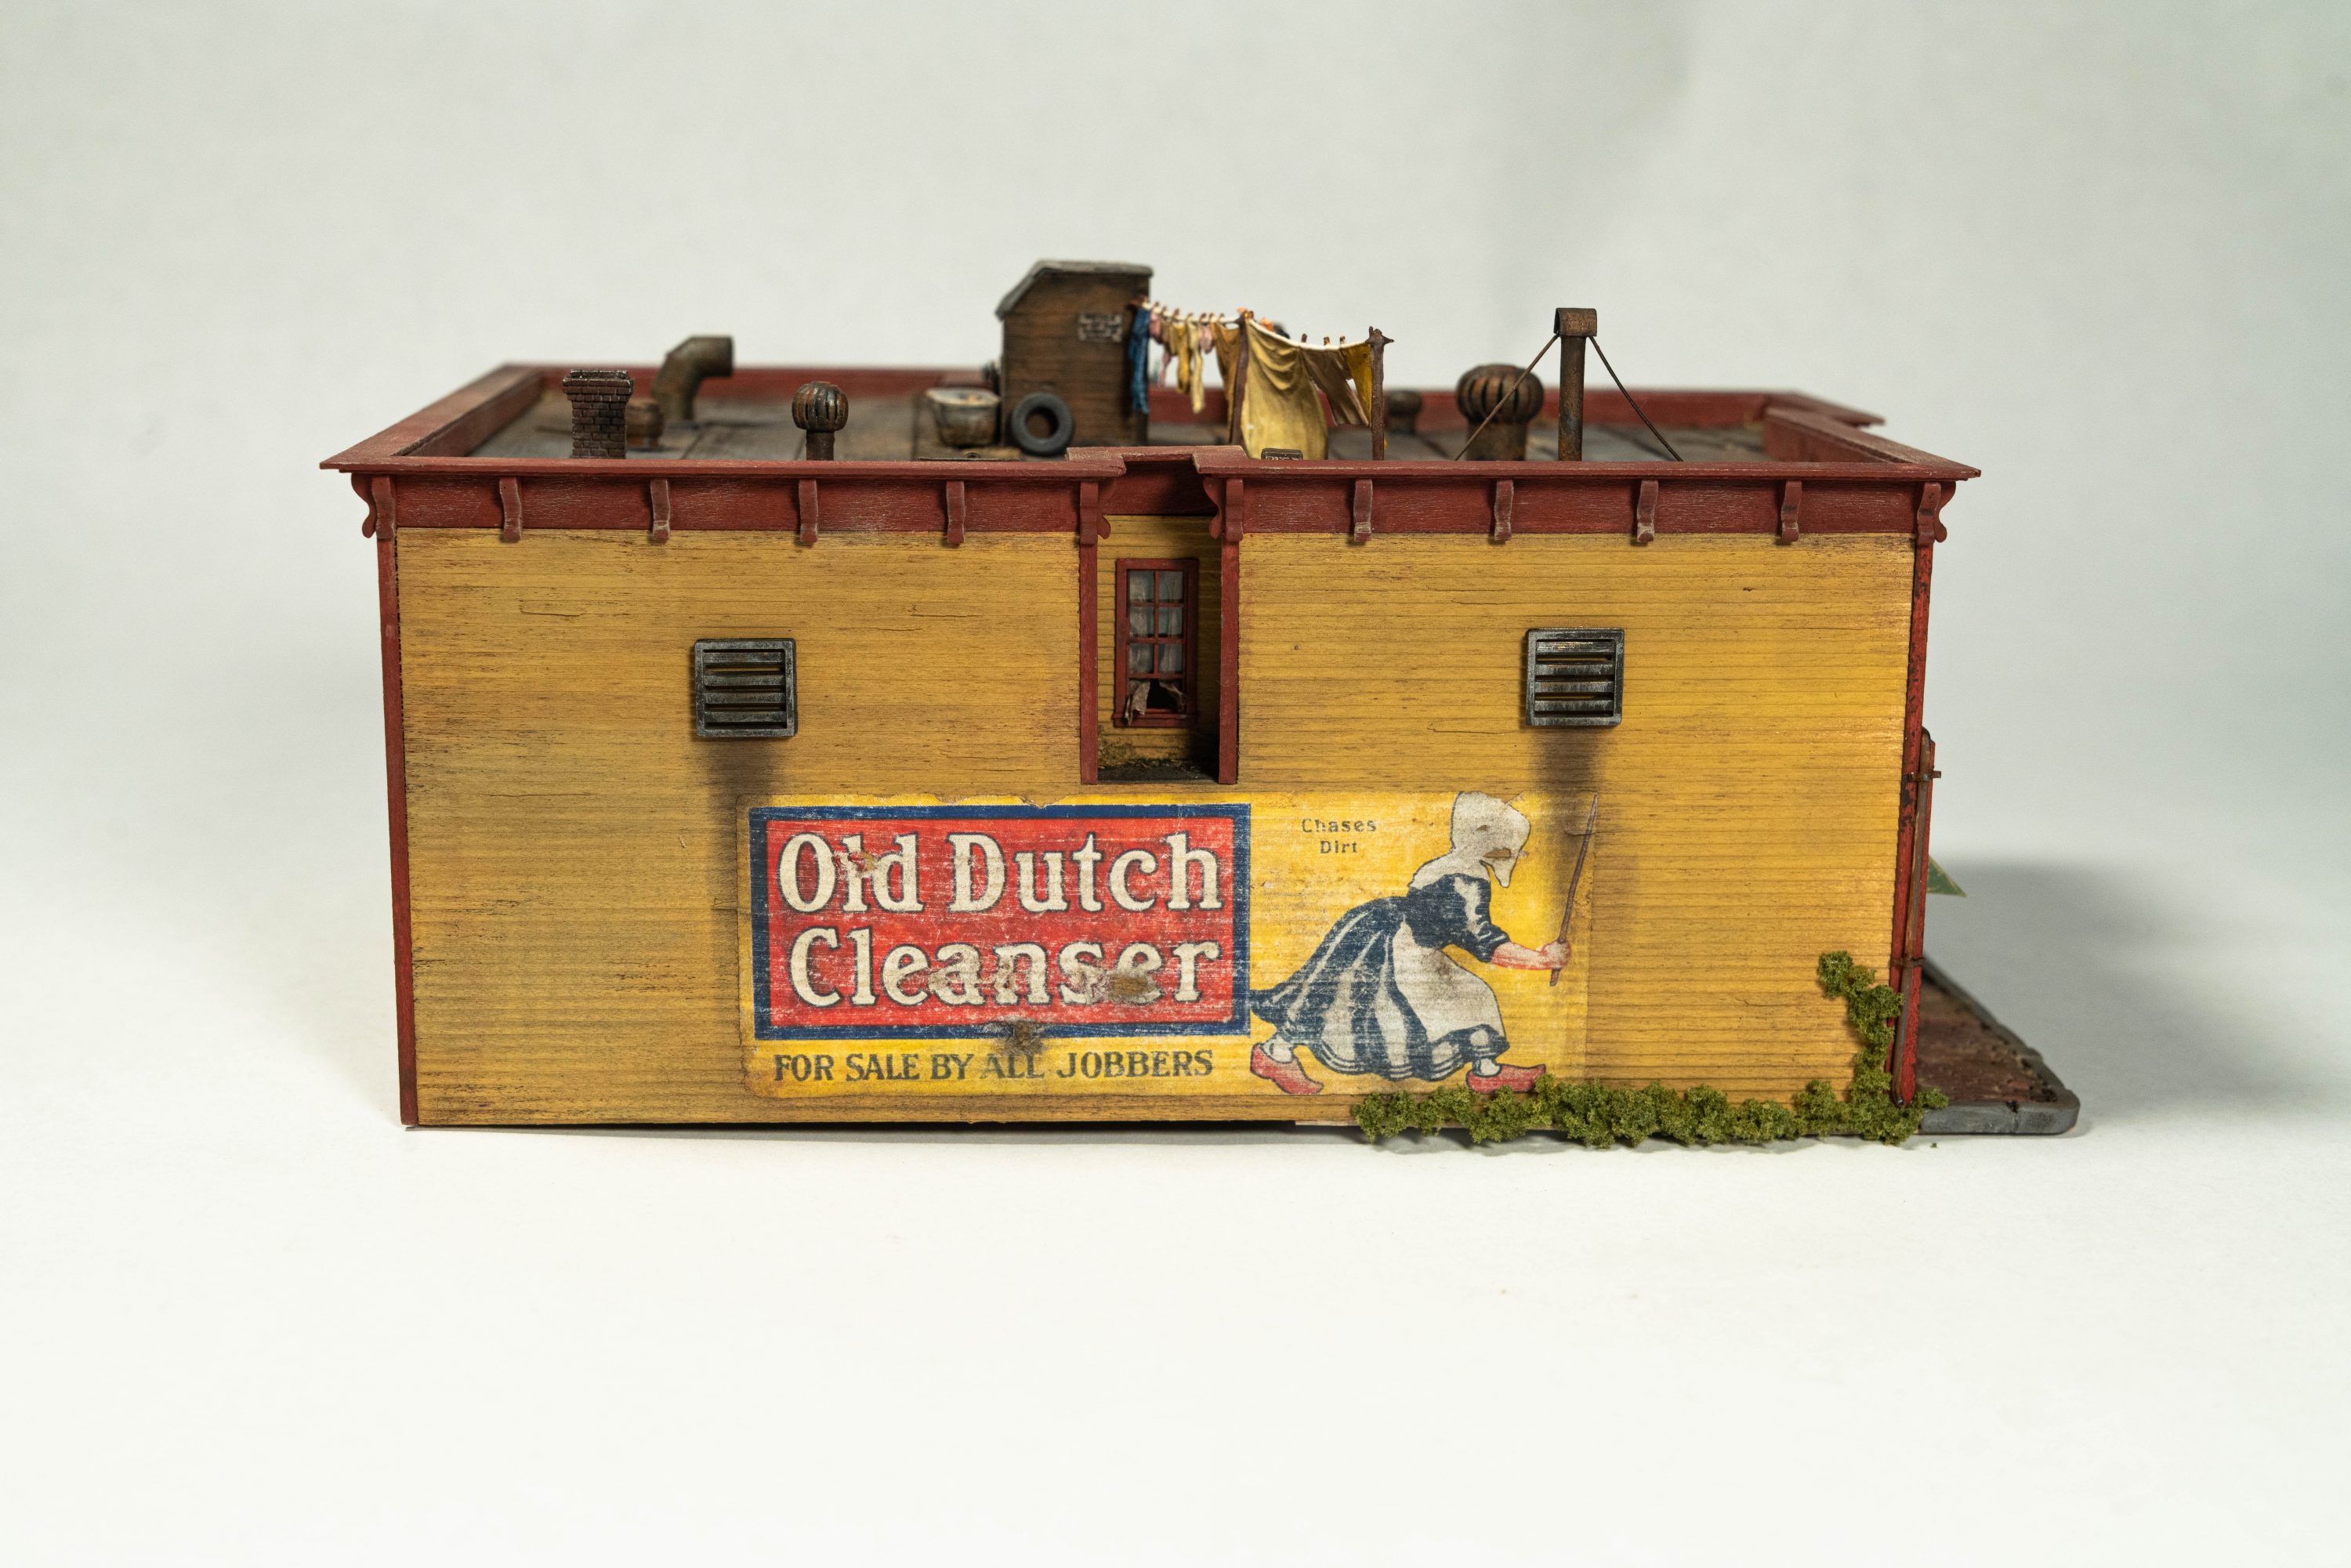
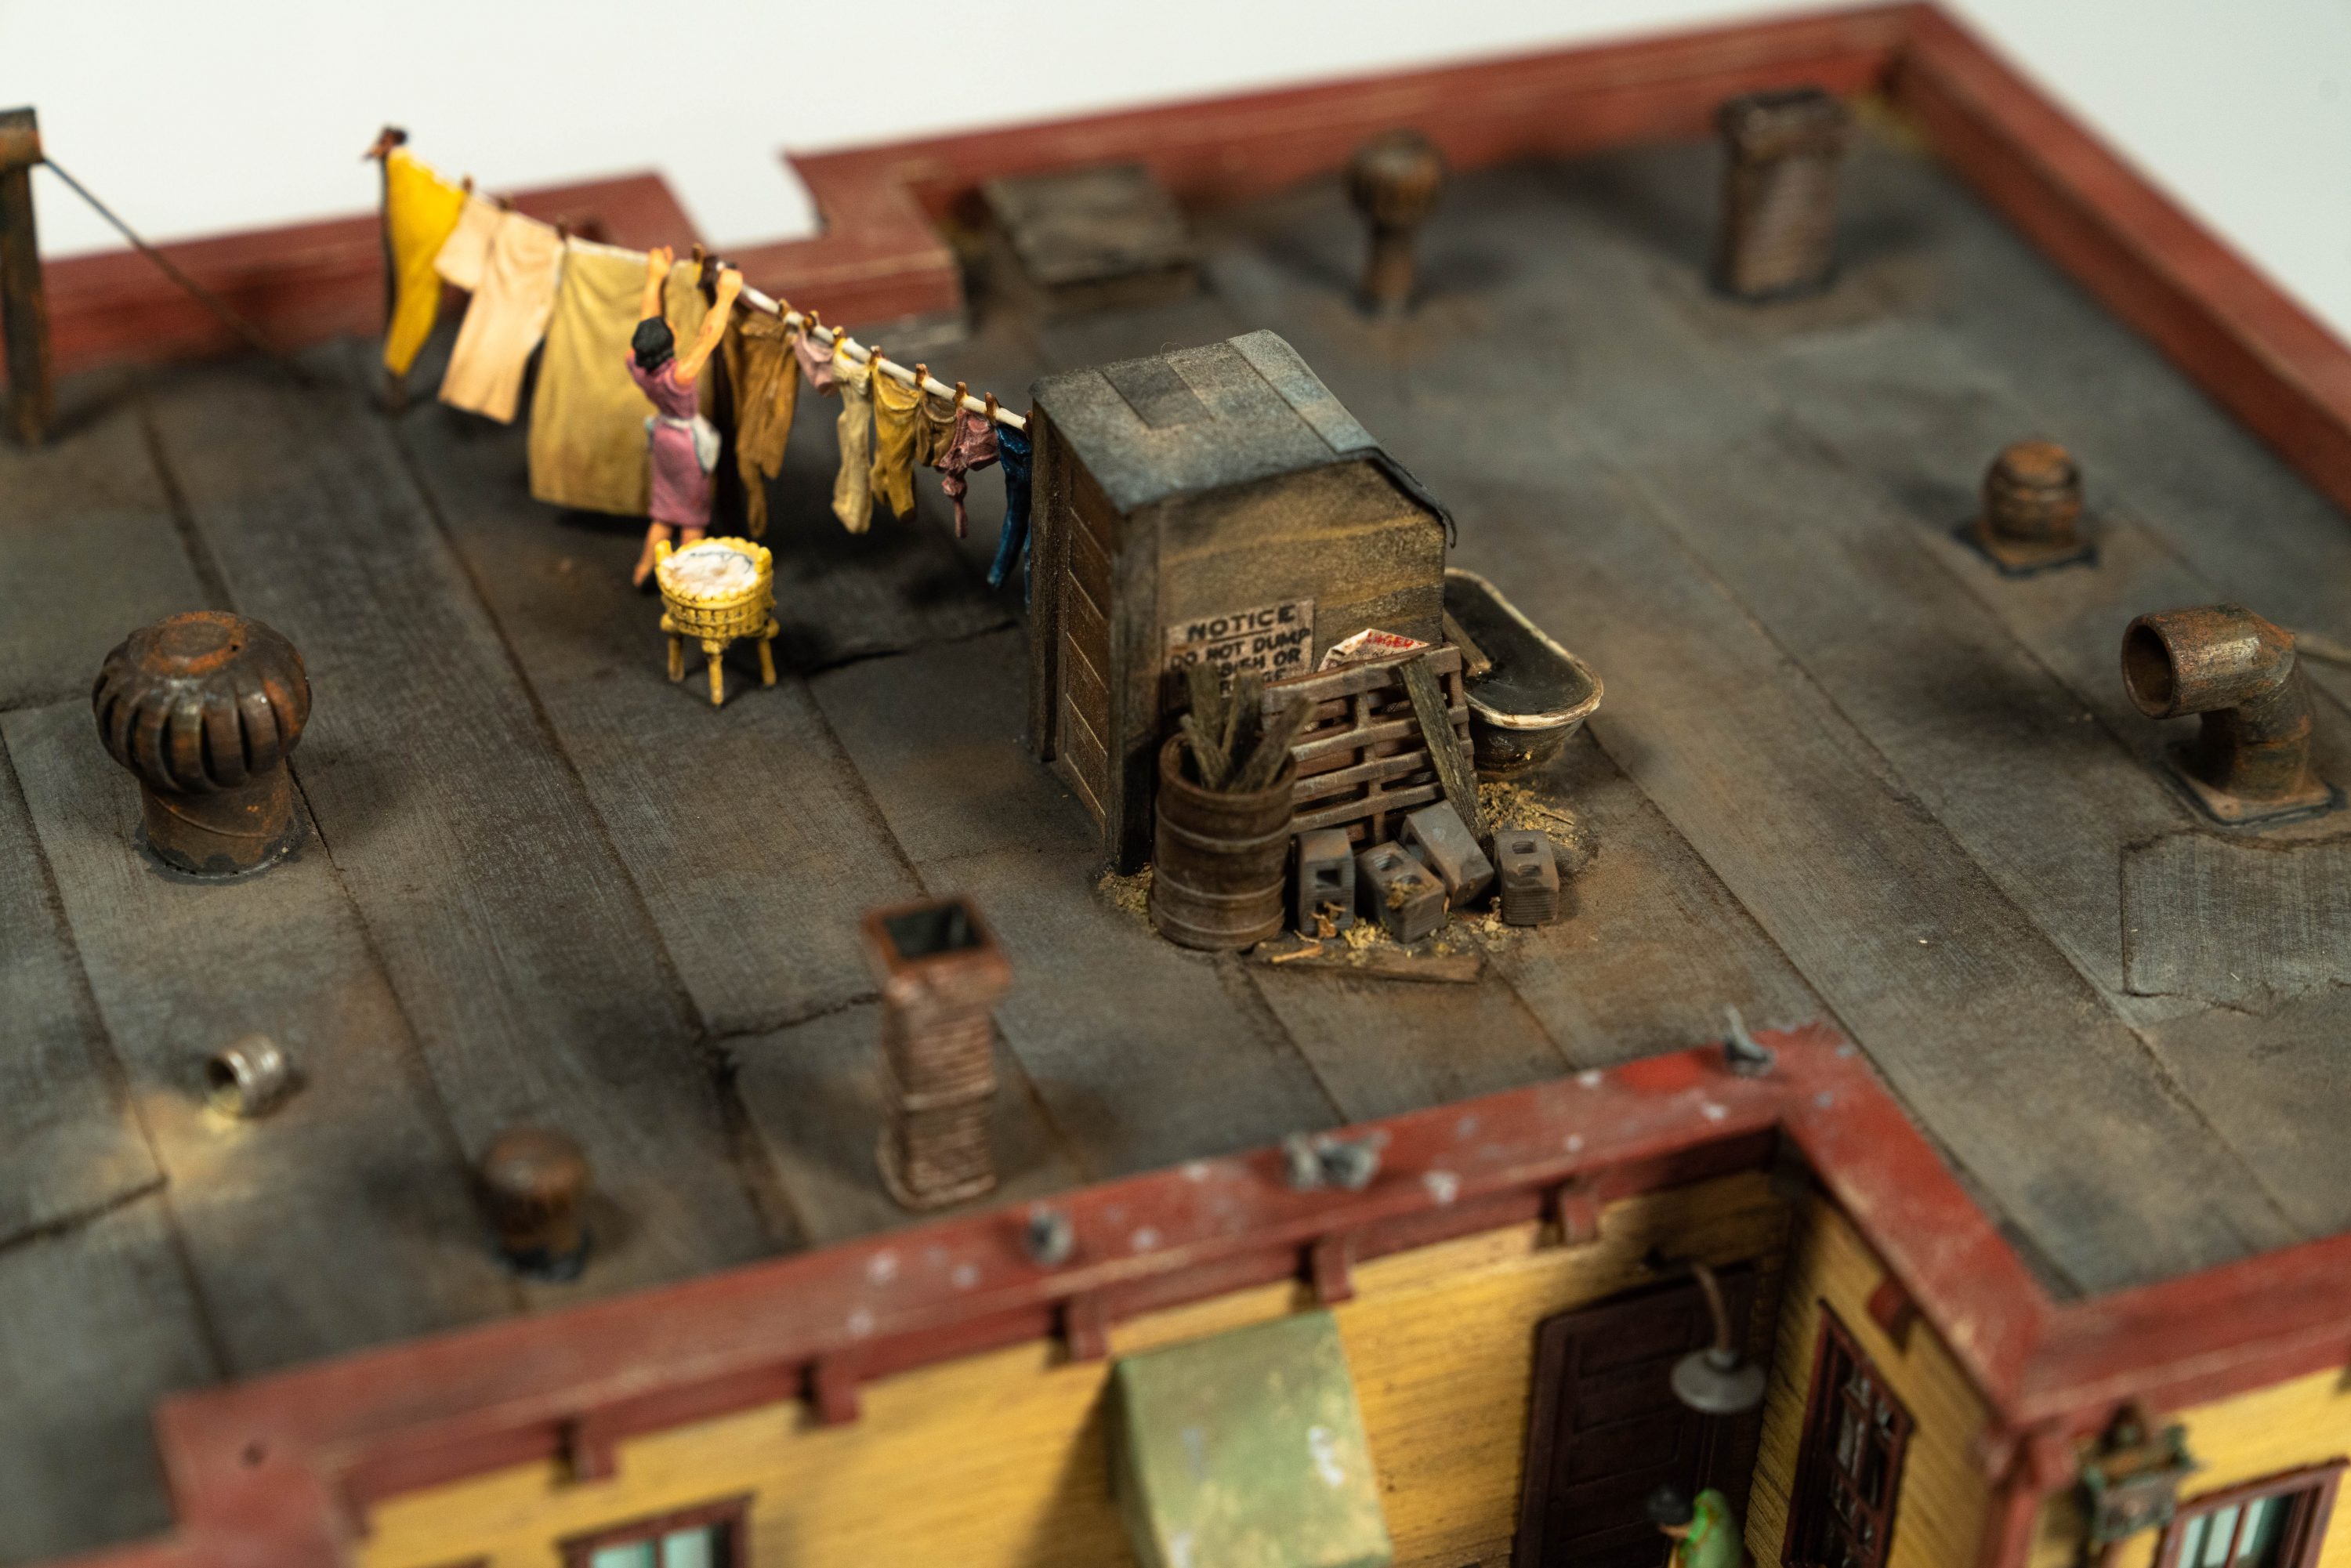
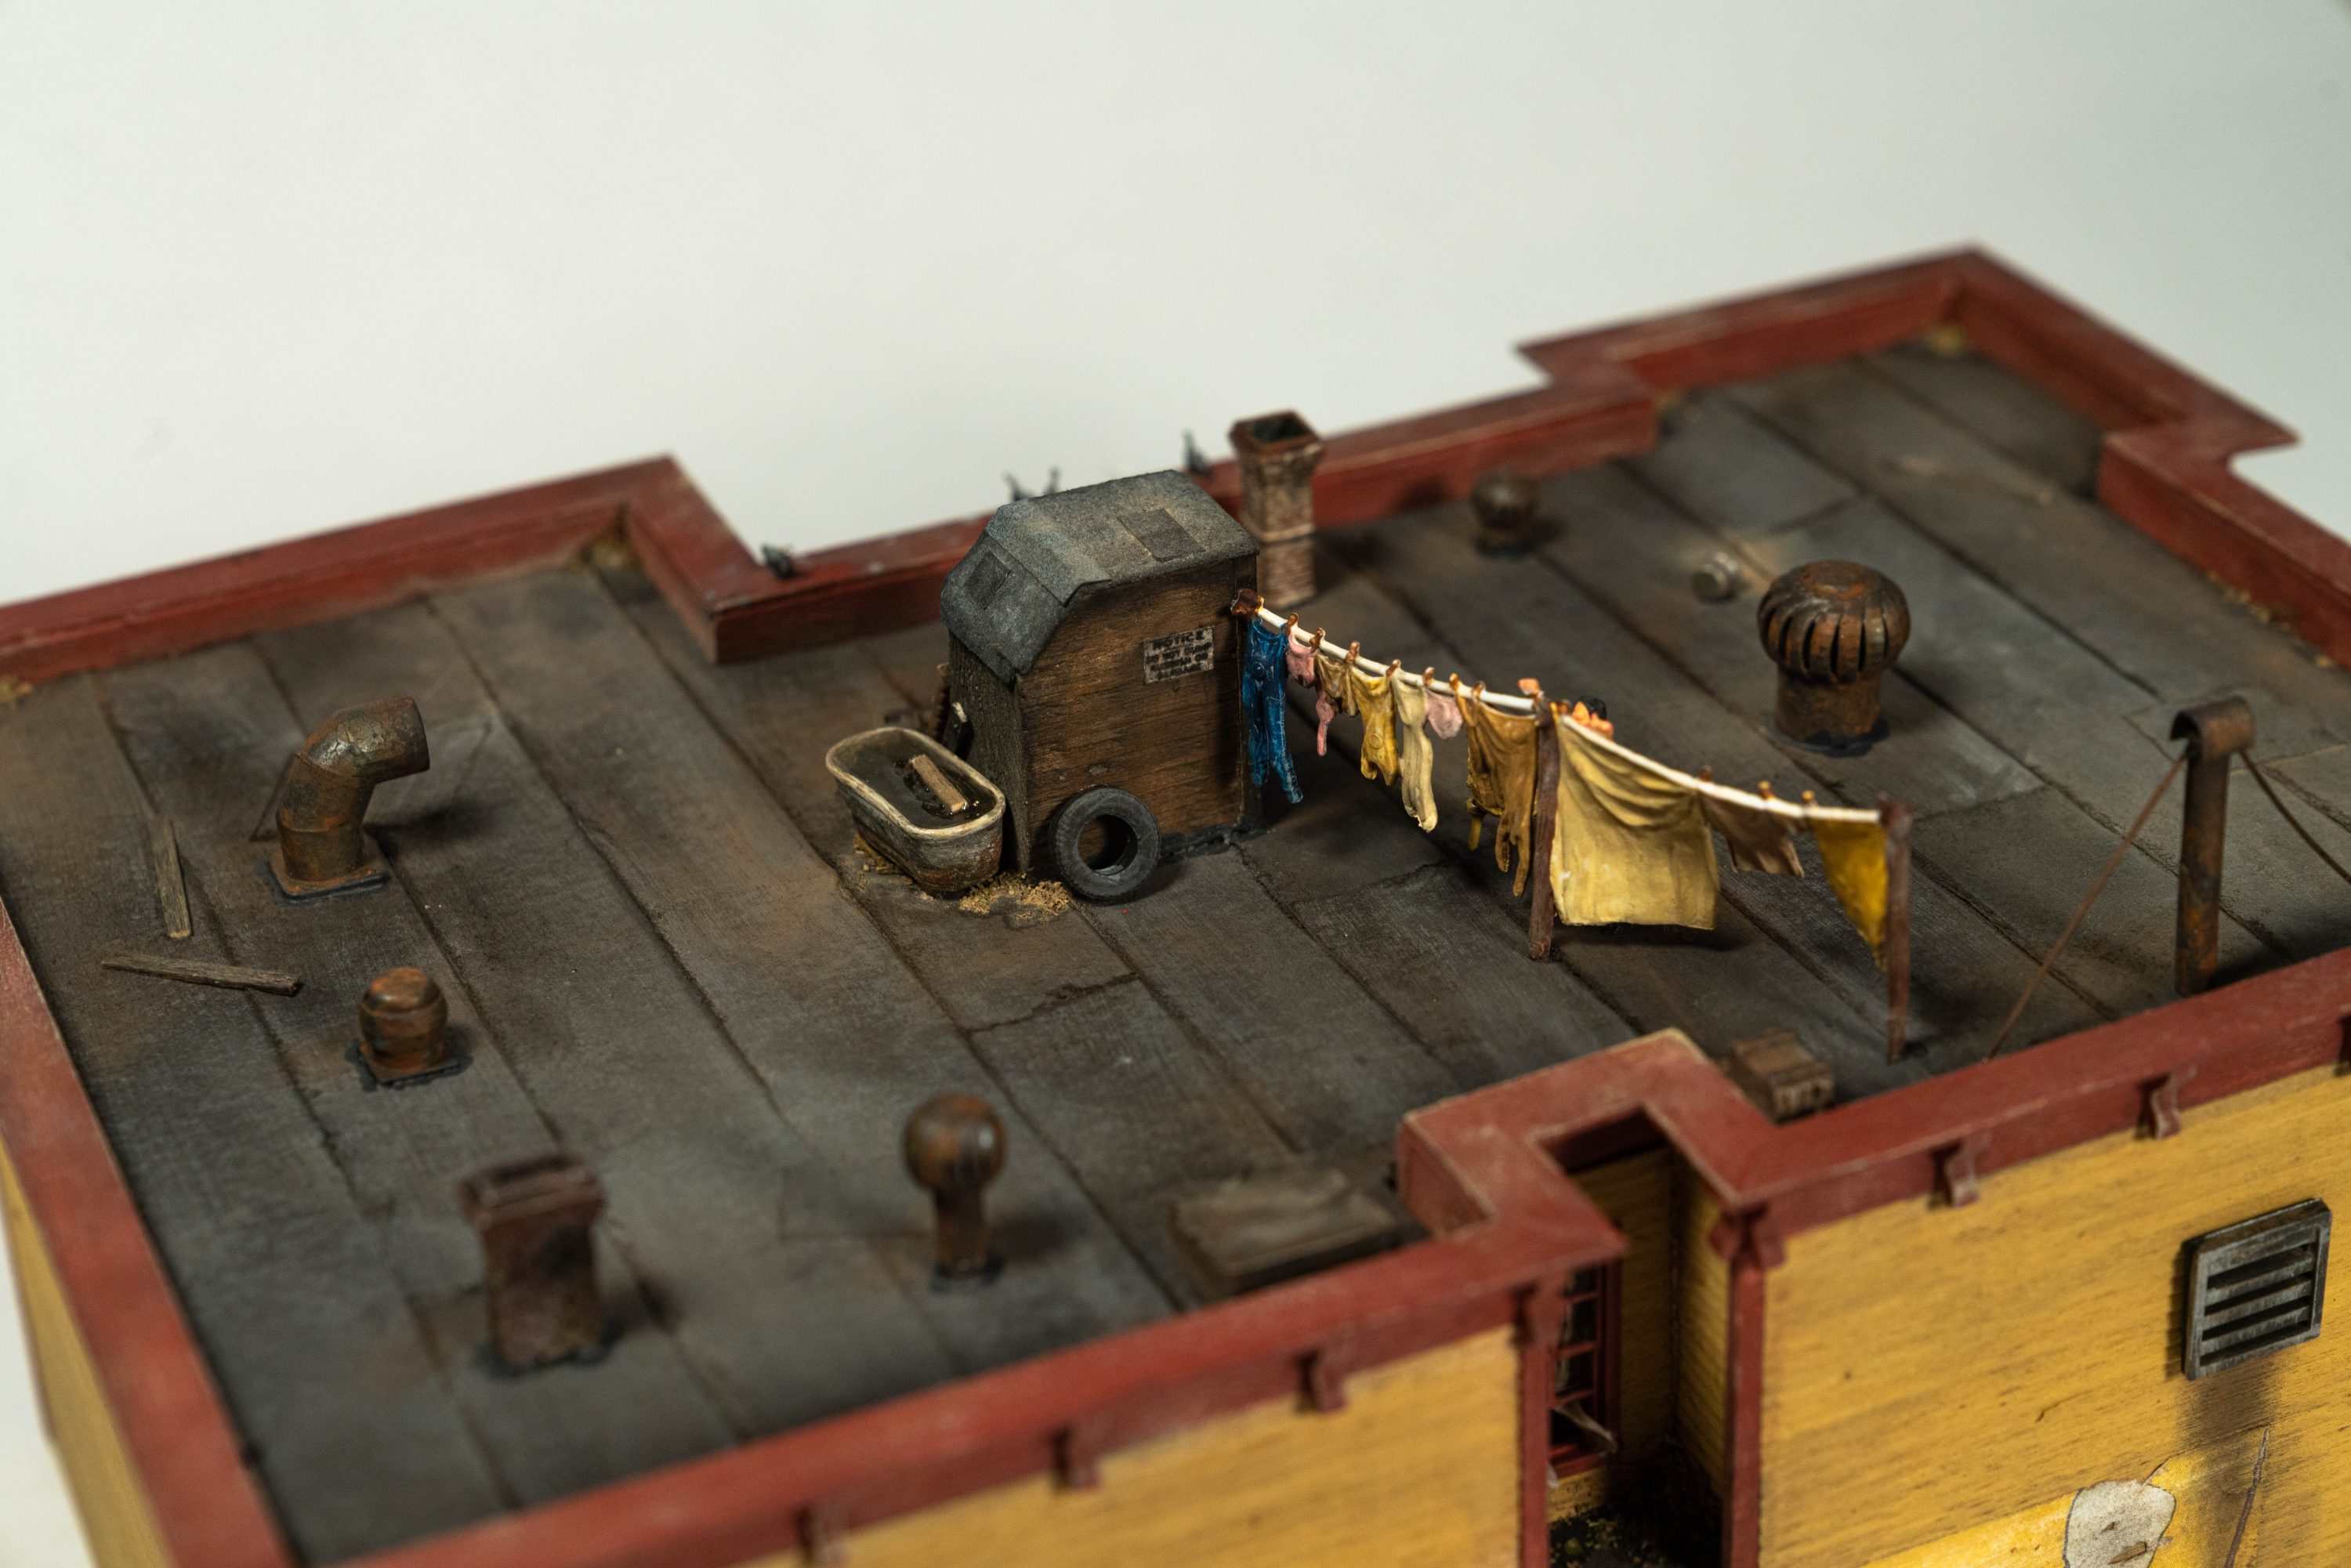
ROOFTOP
The roof access shed was made following George Sellios well-used design. A block of angled wood was roofed with construction paper and a Tichy door was framed with scale lumber. Scale signs were added (also from FSM kits) after the whole shed was painted with dark to light brown acrylics and weathered with pastels.
Other details like breeze blocks, a wood pallet, a barrel were printed and added around the shed.
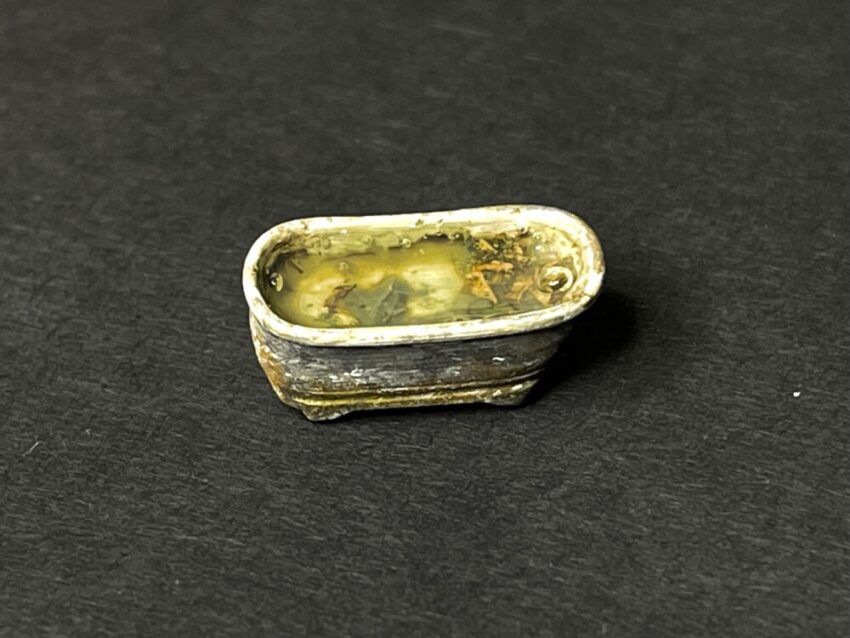
Around the rear of the shed is an old bathtub. This design was sourced from Thingiverse (https://www.thingiverse.com/thing:487864)
Just like the bench, it was scaled to size, printed and painted using a mix of metallics around the outside and an off-white for the ceramic. From here, shallow layers of modeling water was slowly added alongside various flock and lichen. The water was also colored and by the time each of the layers was finished, I ended up with a pretty scummy looking tub:
All the chimneys and vents were also printed. One of which I had made from an artist on Fiverr — as I wanted a replica of a common FSM casting:
I designed an access hatch using Tinkercad. Once printed I used my razor saw to add wood grain, also nicking and scoring it to aid the appearance of wood panelling:
Once all the details were in place, black pitch (white glue and gray paint mix) was placed around the corners of each casting. Then, the whole roof was weathered again with pastels and ground cover fixed into the corners. This helps sell the illusion this building lives in an actual world where wind blows loose leaves into recesses.
The final detail to be added to the roof was the Preiser hanging laundry. The washing line is made up of two Preiser castings, with the base from each removed. I painted each of the clothes with a pastel color palette (not primary colors), so they didn’t draw the eye too much. By this point, the roof was pretty much done.
THE STREET
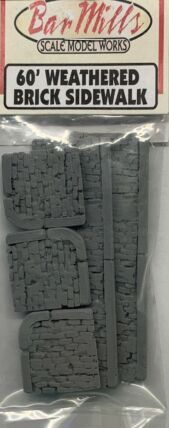
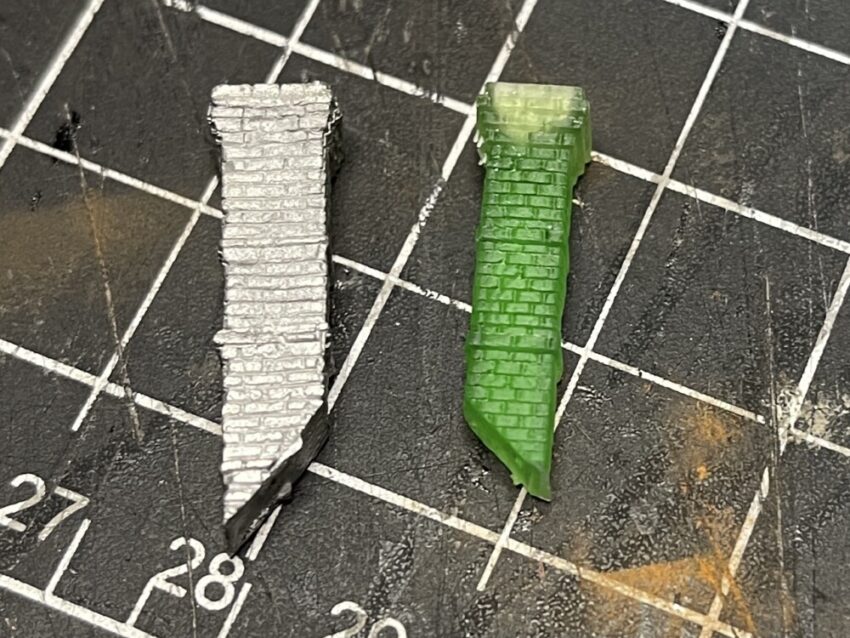
I purchased Bar Mills “Weathered Sidewalk” to make… you guessed it… a sidewalk. This little resin casting pack has got a lot of character and it’s not too pricey at $8.95. Luckily for me, it had the PERFECT amount to make the corner of the Tavern’s street. I had to do some trimming, seeing as the Tavern’s door is at an angle, so to make it work I made a “concrete threshold” by cutting a rectangle of mat board and stippling water putty on it for texture (same technique for stucco). Painted and weathered, it elegantly made up the difference for where the 90-degree casting didn’t quite fill. I added leaves (real ones, ground up), some black wash (with gloss) in the recesses around the curb, and some various trash like newspapers. A mix of real dirt and real (fine ground) leaves was added in various creases and corners. This can be fixed in place using a drop of alcohol only — I actually used some Hunterline Driftwood as I wanted to tint it.
Then I turned my attention to the many detail castings (3D prints, mostly). To start, I made a bench. The iron ends were 3D printed from a design I found on Thingiverse (I only used part of the model found here: https://www.thingiverse.com/thing:21157)
I used lumber to make the supports and then painted/stained and weathered it using just Black, Metallic and Driftwood stain.
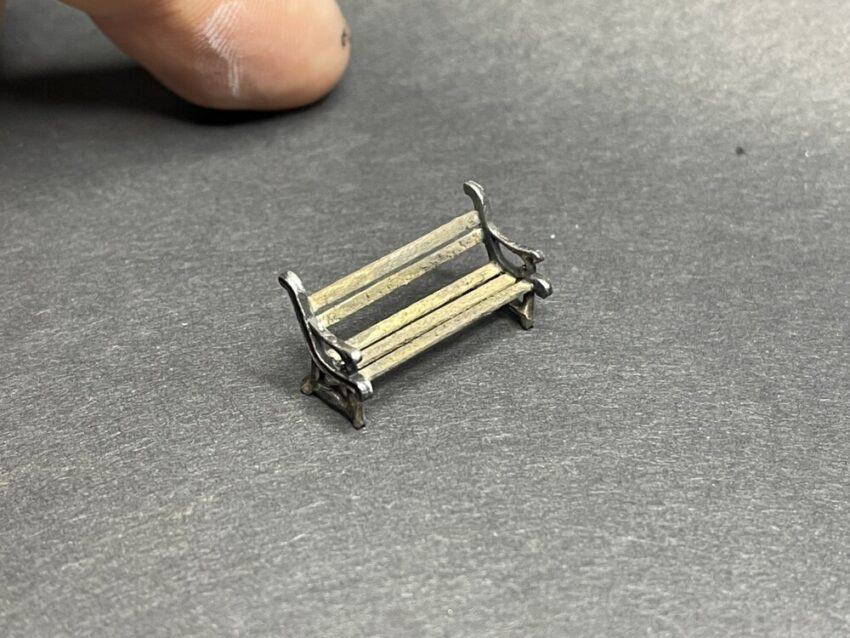
Two seated Preisers were added followed by a wash mix of Alcohol and Ink.
The trash can and trash bags were also 3D printed, but I cannot recall where exactly I sourced these models — I only know they were free from somewhere on the internet. If I happen to remember, I will edit this post with the link.
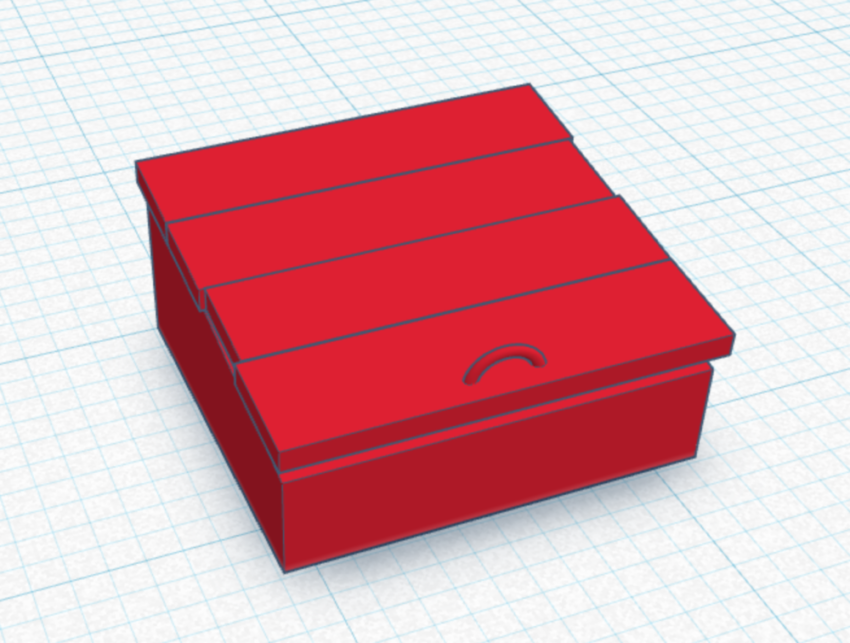
The cardboard box is an FSM kit design and the tiny, tiny, tiny tin cans were made from tiny cuttings of 1.2mm aluminum rod. The lid was punched from manilla folder and carefully (and fiddly) glued to top of each cutting. It was painted with a simple metallic paint.
For the corner post, a 1/8″ dowel was cut to length and end caps were designed to fit and printed:

I used only two of the castings that came in the Bar Mills kit — one of which being the weight scales on the street. This casting can be seen on the original prototype, also next to a bench:
Moving on… organic detail like lichen and underbrush was added (mostly to the rear wall) but also between gaps in the sidewalk and curb. It was attached using a little Tacky glue. This is typically my last step of any given build, but after this was finally complete I did one more thing:
A streetlight from Tichy Train Group!
And with that… Saulenas’ Tavern was done.
by on December 25, 2020


