


To start, I spent about 4 hours – probably more – carefully scraping away all the mould lines from the casting process. This was a tedious process but I broke it down into small “shifts” and further passed the time by listening to Chris Morris’ Radio 1 show from waaaay back in the day. In the end this was one of the more therapeutic tasks. Regardless of how you think of it though it’s one of the most important steps to do and get right. If you leave, forget or mess up removing the mould lines it’s makes everything else (the paint job!) pointless. You can’t polish a turd, so this is a process that does not benefit from cutting corners.
Once that was all done began adding some of the detail work. The first job I did was adding battle damage. I used a 2mm circular burring tool on my Dremel to add small recesses where I wanted damage to be. This allowed me to then cover the hole and bring it back to surface level with Greenstuff. At that stage I then used a sharp point on the Schellert Tool (more on that in the next post) to sculpt a bullet hit. I did this on random areas over the Sentinel’s body.


Next, I added some aerials. After drilling two small holes on a back shelf of the Sentinel (pin vice!) I inserted some single core wire I purchased from Maplin. At the base of the aerials I added a small amount of heatshrink so that they didn’t just jut out of the Sentinel’s body. [see below].
At this stage I undercoated the entire model in Chaos Black before I began the cab revamp. Reason for this is that when I do it is easier to see exactly what I am drilling away, as the grey resin colour contrasts against the black.
The inside of the Elysian Drop Sentinel has the lower half of the pilot, controls and seat all built in. That makes it easier for the standard setup, but for my diorama it was exactly the opposite of what I needed. The easy route would have been to re-jig the Sentinel’s setup so you couldn’t see the interior of the cab… but that’s cheating. Even if this is the first time I have modelled or converted or sculpted I knew this was a step I couldn’t just skip over because it didn’t suit me. So, I put the 2mm circular burring tool in the Dremel and began the extremely messy process of drilling out the pilot’s legs, waist and ball-sack. It was hard to see anything I was doing without stopping every few seconds and blowing out all the erroneous resin shavings. After 30 minutes though I had a finish I was happy with.
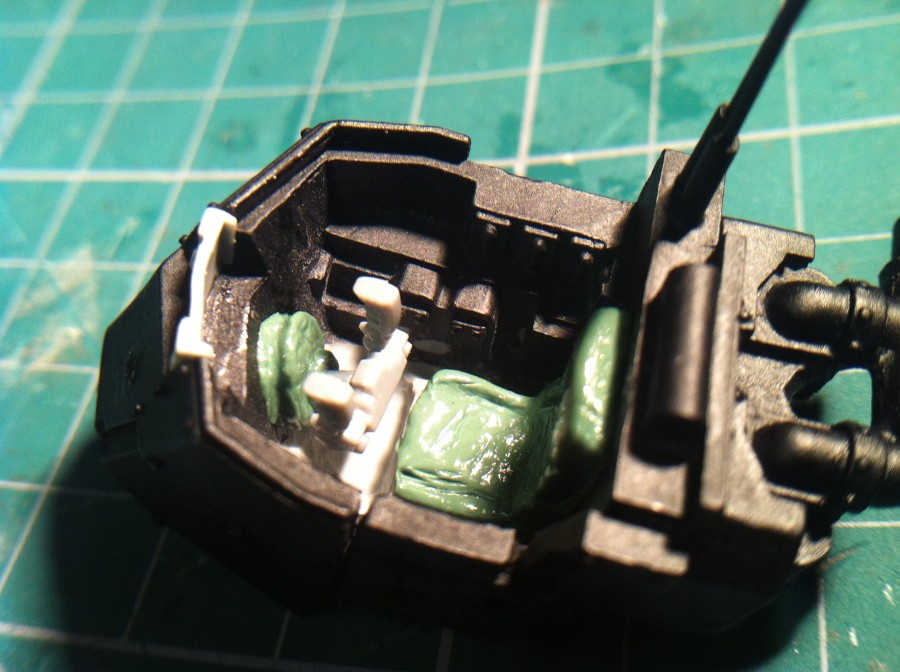
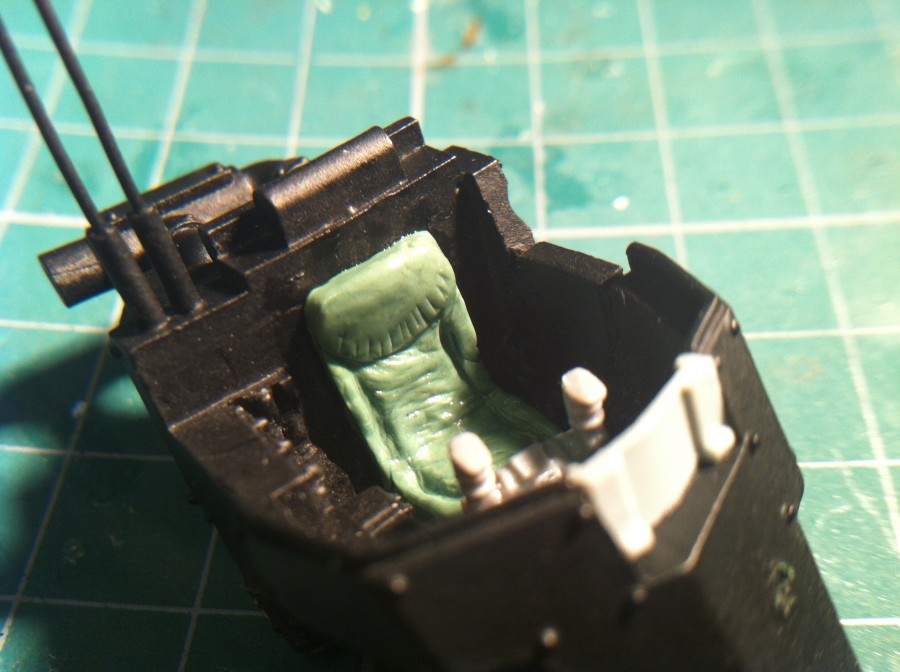
I sculpted the new cab seat and rubber guard around the steering column from greenstuff. I found some pilot controls and what could pass as a steering column in my very limited bits box. Whilst that was setting I cut and shaped the roll cage to have separate feet, rather than a support bar.
The last job I did was adding my own hydraulic lines on the Sentinel’s legs. I extended these lines so they ran from the base of the engine to the legs. I have pictures of these from the painting process in the next post.
by on January 13, 2012


