


So, whilst I was waiting for the other materials to arrive I got started with some other stuff in the meantime.
First, I took a trip to my local pound shop (or dollar store if you are reading from America). Once there I picked up a whole bunch of goodies that would prove to be very useful indeed. That list included:
– Rubber gloves
– Tuperware containers
– Craft wire
– Wall filler
– Hairspray
– Applicator bottles
– Ladies nail file kit
– Tissues
– Sponges
– Greaseproof paper
– A sieve
… amongst some other bits too. It was quite a shop, but it all came to about £15. Sorted! I’ll get into what I was using some of those things for in subsequent posts.
The first job I got onto, then, was the interior walls of the bunker – in case anybody peeked inside. I started the job the arse-way-around by, the day before, adding the wooden structure first. Of course it would have been a whole lot easier to add the wall filler first, then press in the wooden structure afterwards. No matter, with careful application I managed a realistic texture. [Unfortunately I do not have pictures of this stage]. However, you can just about make it out in the background of this image:
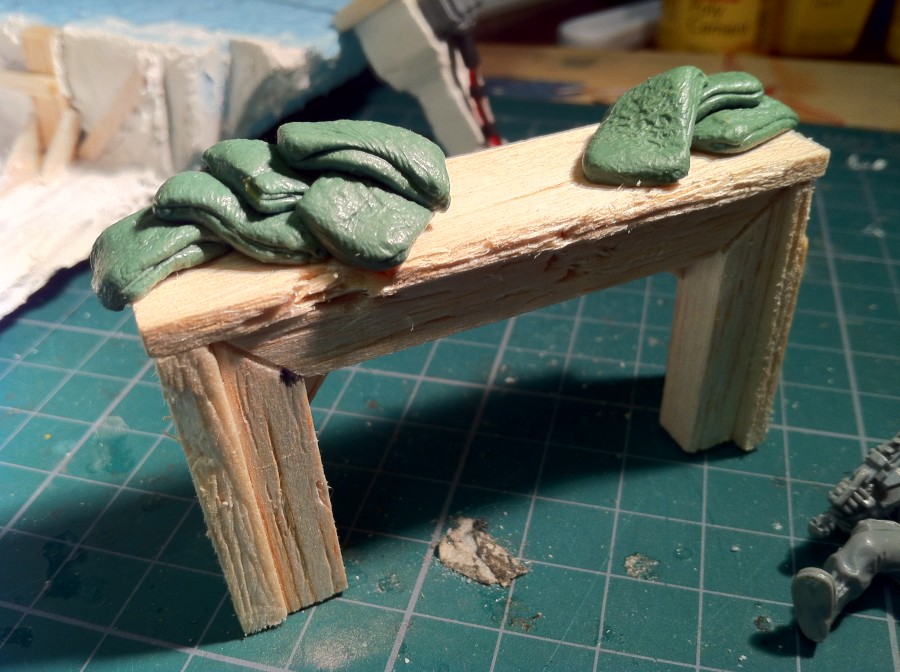
Which segways me onto the next job I undertook. The making of sandbags. Like everything I did with this diorama, this was the first time I ever tackled making such a thing. I took great advice from Forgeworld’d Model Masterclass Vol 1. Excellent reading.
The process I took (thanks, Phil Stutcinkas):
1. Mixed the greenstuff and rolled it into an even width.
2. Using a little vaseline (important!) on the work surface to avoid stickiness, I pressed and flattened the length of greenstuff with a steel ruler.
3. Using a craft knife I began to cut the size sandbags I required.
4. A cloth was used to re-shape and lightly press the sandbags to give them a woven texture.
5. The craft knife was used to slice once of the sides, imitating a fold. Finally, all sandbags were placed into position.
This was the very first time I have ever used greenstuff, let alone try to sculpt something. I found greenstuff to be incredibly workable and easy to use. Back in the day I used to use Milliput (and very badly at that!) but I never got on with it… it always crumbled. Then again, I don’t have the patience then as I do now.
As that was drying I got making a power conduit that would jut out of the ground for the bunker. Within context, I imagine it to be some sort of communications relay.
I dug deep into my assorted mix of balsa I got from Hobbycraft and worked some of the pieces into a shape that could pass as a vertical structure. I knew I wanted to add an aerial to the top so I made a small wooden frame (as can be seen) to surround the aerials base.
As a sidenote, I use a rotary tool (Dremel, well… B&Qs own branded version) to cut all the balsa. This is probably overkill but I don’t have a suitable (razor) saw to hand. The rotary gave clean cuts.
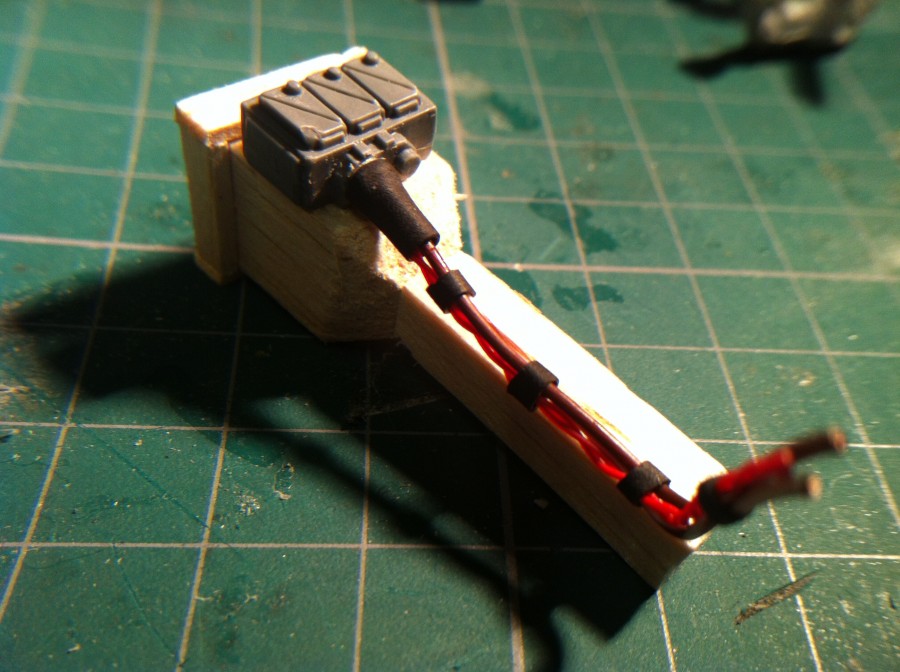
After cementing it all together I used the junction box that came with the sentinel kit for the main part of the conduit. I cut the moulded cabling off the bottom, as I knew I wanted to add my own. Once cut and sanded, I drilled up into the box creating a whole to push my own cables into for added support. (Gluing the cables flush to plastic just won’t hold).
I used to fix xbox 360s so I’ve still got a box full of 30-gauge wire that is a great size for 28mm work. I use 30-gauge for twisted cabling and I shredded an old ethernet cable for some suitably thicker cables. Once I cut and placed them I added heatshrink that would not only hold the wires together but also create a nice finishing effect.
I covered the structure in some more wall filler to give it a concrete effect then added the power conduit. I finished off the structure by adding an aerial to the top and some tread plate to the sides.
by on January 4, 2012


