


I’ve started on many details of “Closing Time” already, putting the cart somewhat before the horse. I say that because I’m still skirting around constructing the buildings for the alley itself. I’m still working out various plans of where things will go and how… so it’s fruitless building major components if things are only going to change. So, I’m doing things like making scale ventilation ducting:
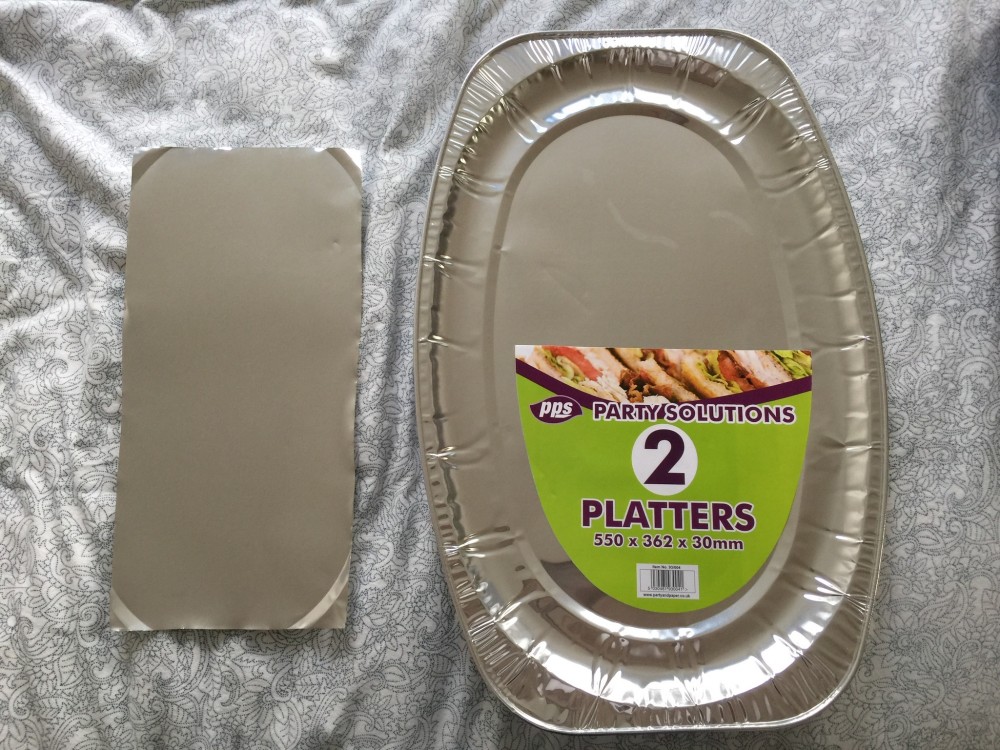
I started with a couple of “party platters” or “turkey trays”. These were in abundance as I went looking right after Christmas. The important thing is to find one that has a flat, smooth bottom to it.
Then cut it out:
After I was done cutting I started mapping out the ducting. Measuring out how big I wanted the center to be, I then measured equal distances to the left and right for the edges. I opted for a thin-sided style of ducting as I want it to sit relatively flush to the building.
Drawing the grid pattern, which was important to get precise and equal, was necessary for the next step.
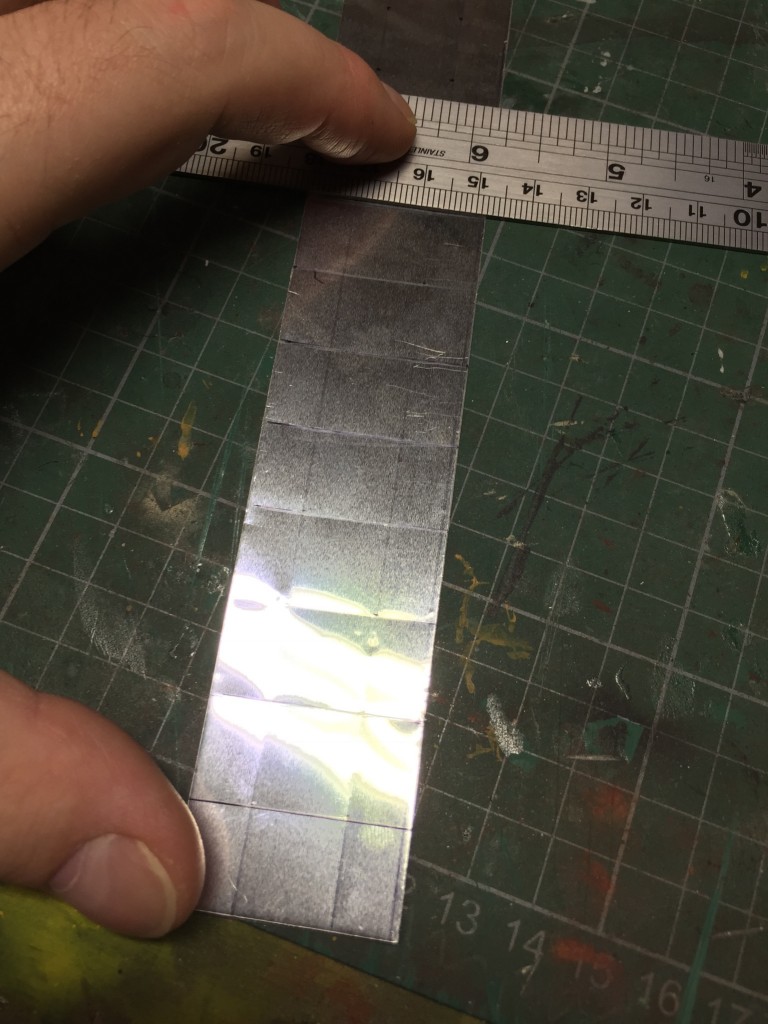
From here, it was a matter of scoring. I used a small round-headed sculpting tool that was safely blunt. I didn’t want to be cutting through the sheet metal.
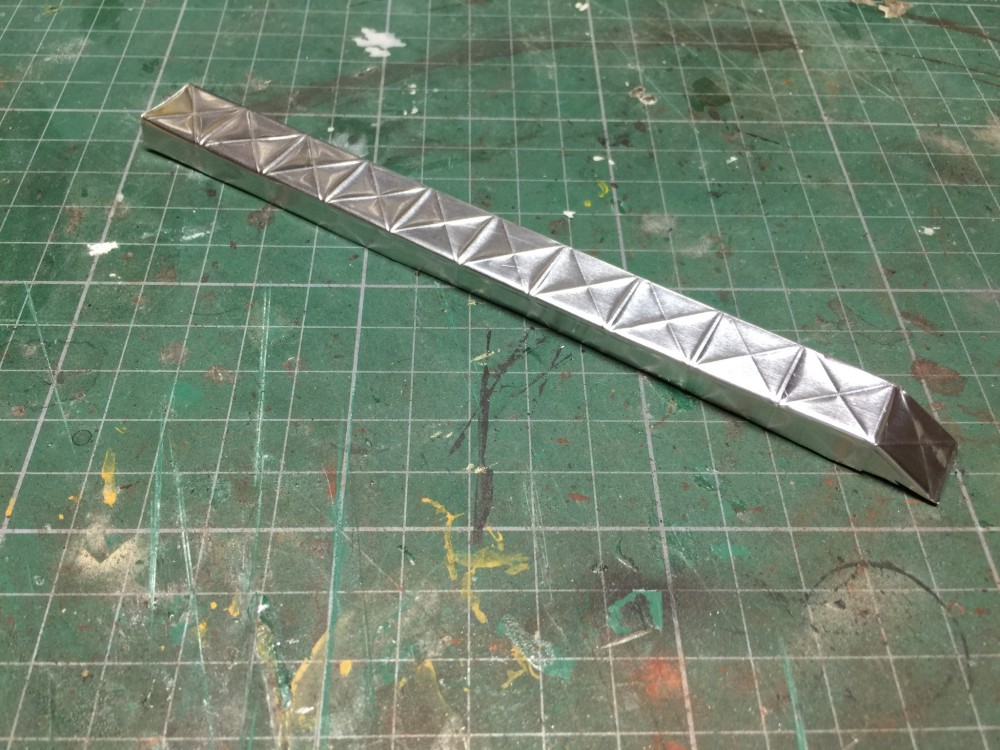
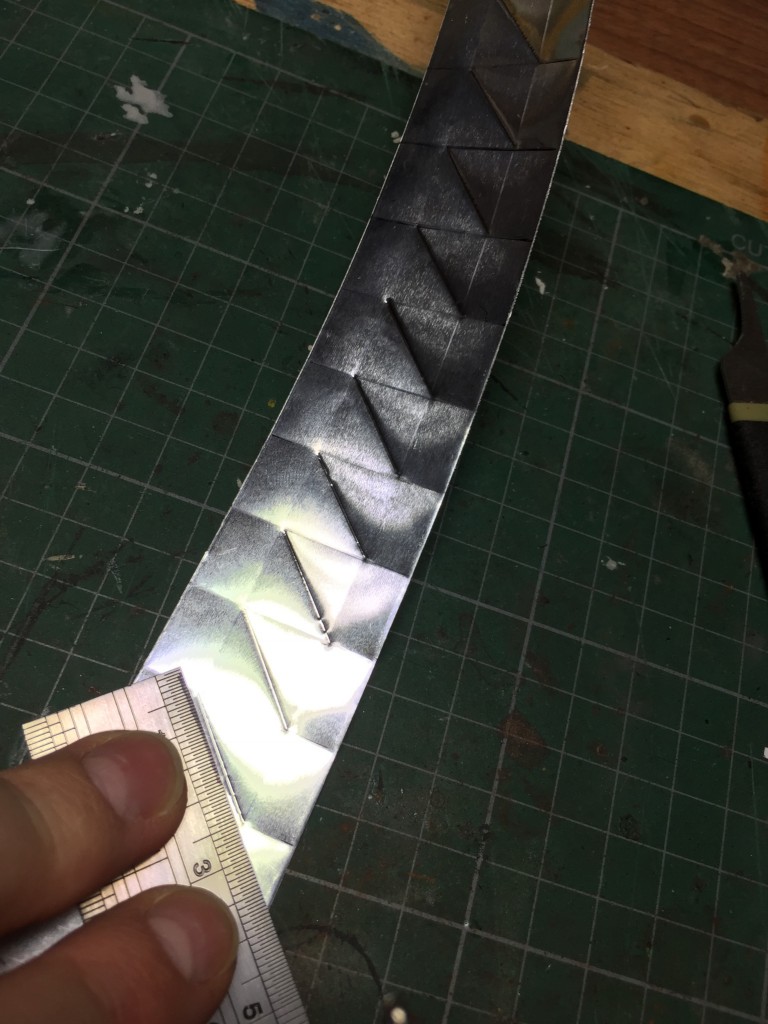
So, here is where the grid pattern came into play. The scoring lines all matched up perfectly. Once all scored, I simply folded the sides using a ruler (can be a little tricky) and then it was done. I cut and folded the end at a 45-degree angle, where the vent would be ejecting from the building.
From here, I will be super-detailing the ducting with angled plastruct to simulate the brackets holding the ducting to the brick work. I may add other details like cable conduits or adjacent pipework.
by on January 5, 2017


