


Making “The Flux Mill”
I’ve always wanted to try laser cutting. Especially when it comes to HO scale structures.
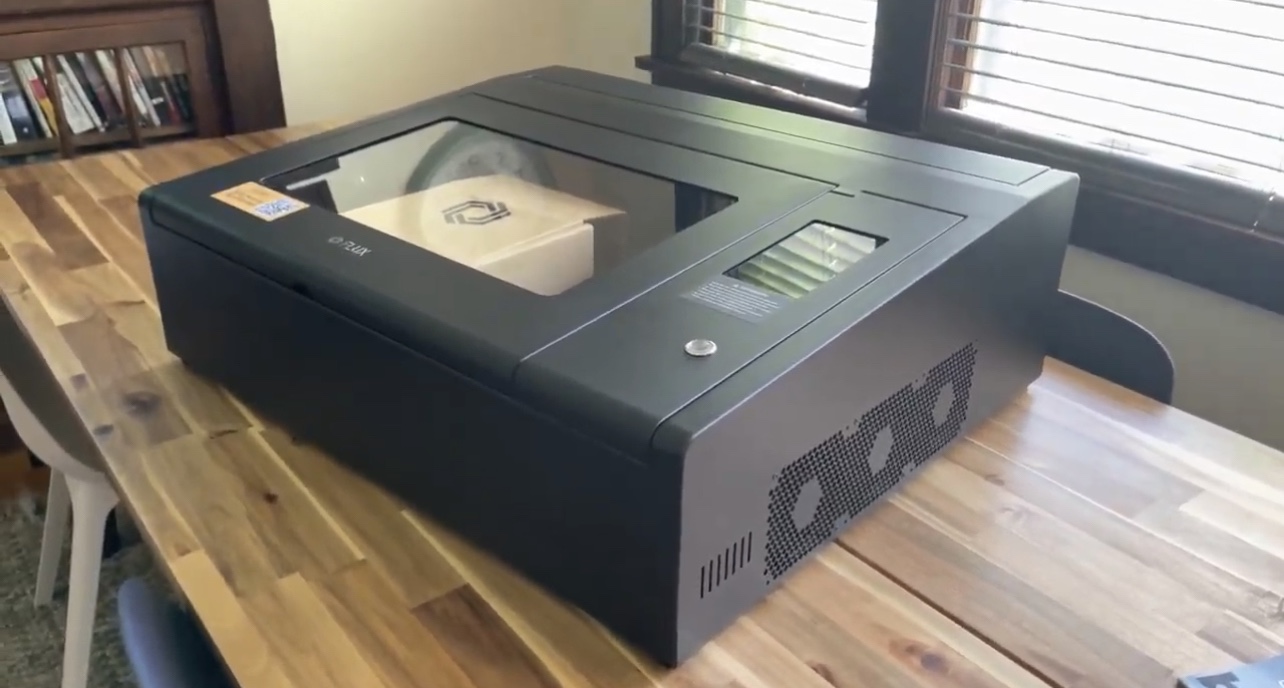
So I jumped at the chance when FLUX (www.flux3dp.com) offered me the opportunity to try out their Beambox – their middle of the road offering (they make one smaller and one bigger than the Beambox). For my purposes, a 40W Co2 laser was powerful enough. Here it is:
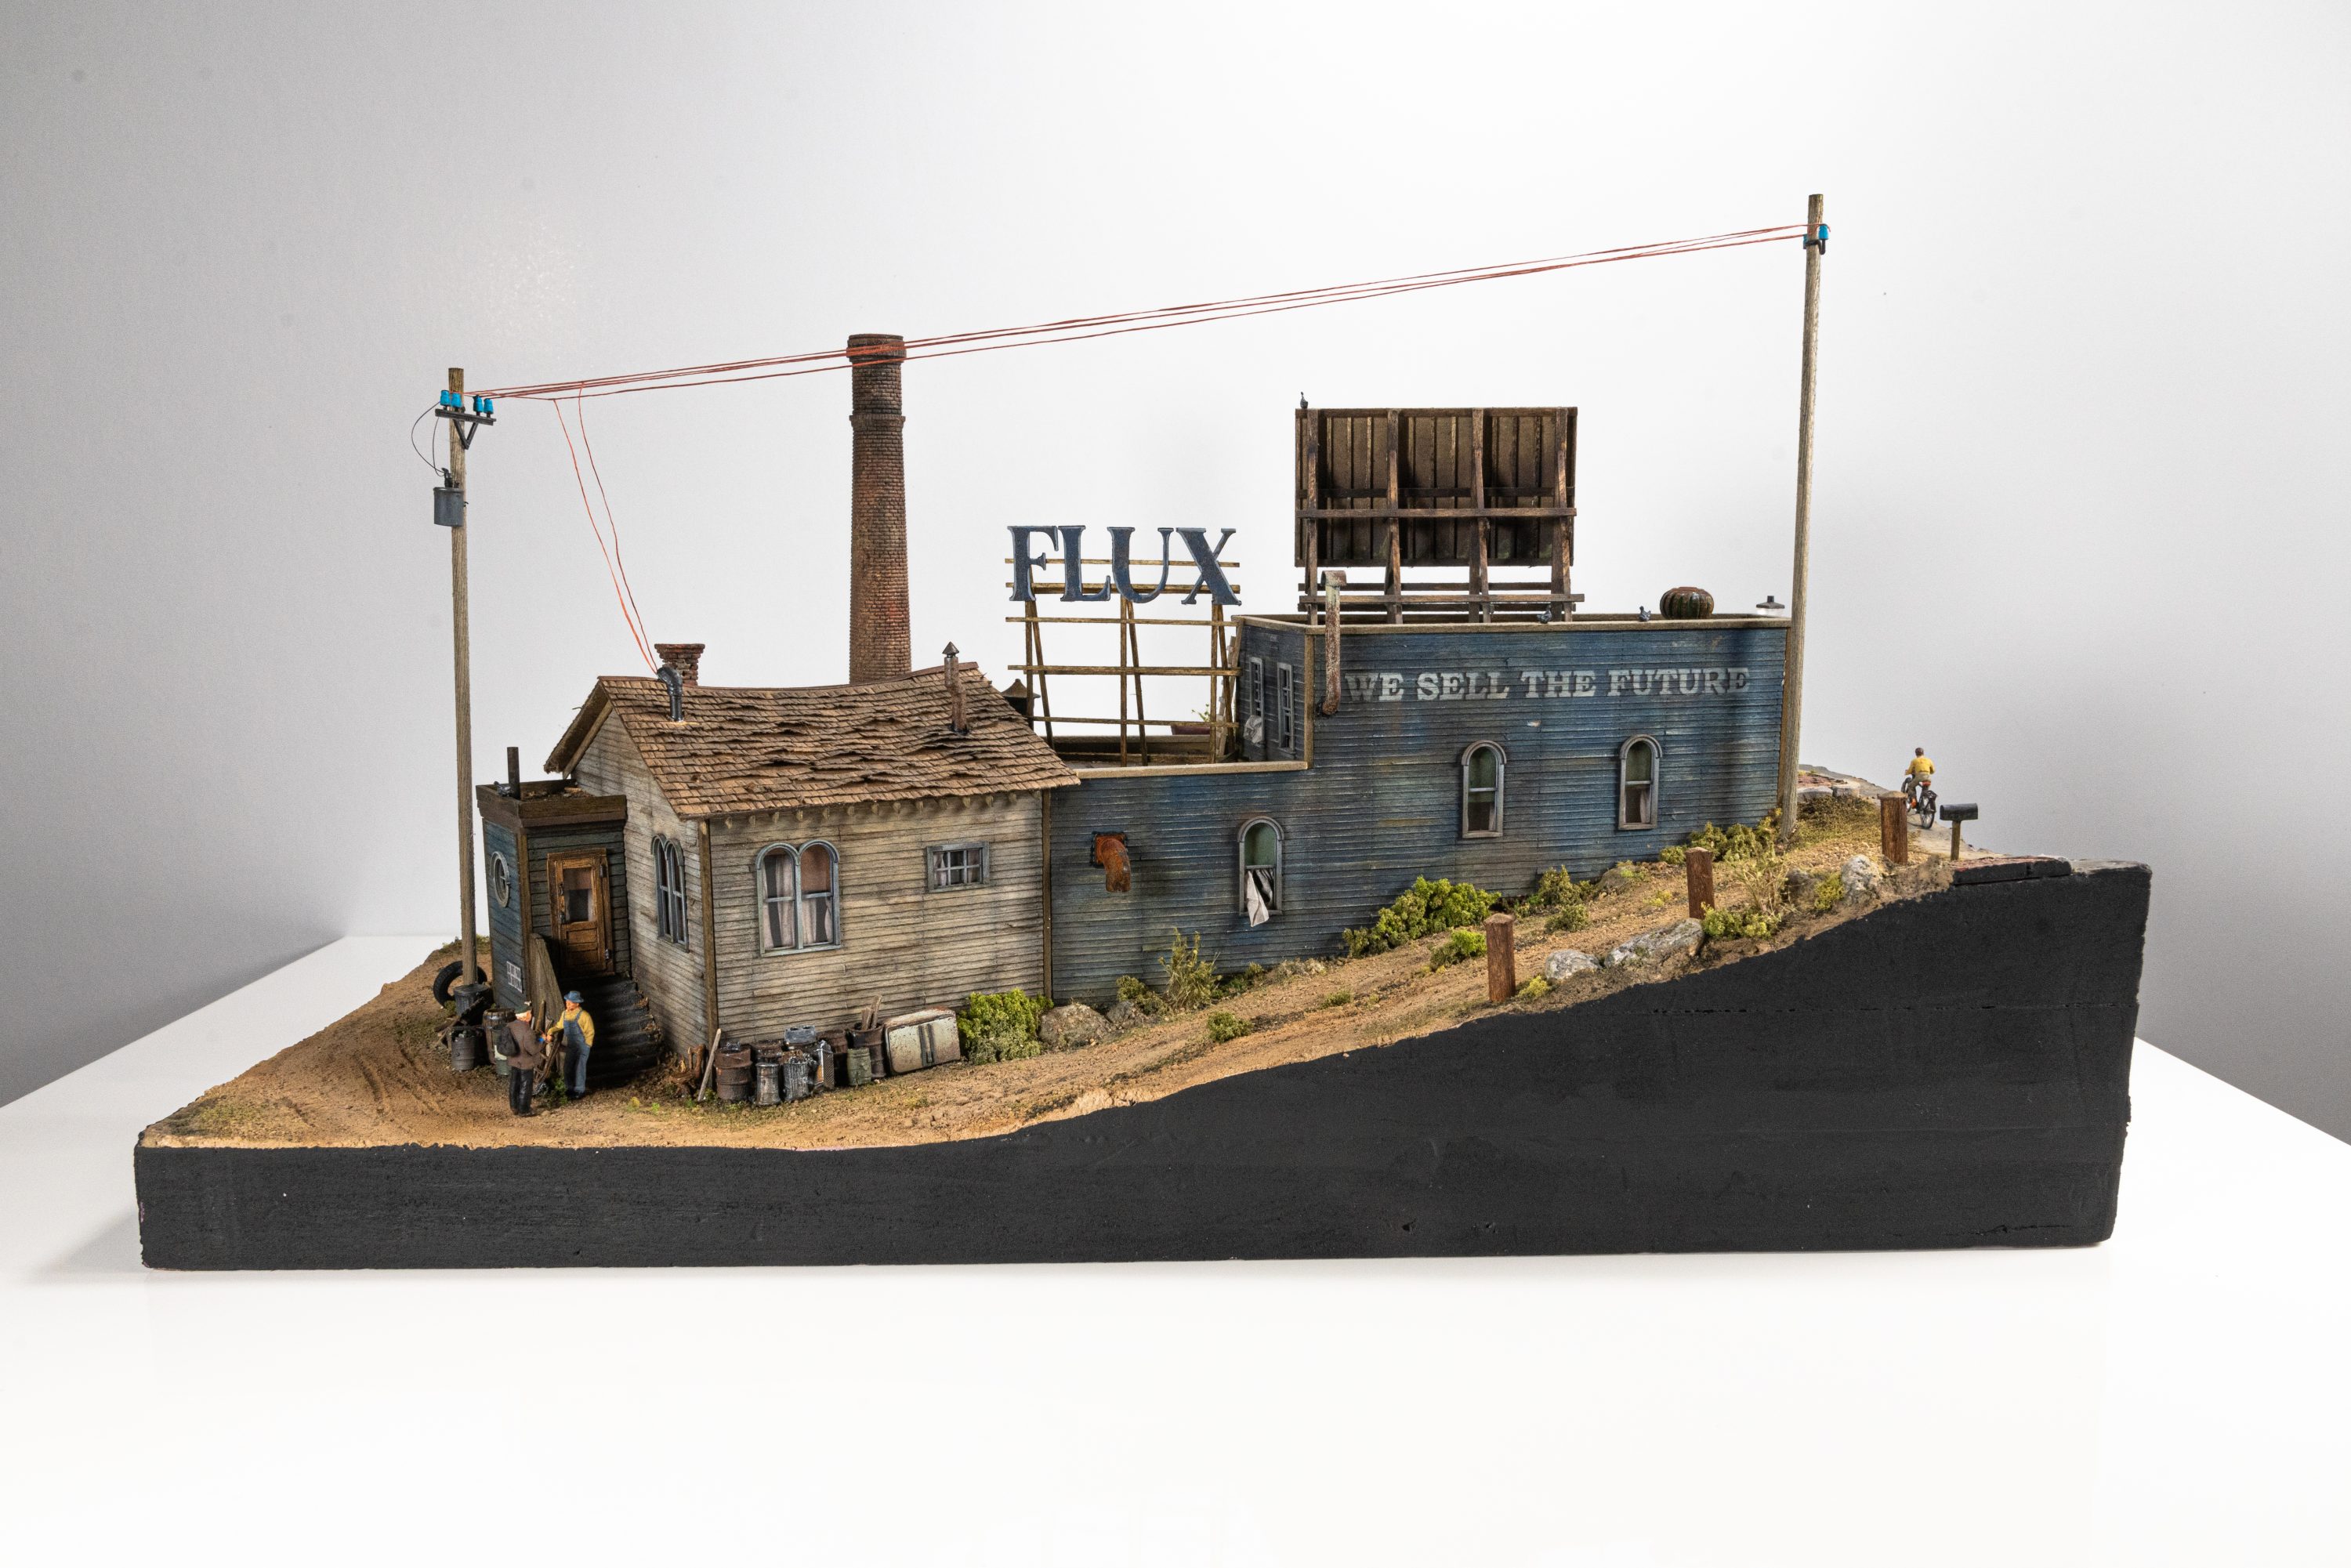
In return for their machine, I agreed to make FLUX a diorama. I told them, “I’m going to make the FLUX building as if it existed in 1930’s America”. They loved the idea, so I got to work.
First thing I did was design a few different structures in Fusion 360. I tried out a few things, but I settled on this:
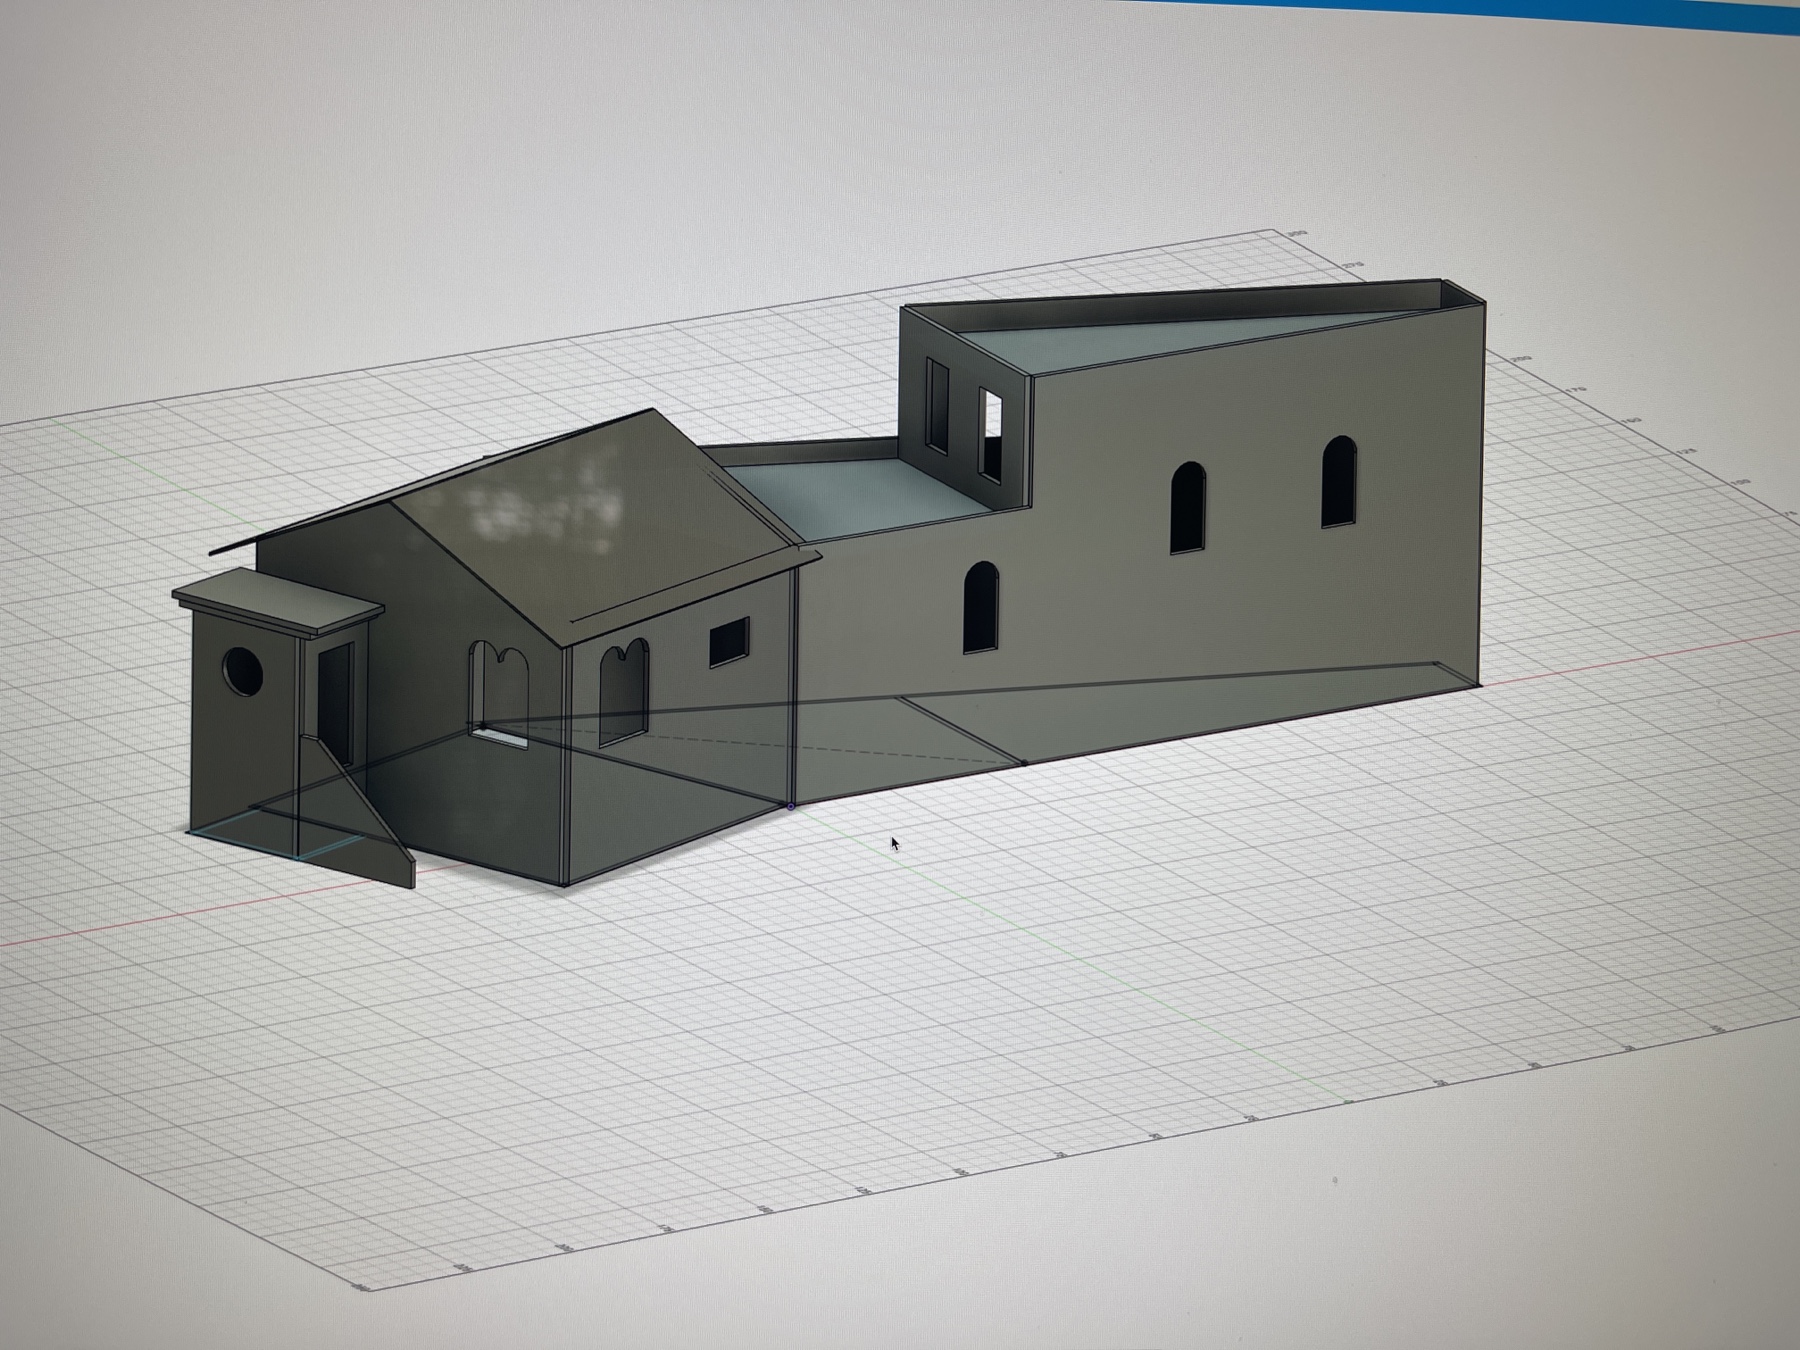
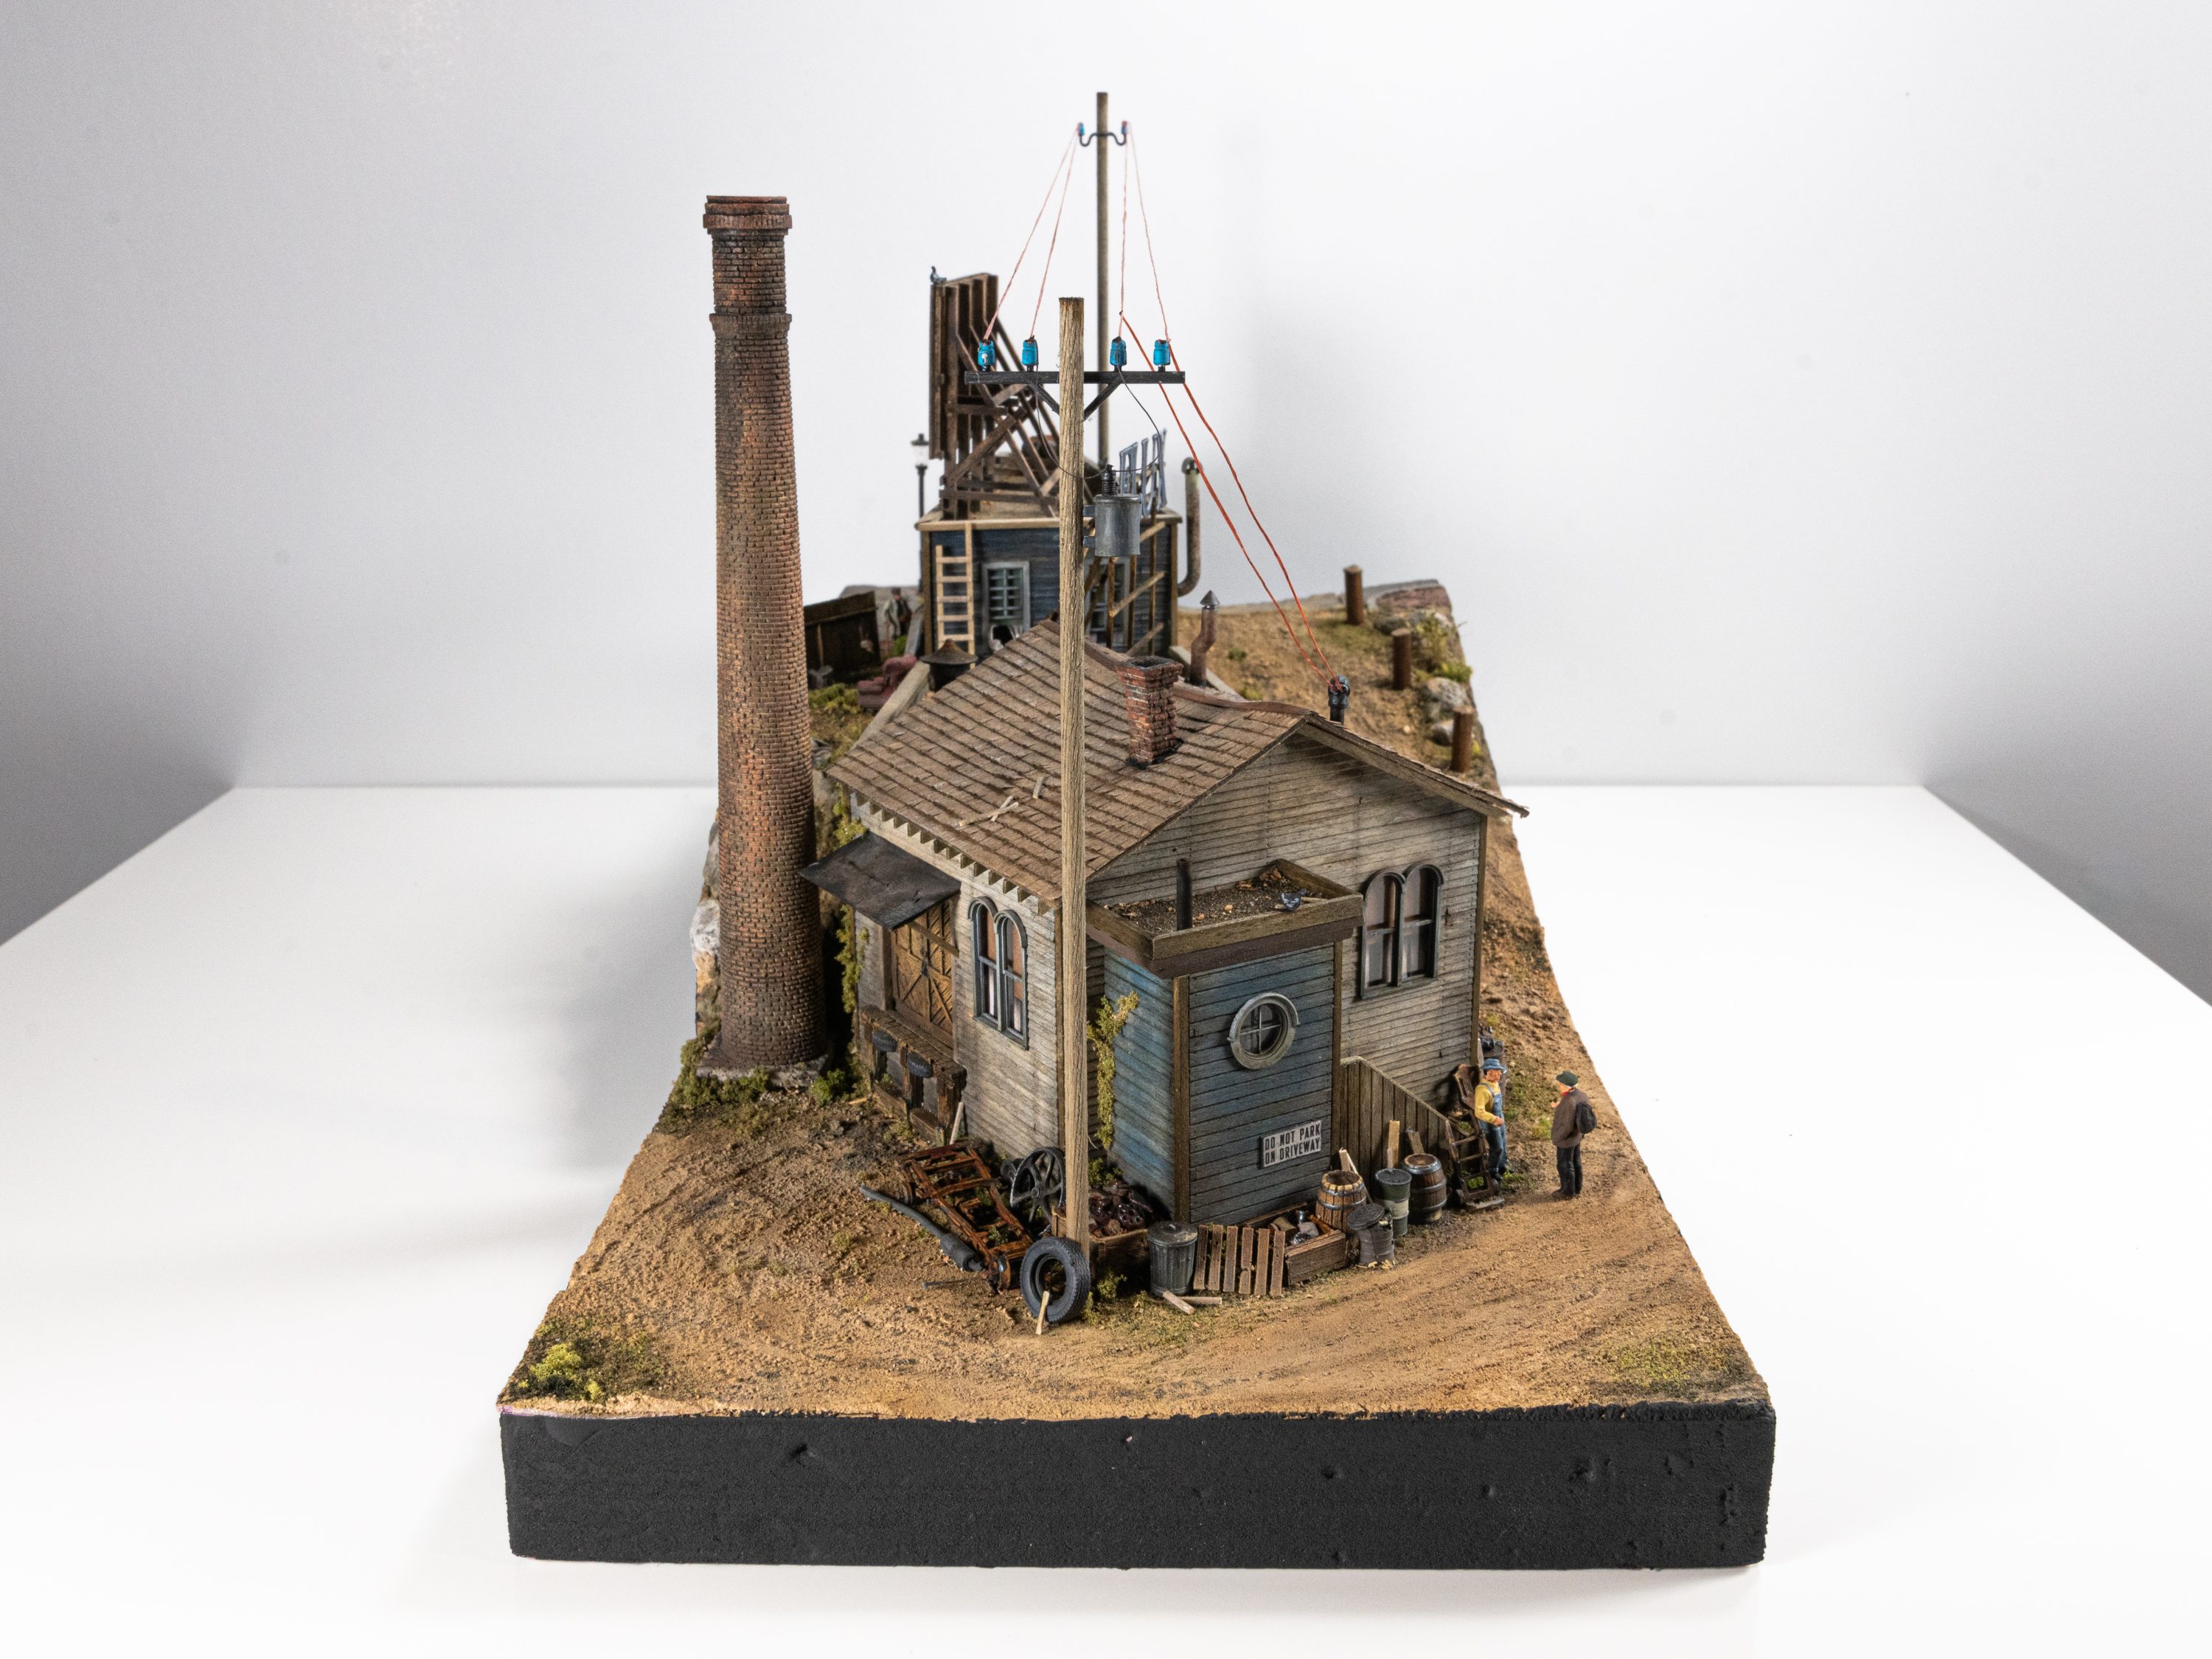
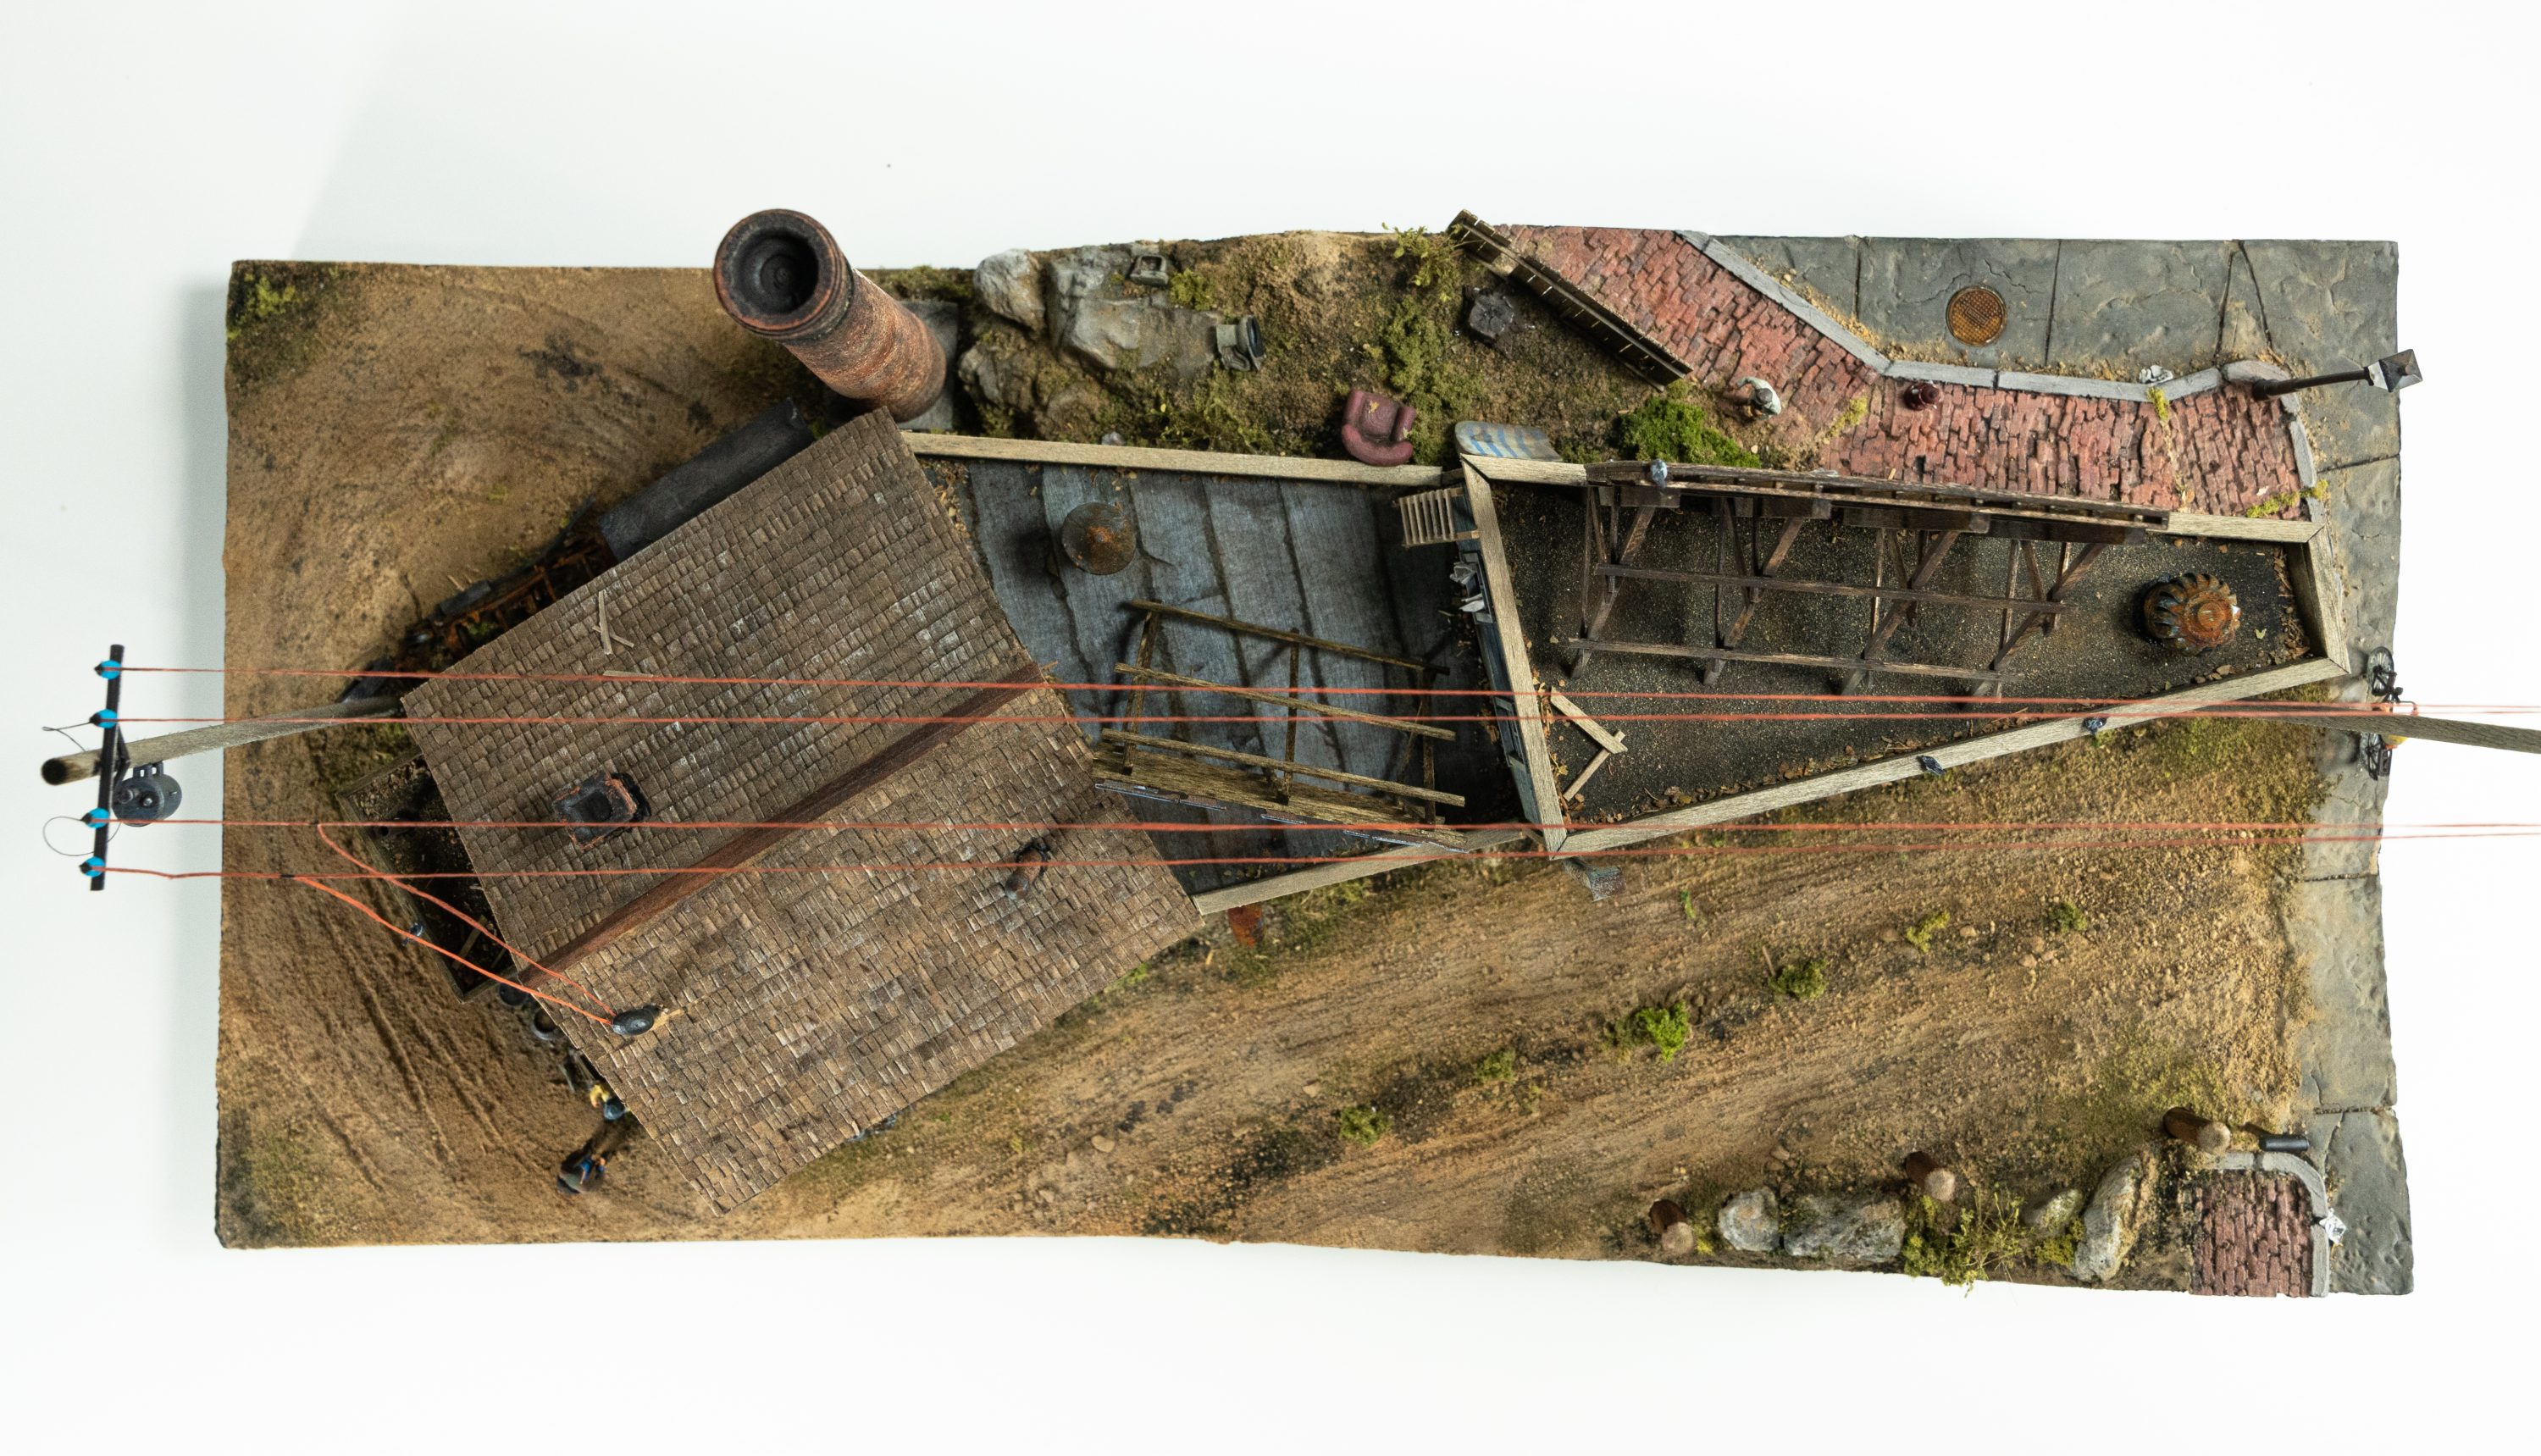
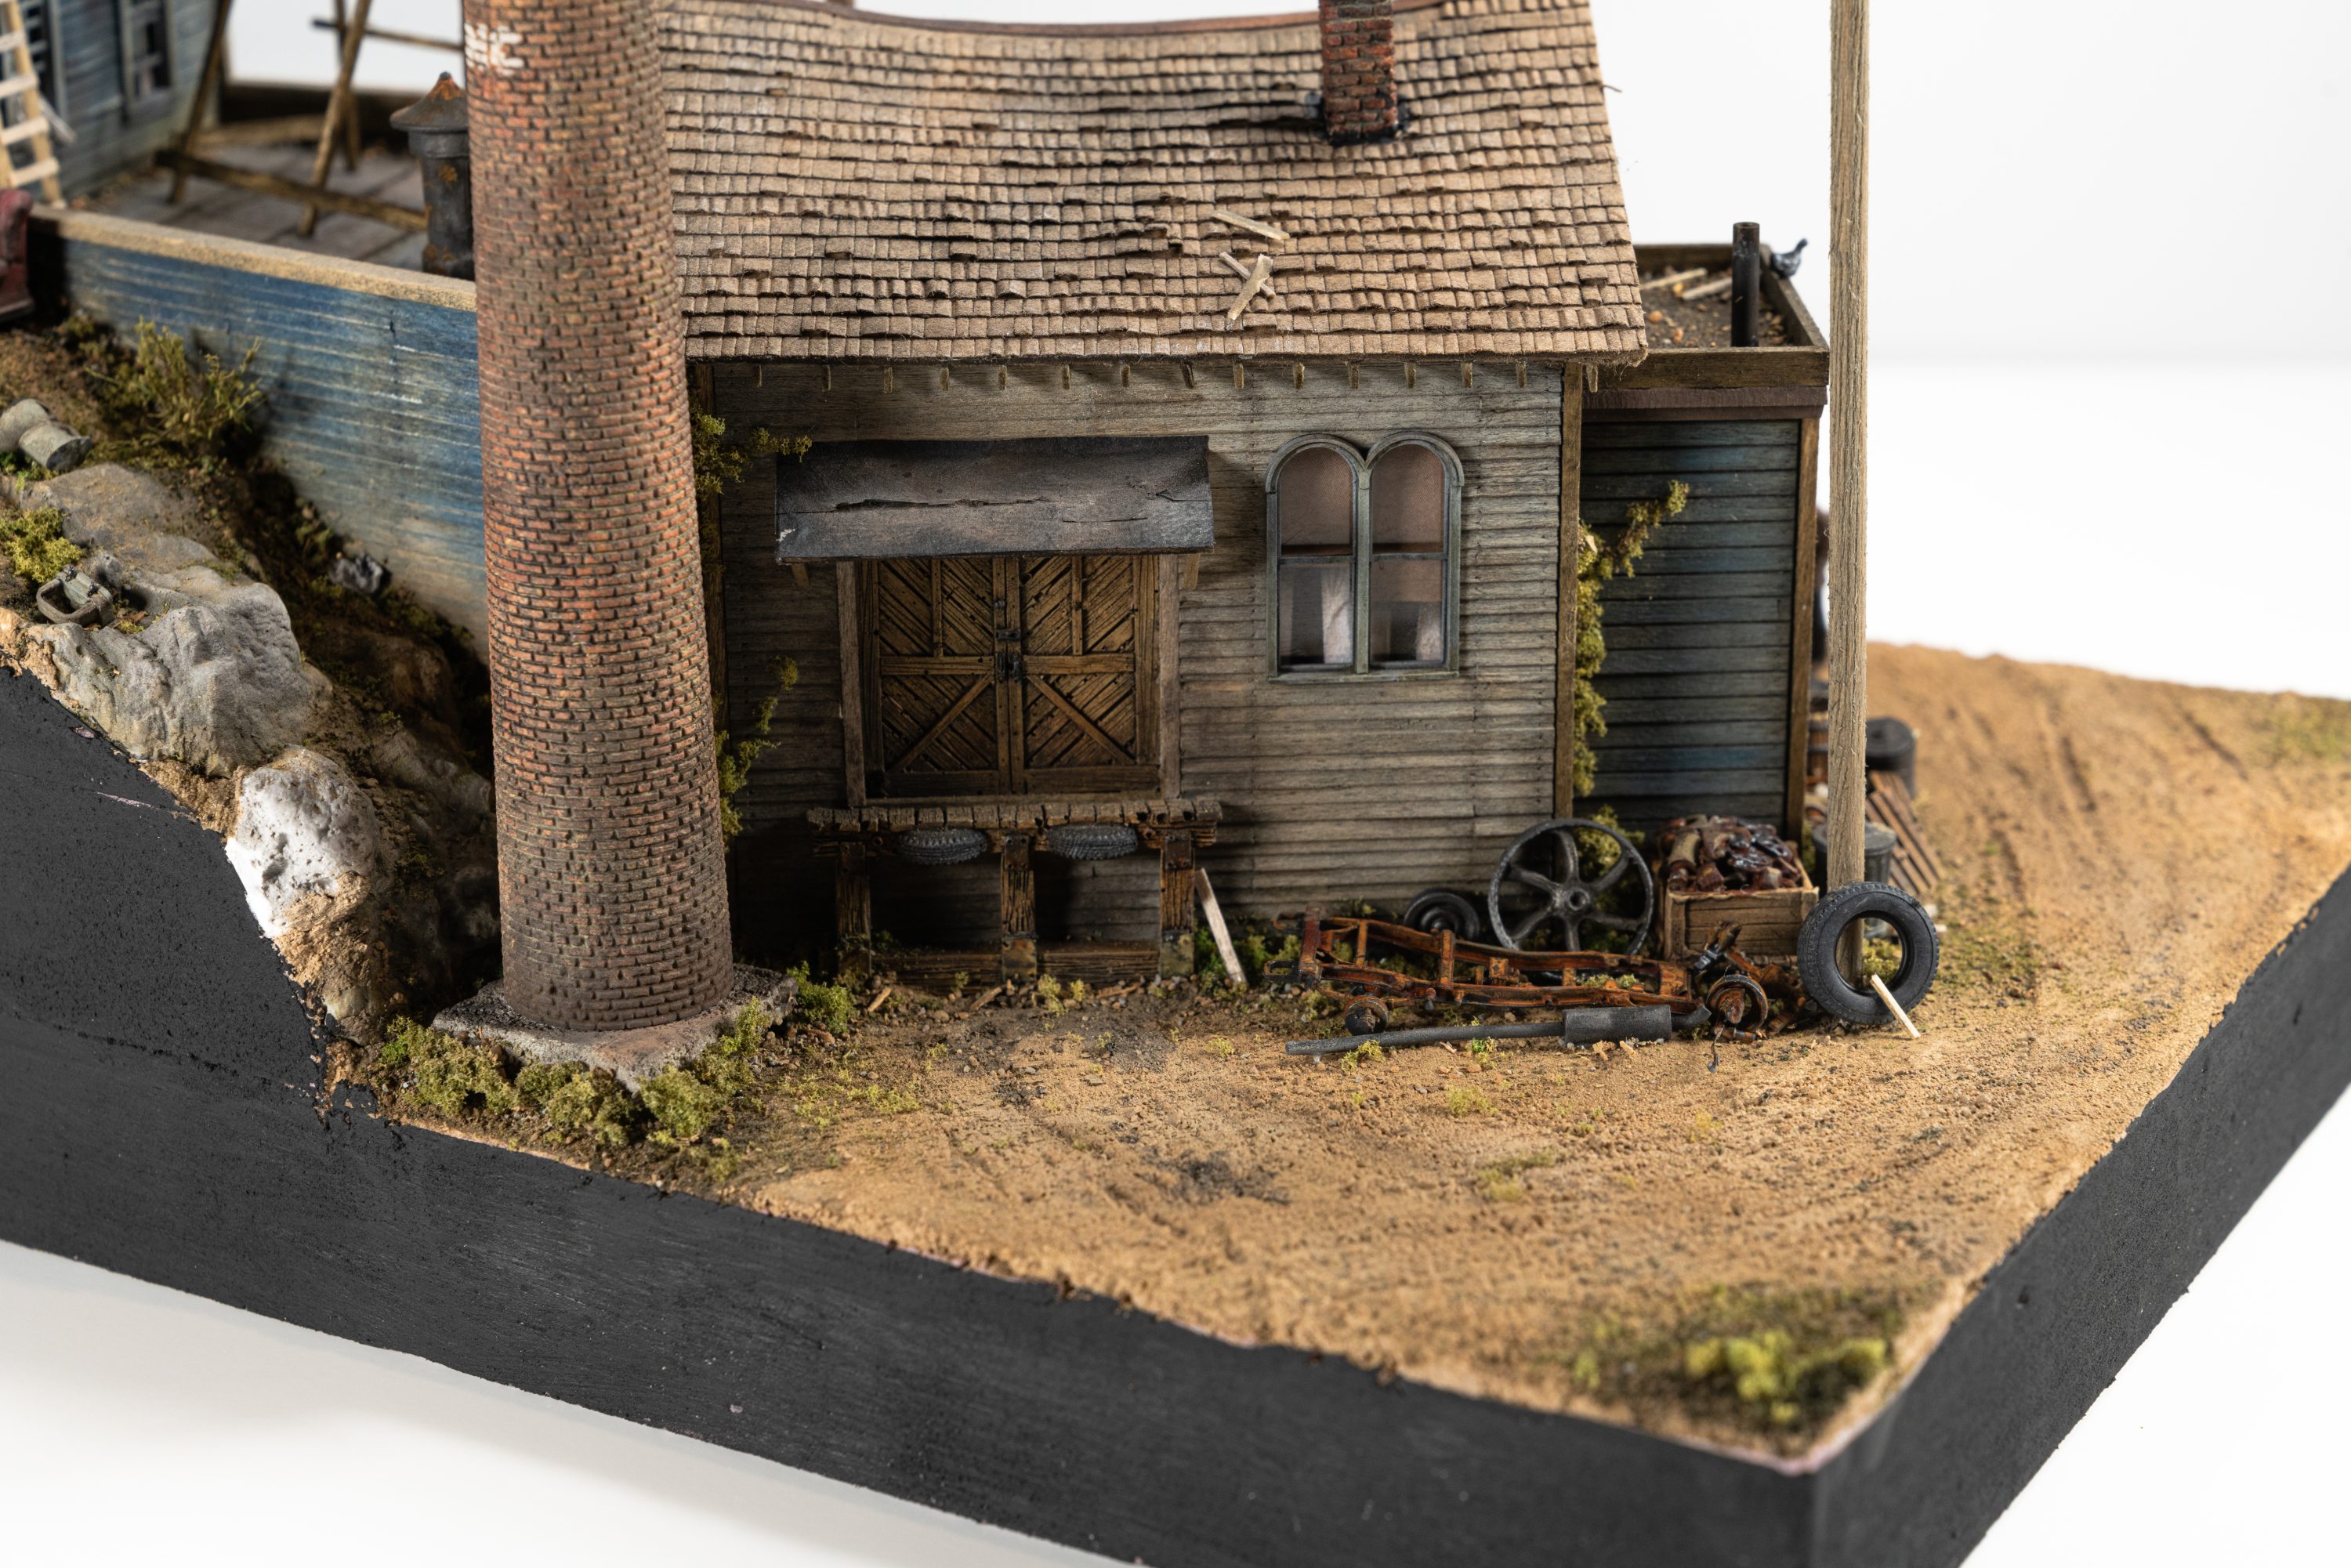
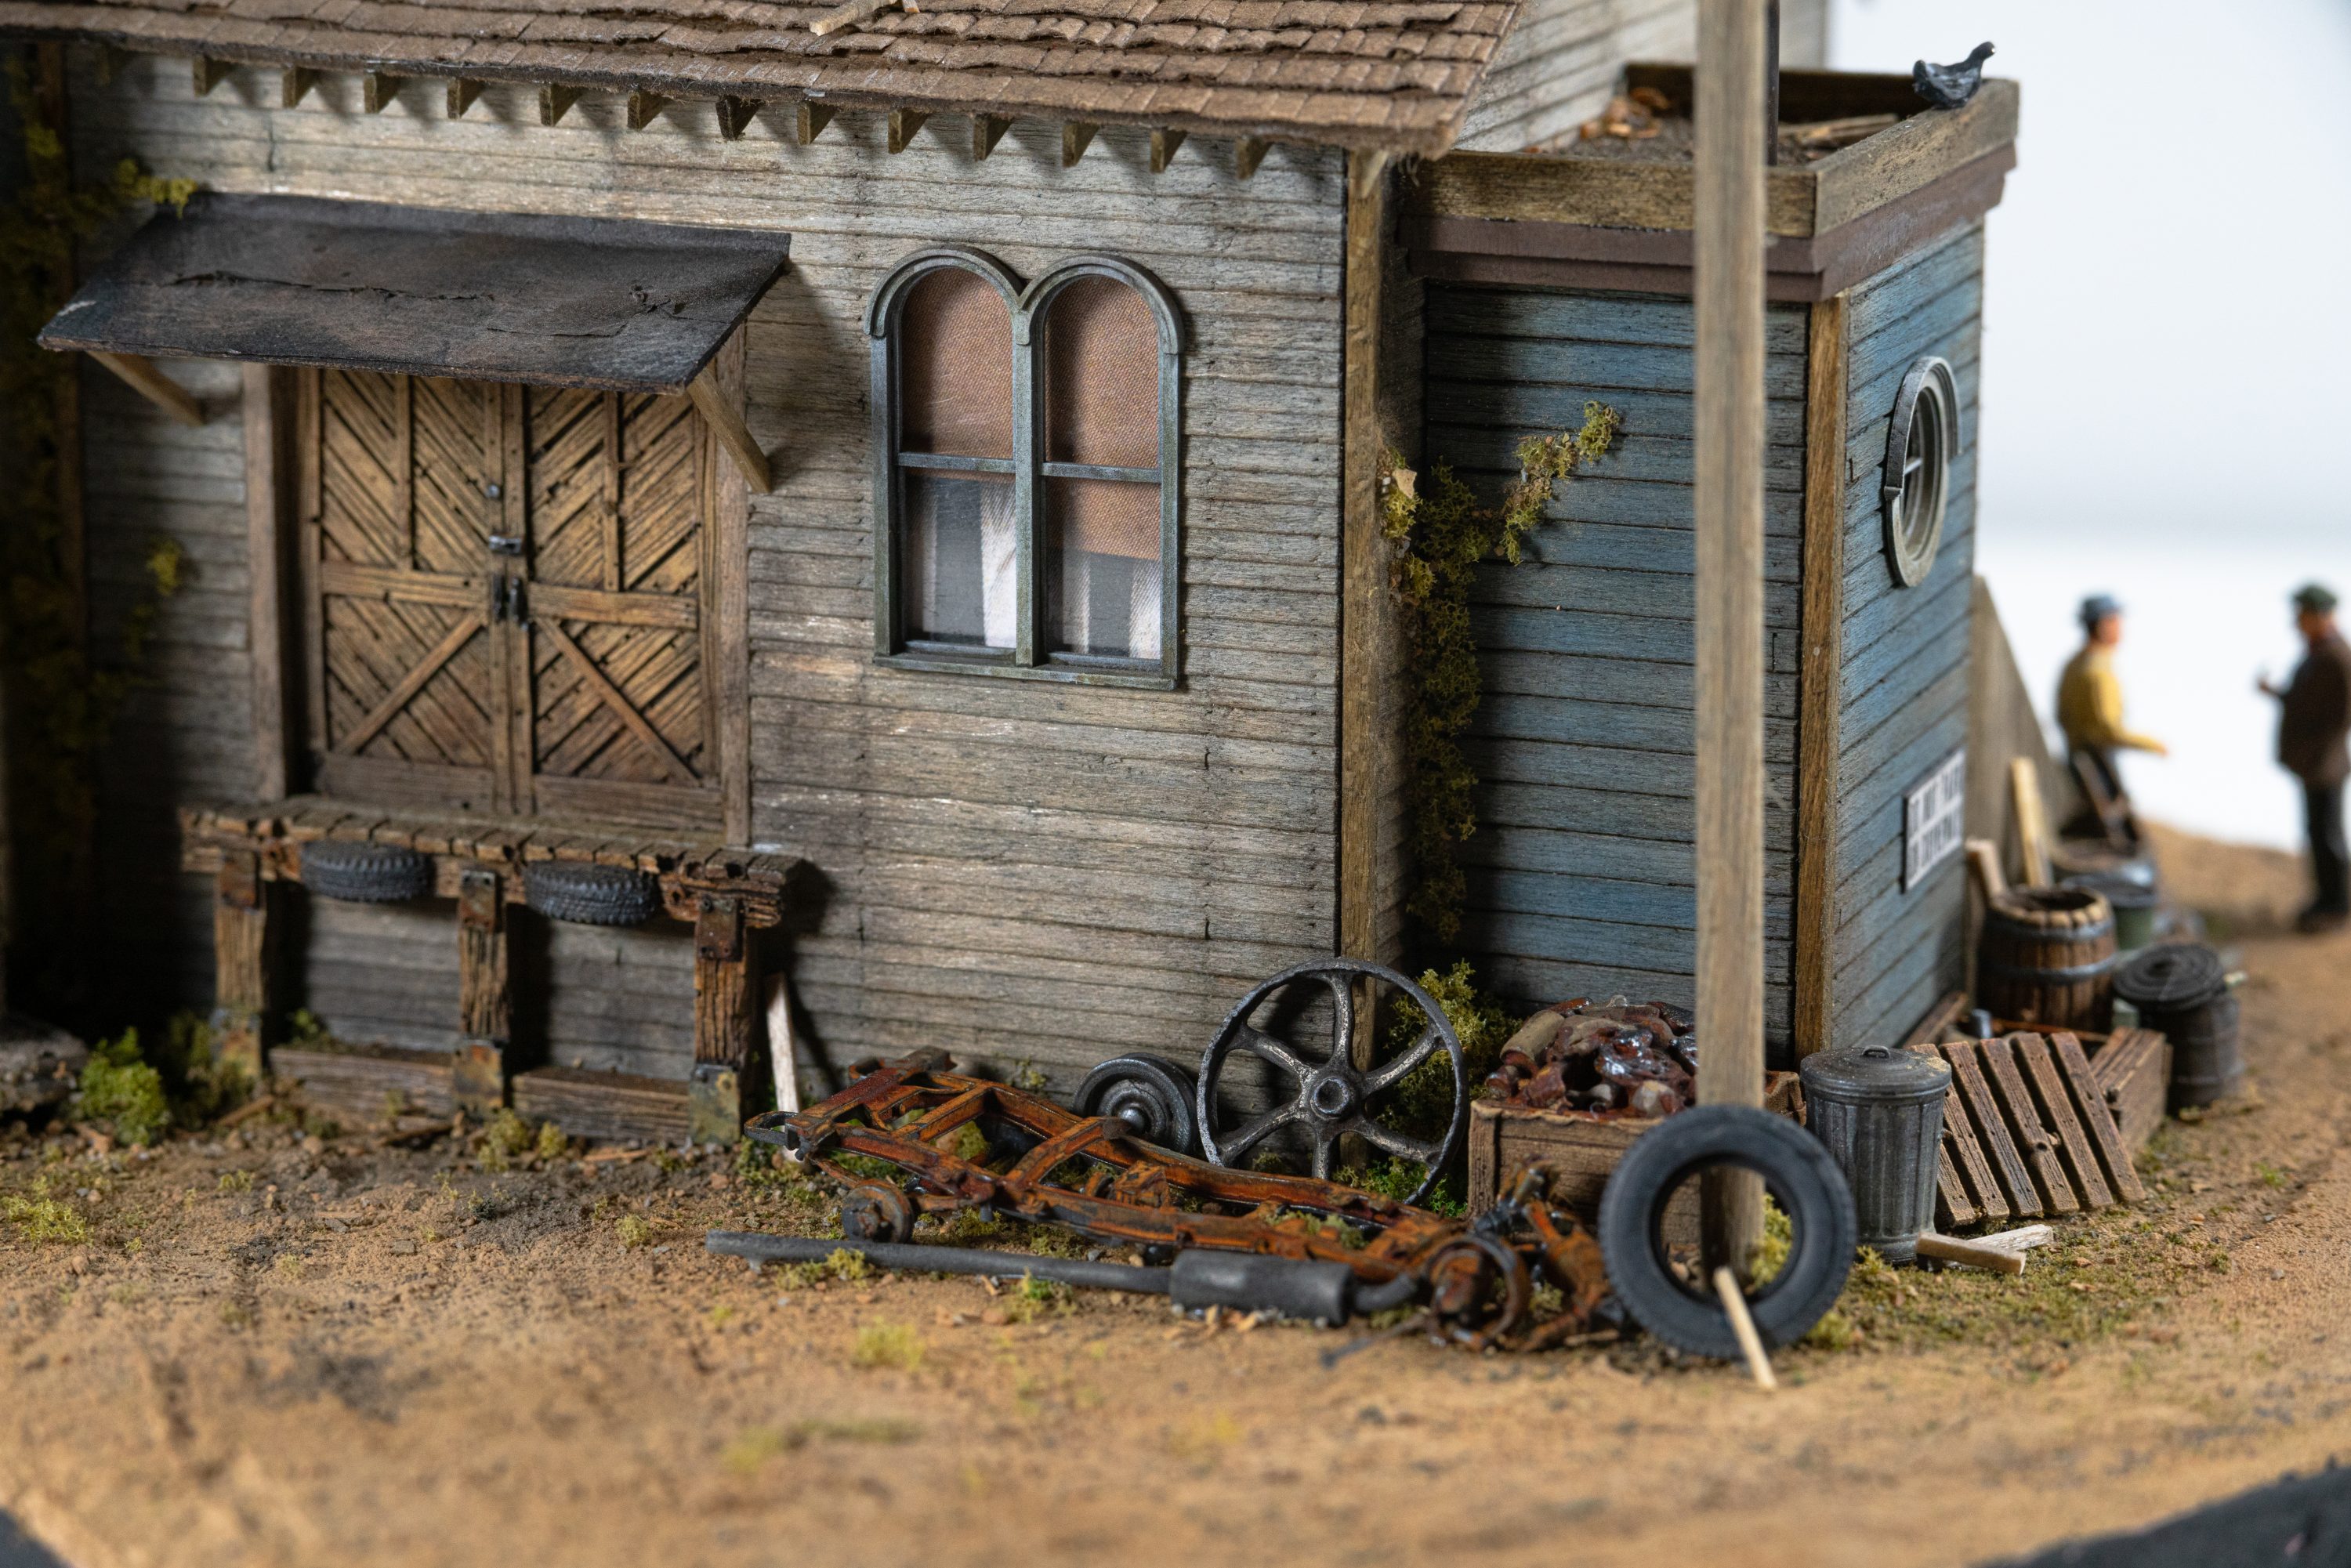
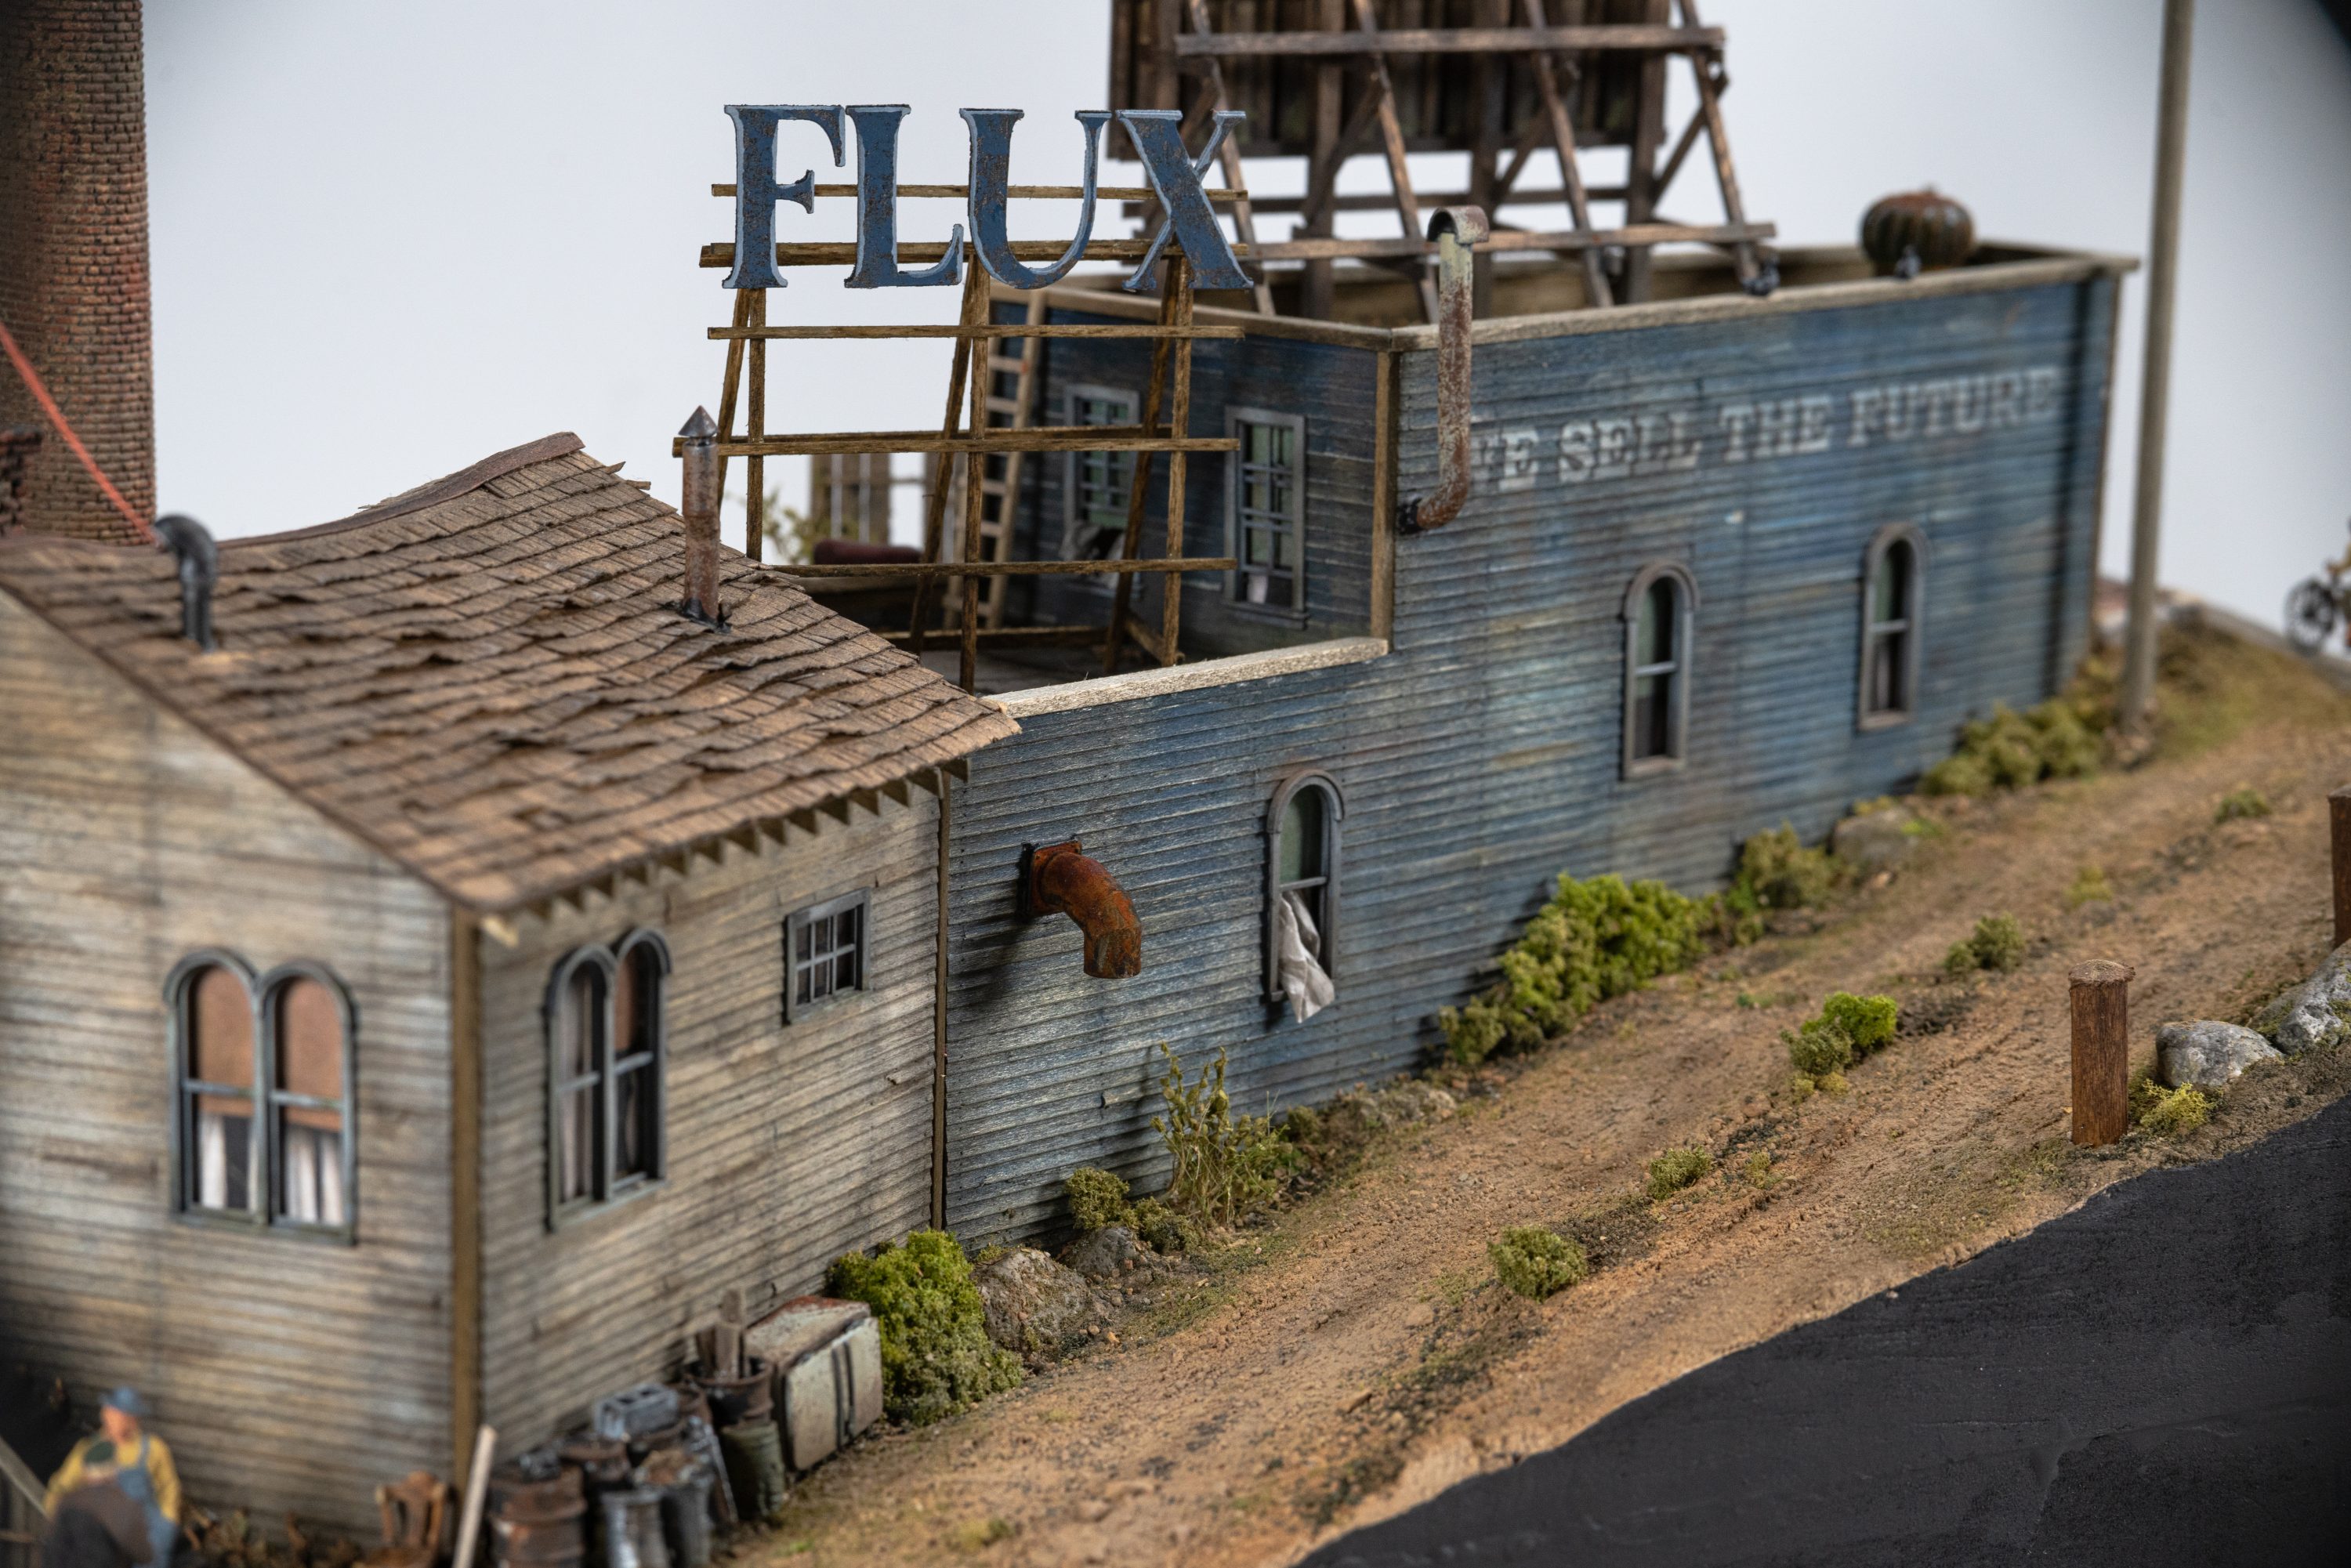
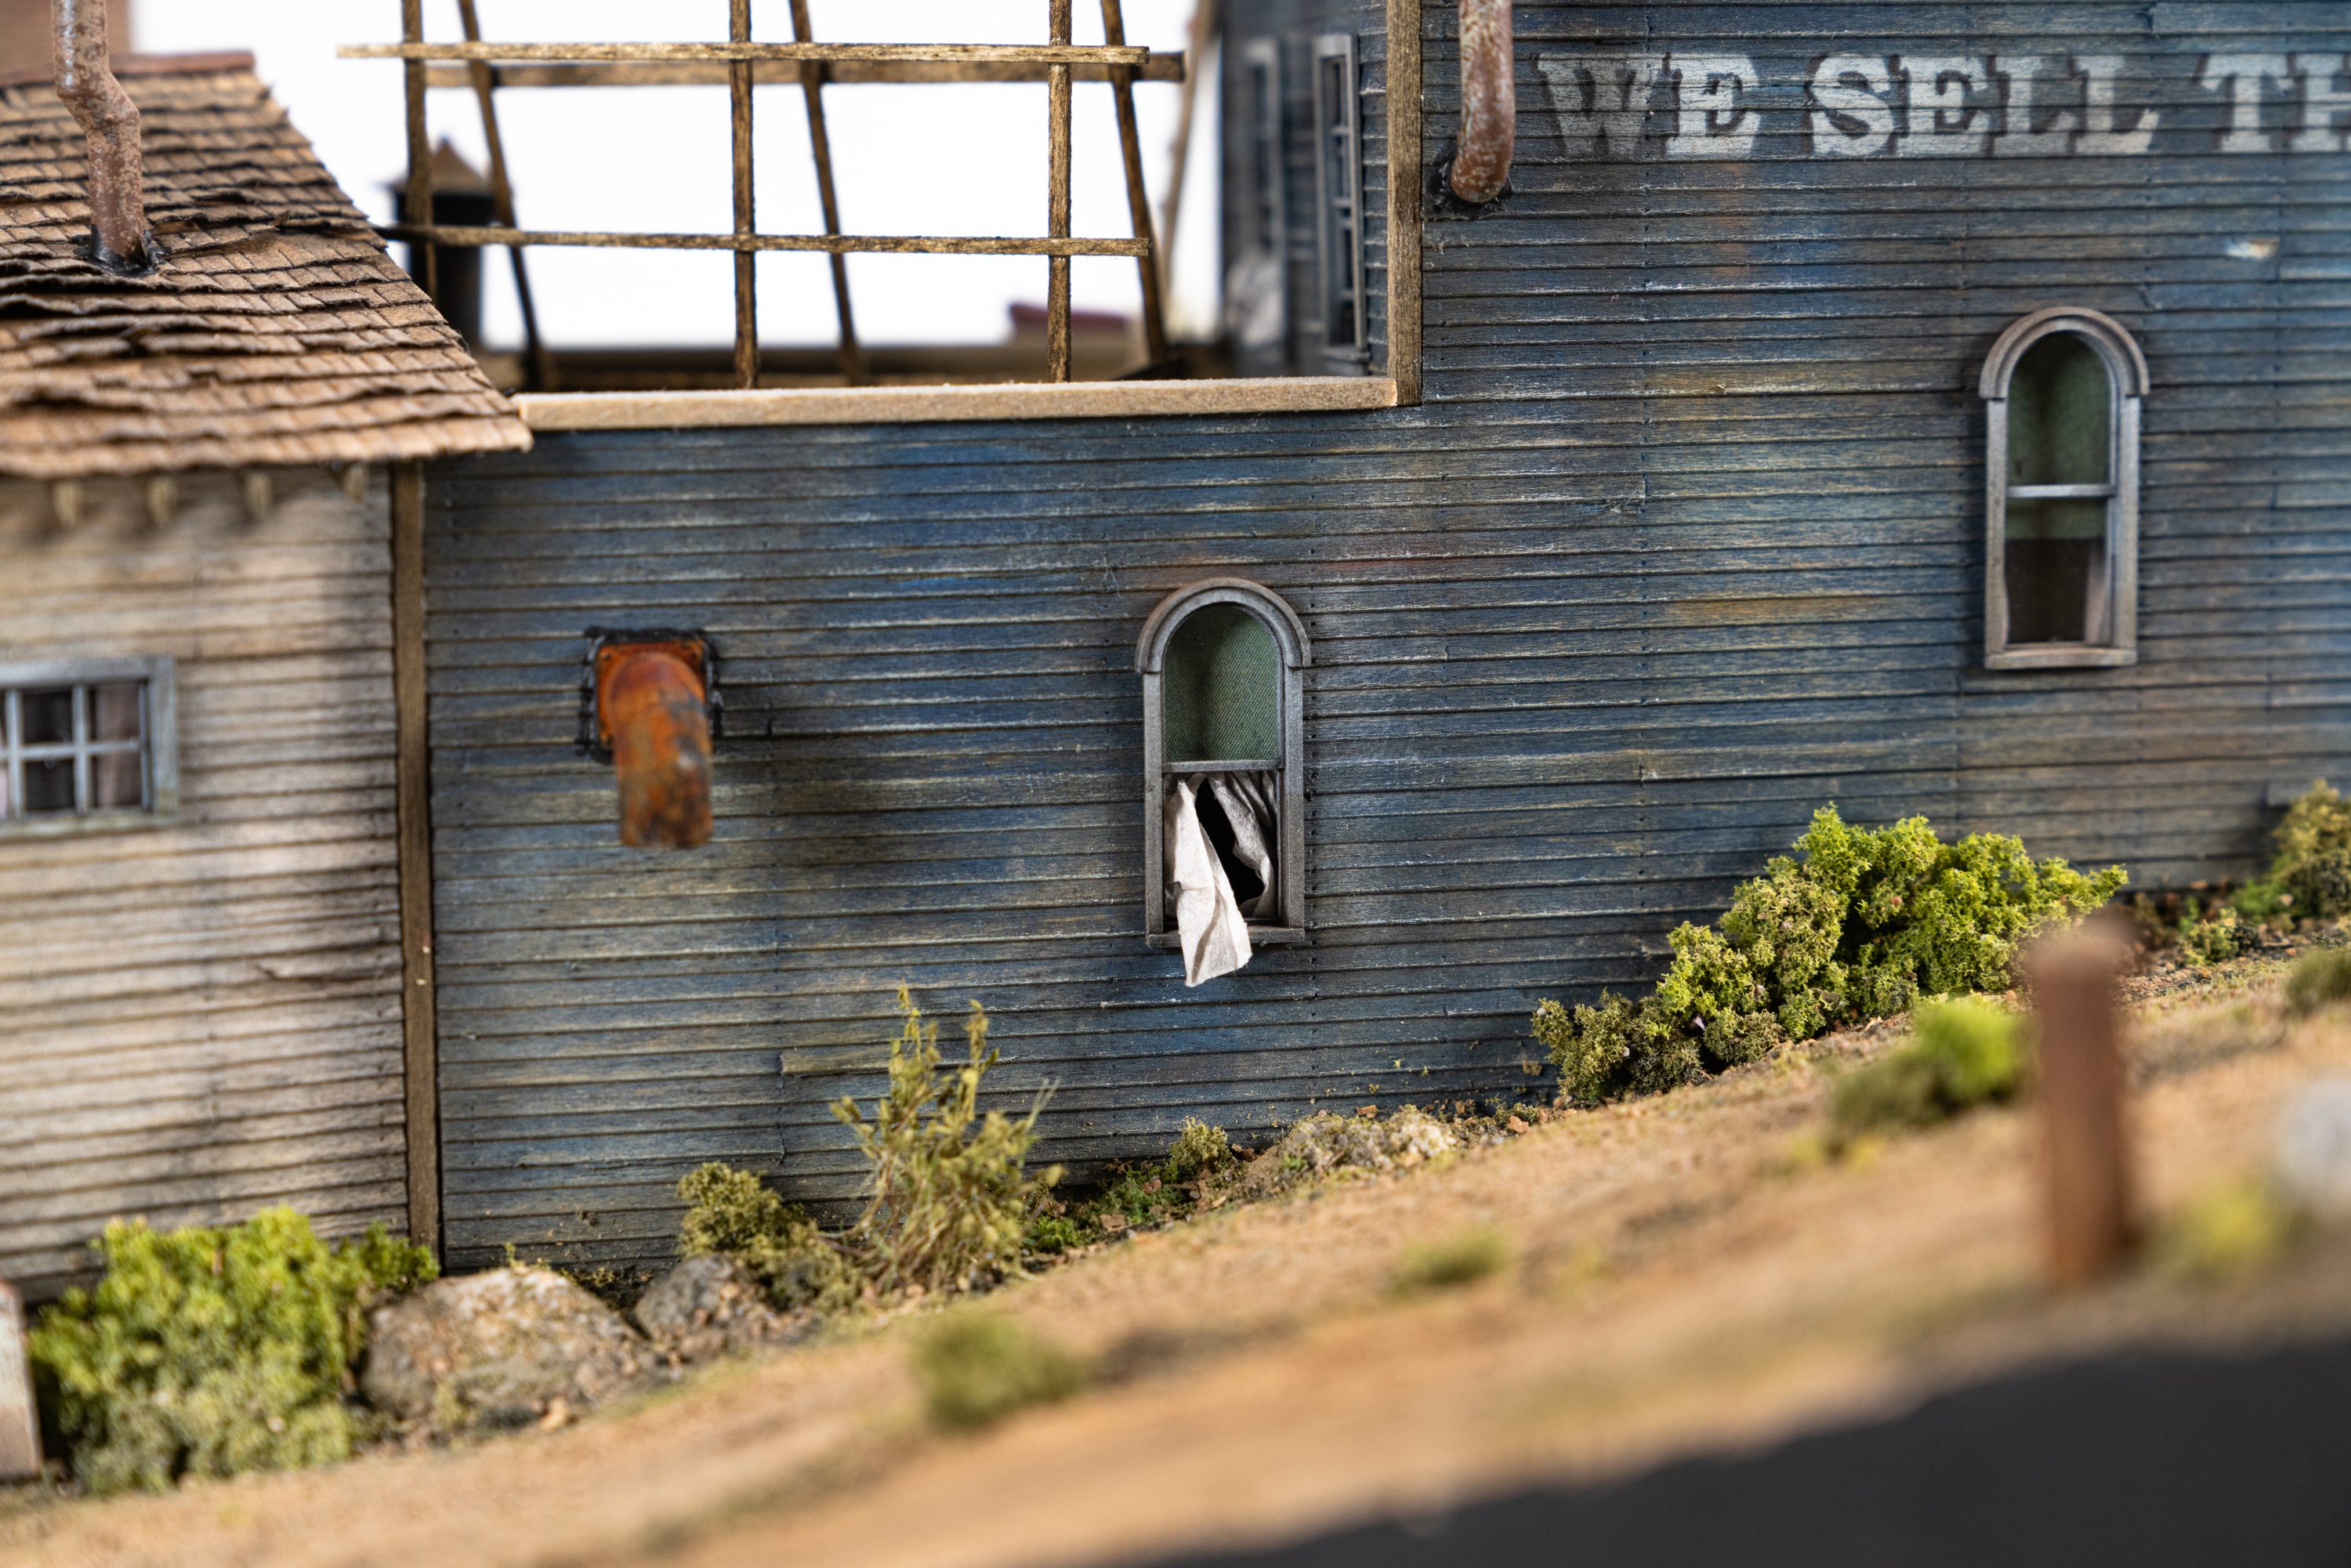
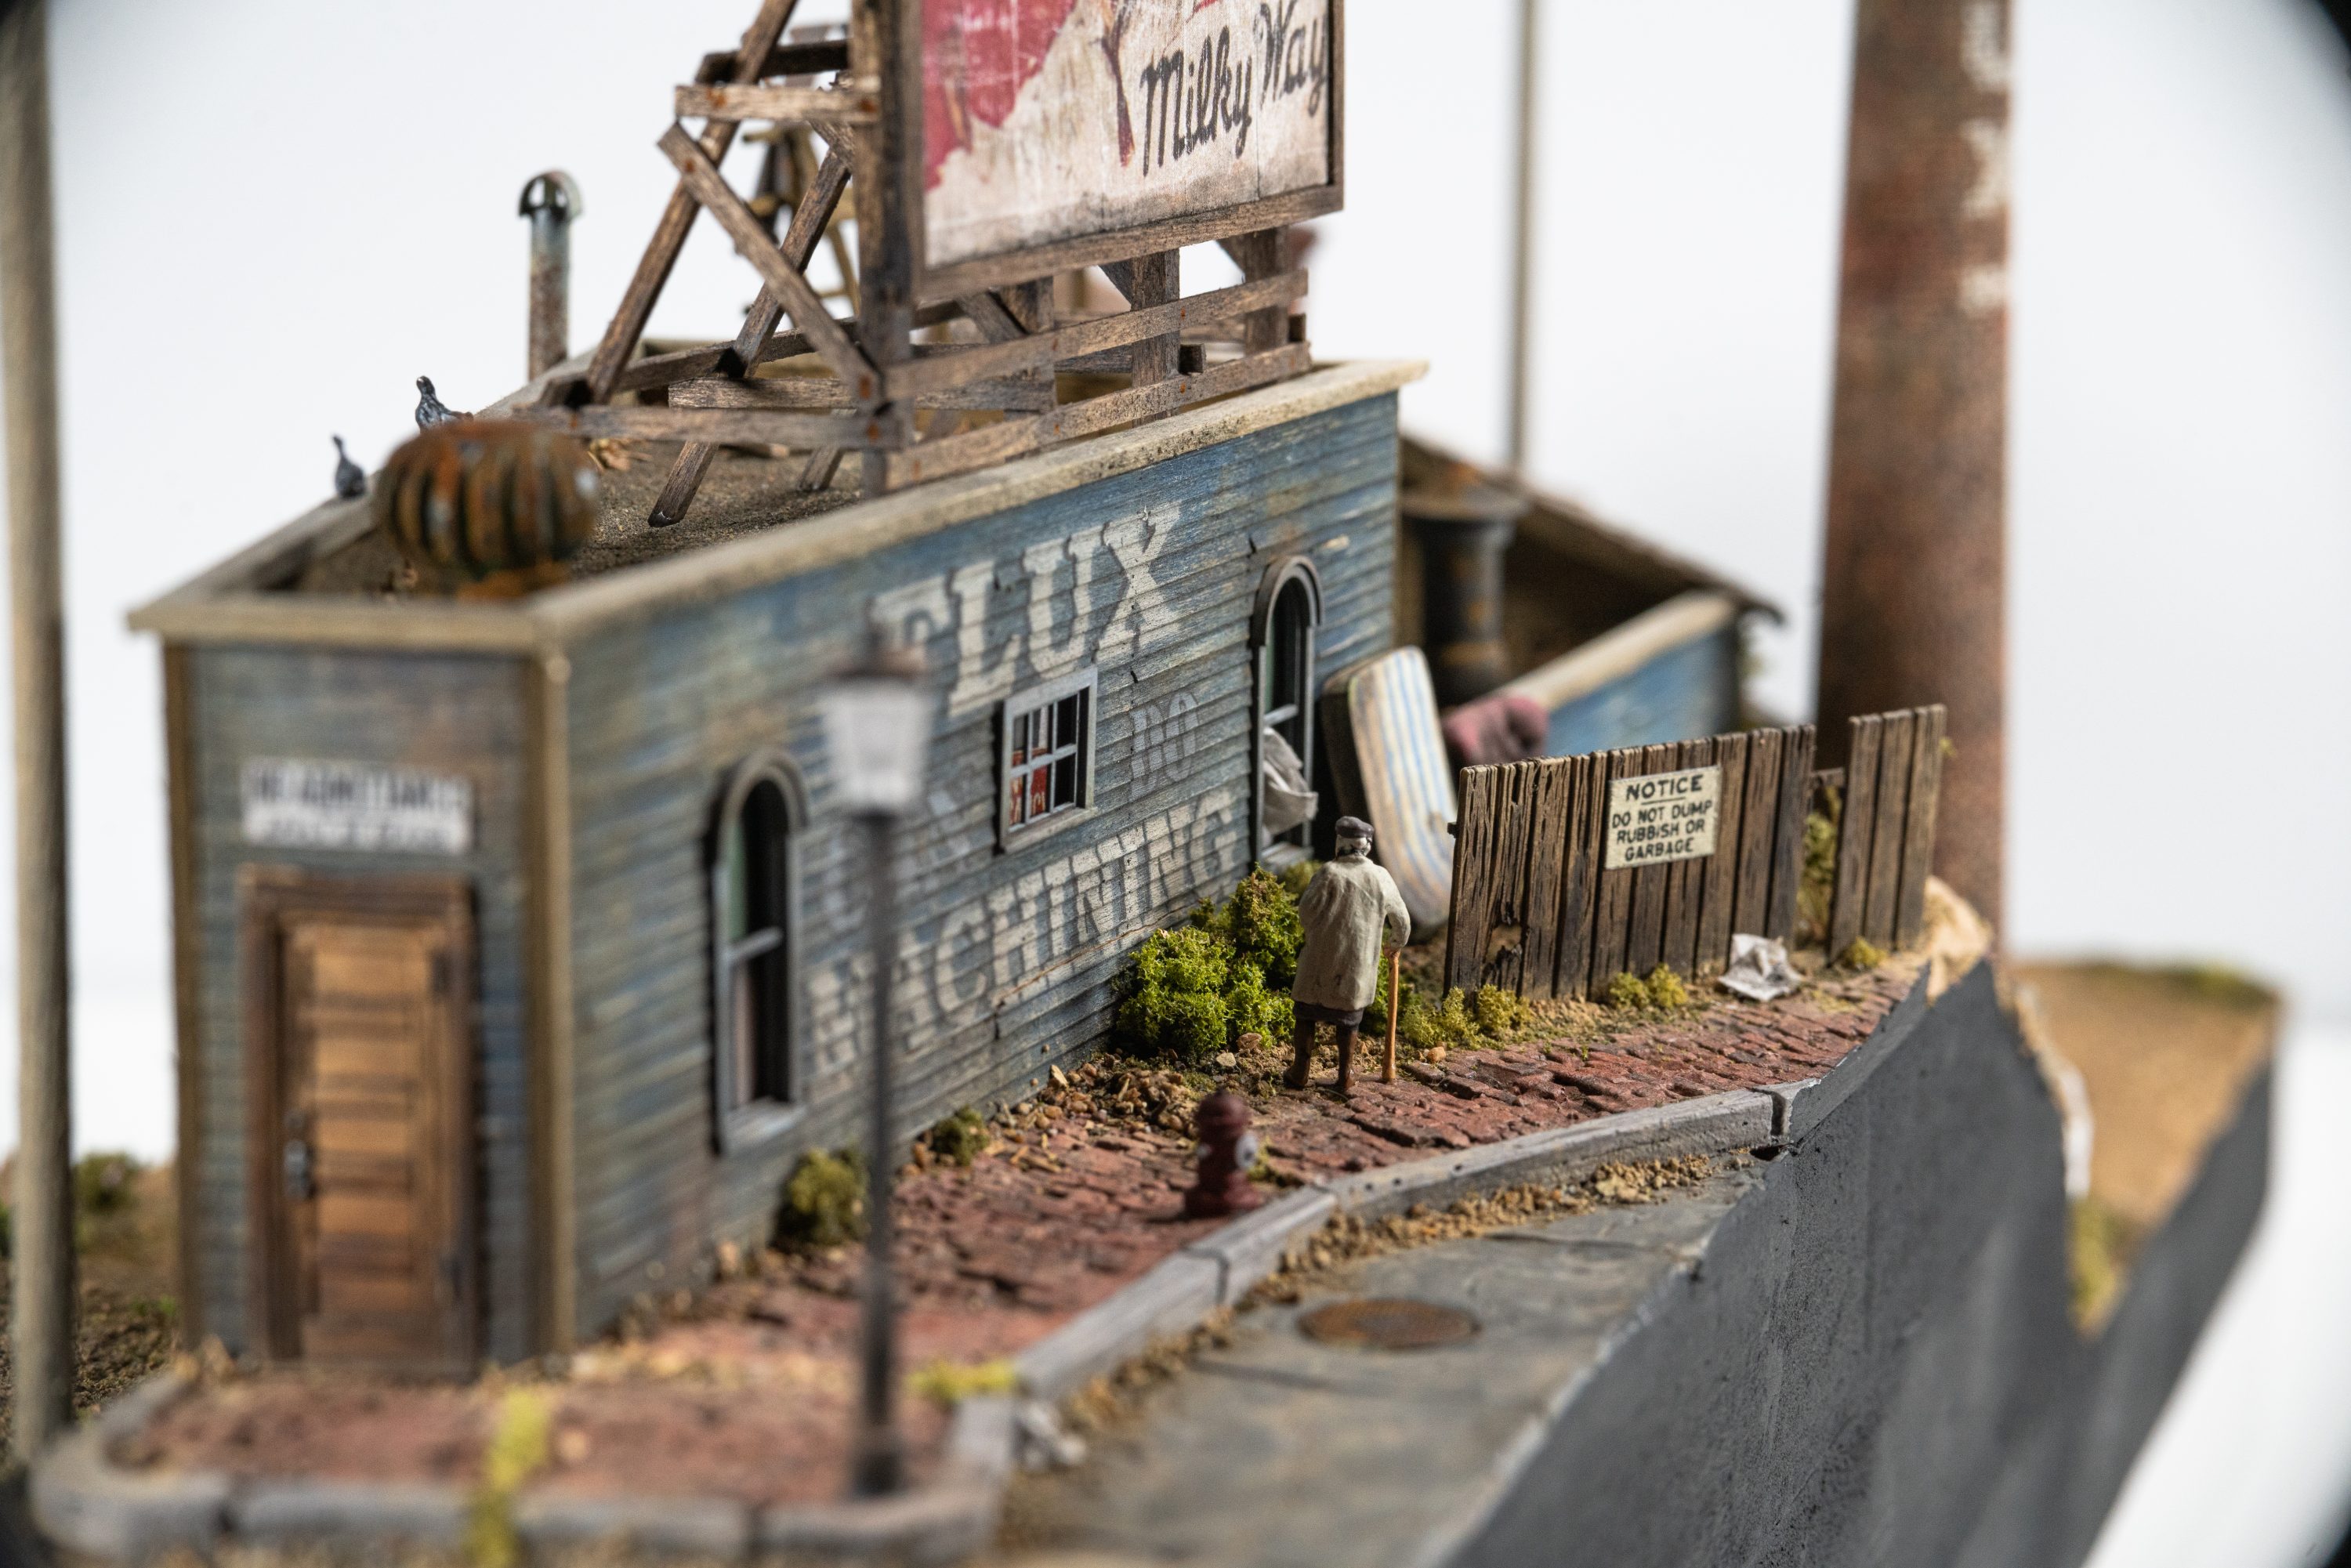
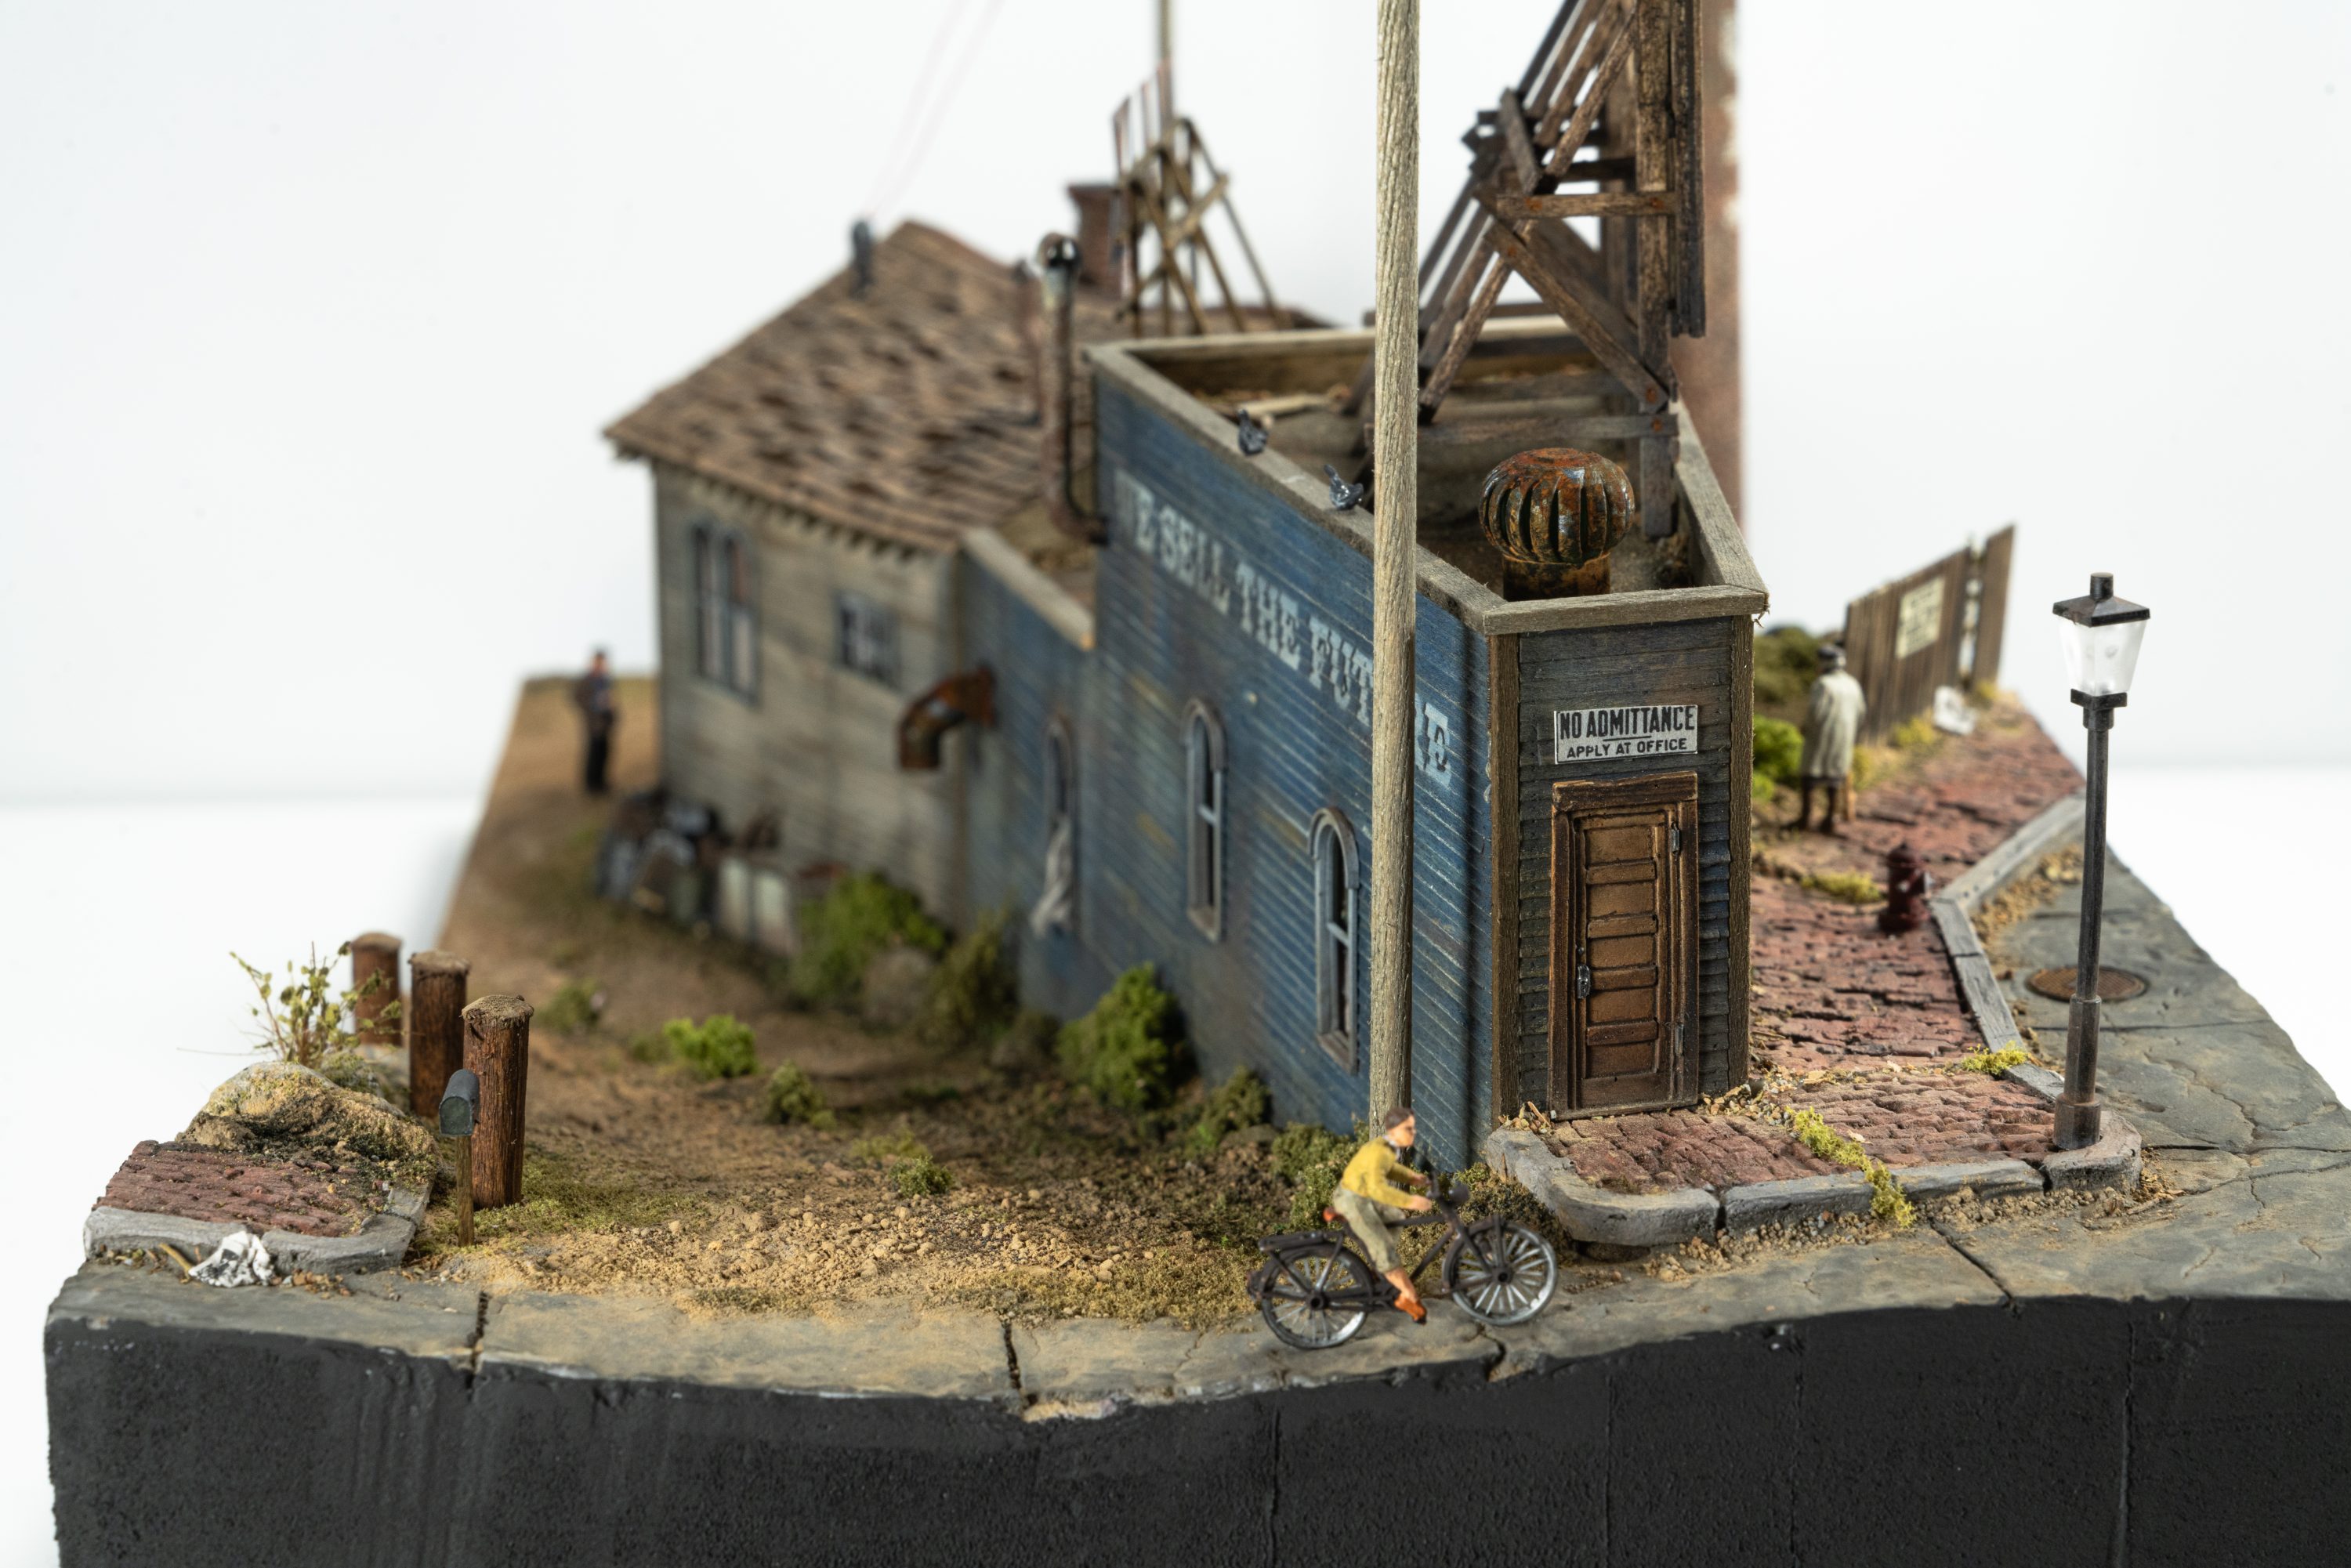
An odd, wedge-shaped building that fanned out toward its office. The intention, just like Lamont Camera, was to play with slopes and gradients once again. Hence the staggered windows.
I exported all the walls into a DXF format and loaded them into FLUX’s “Beam Studio” software that communicates with the laser. I took a few days testing and cutting all the materials, loading each parameter into as I went. After a while, I had a whole list ready to go:
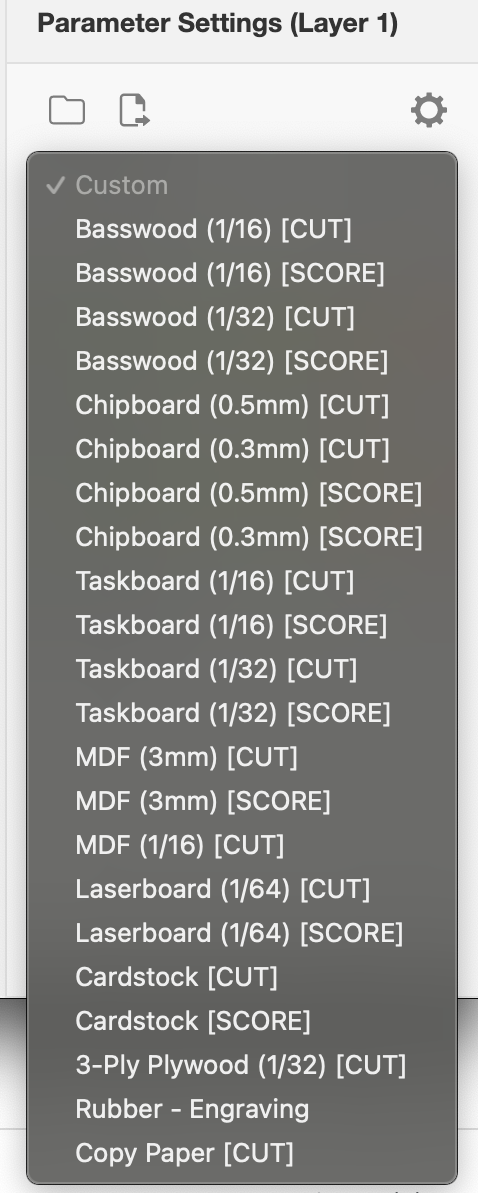
For this build, I used Basswood, Chipboard, Taskboard, MDF, Laserboard and Paper. It was an excellent way to test run the laser for the various materials I would be using further down the road.
After everything was cut, I did a dry fit on a base I cut from pink foam.

I also got the 3D printer going, as I knew I was going to want a lot of details for this build.
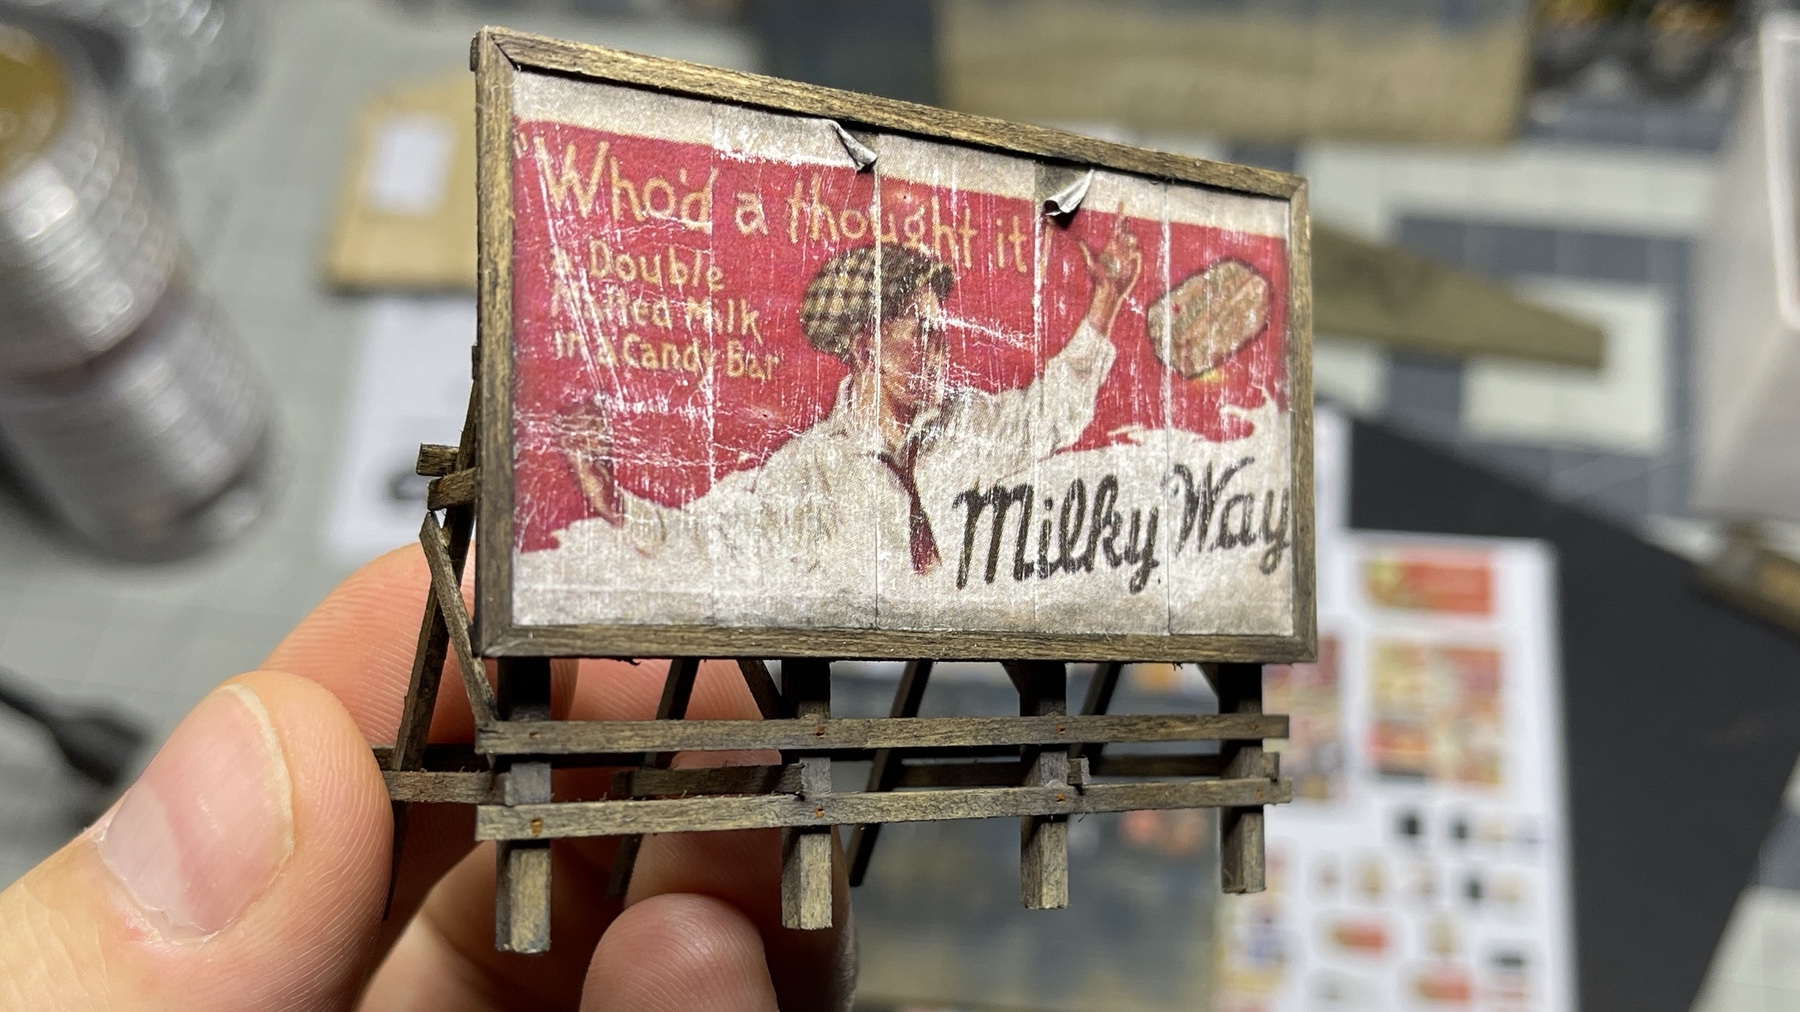
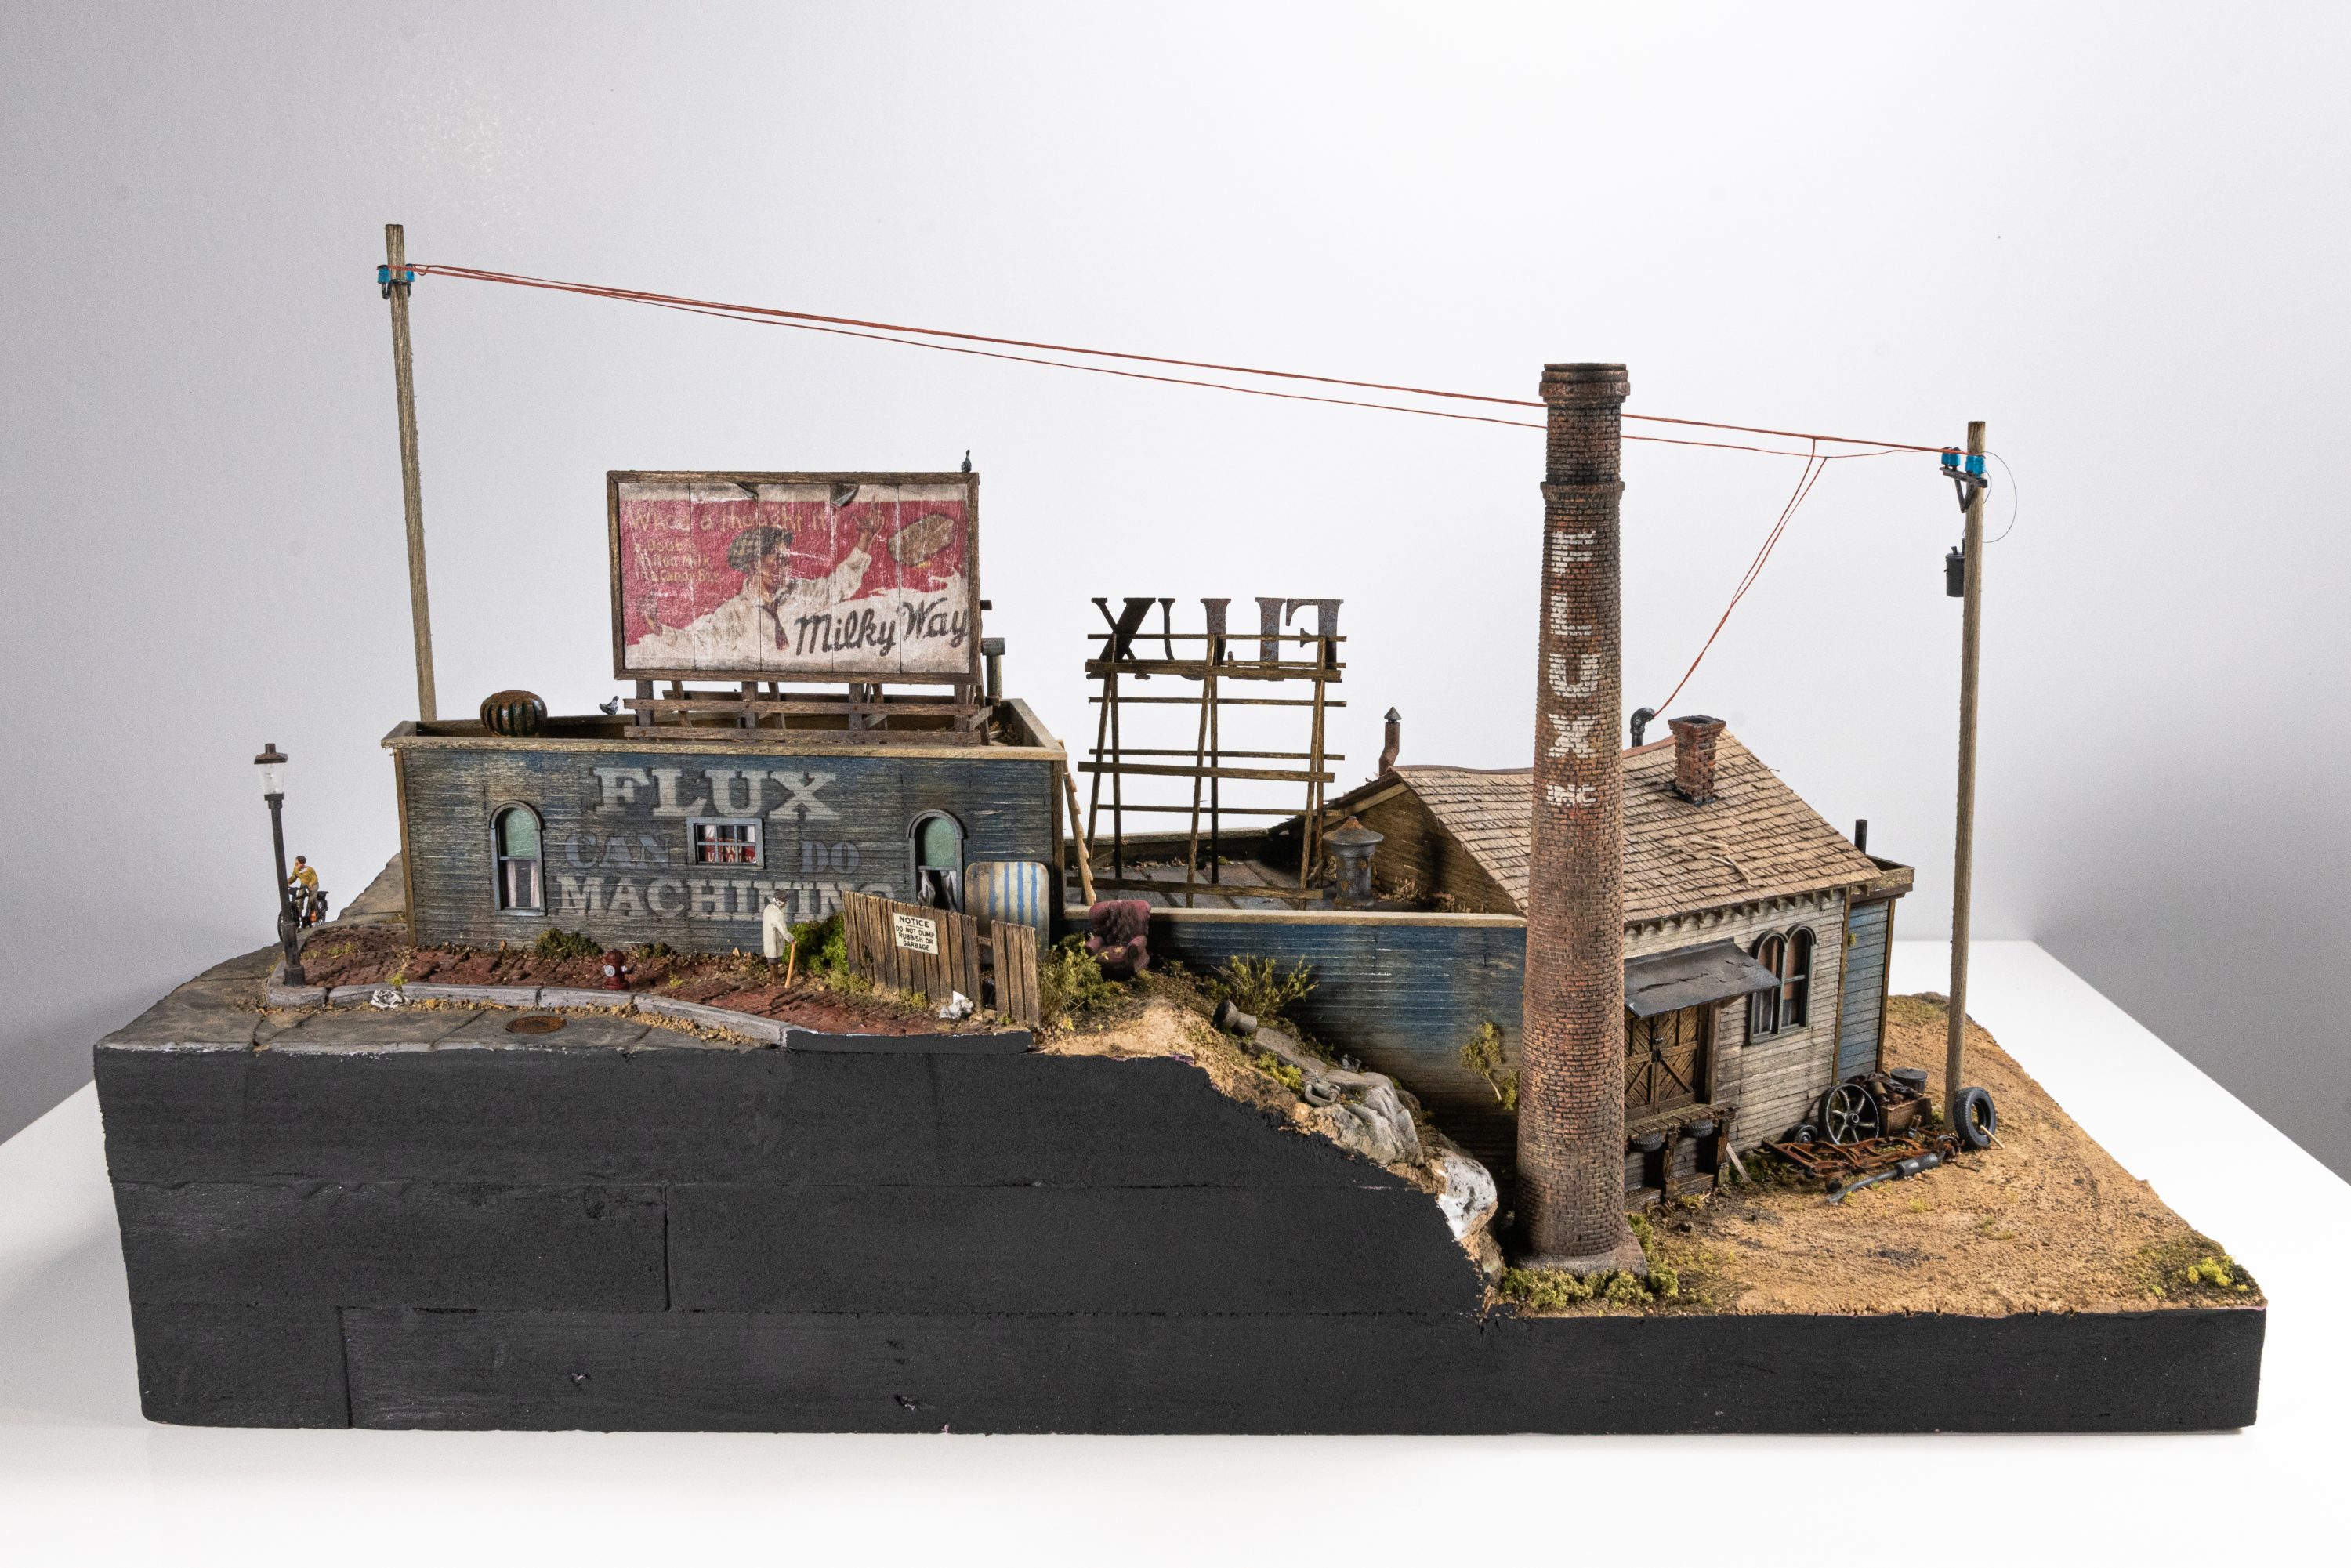
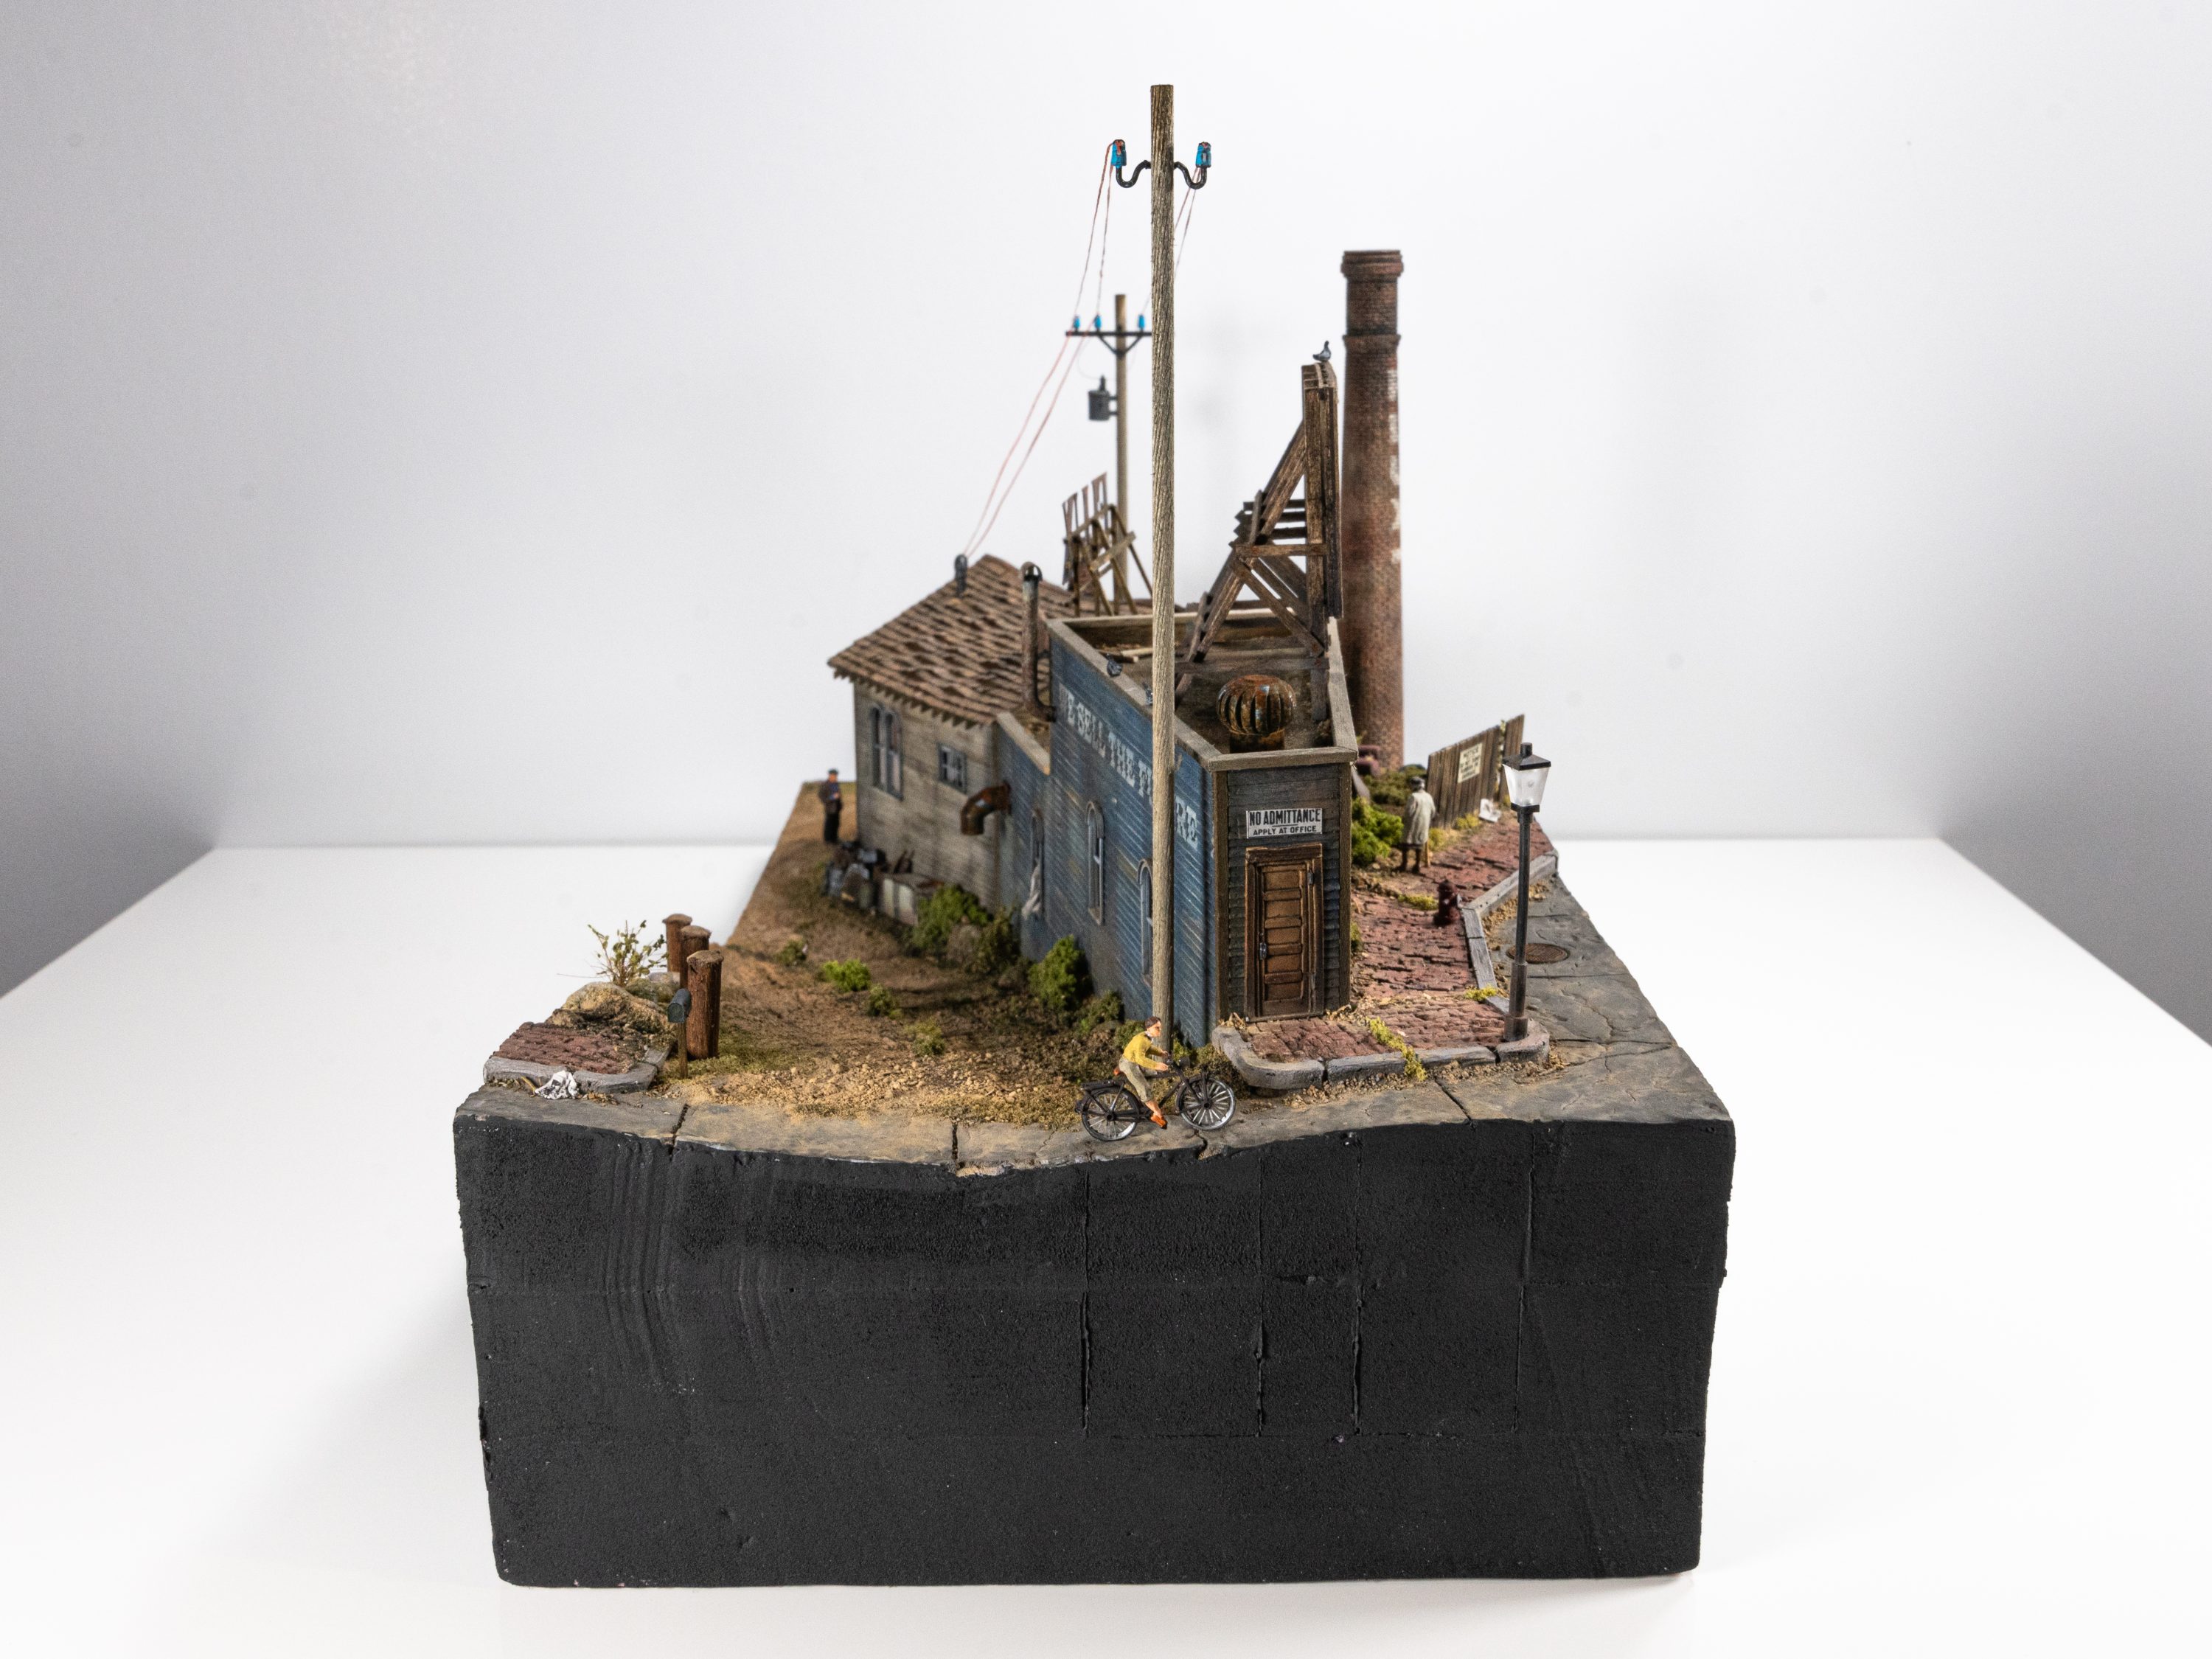
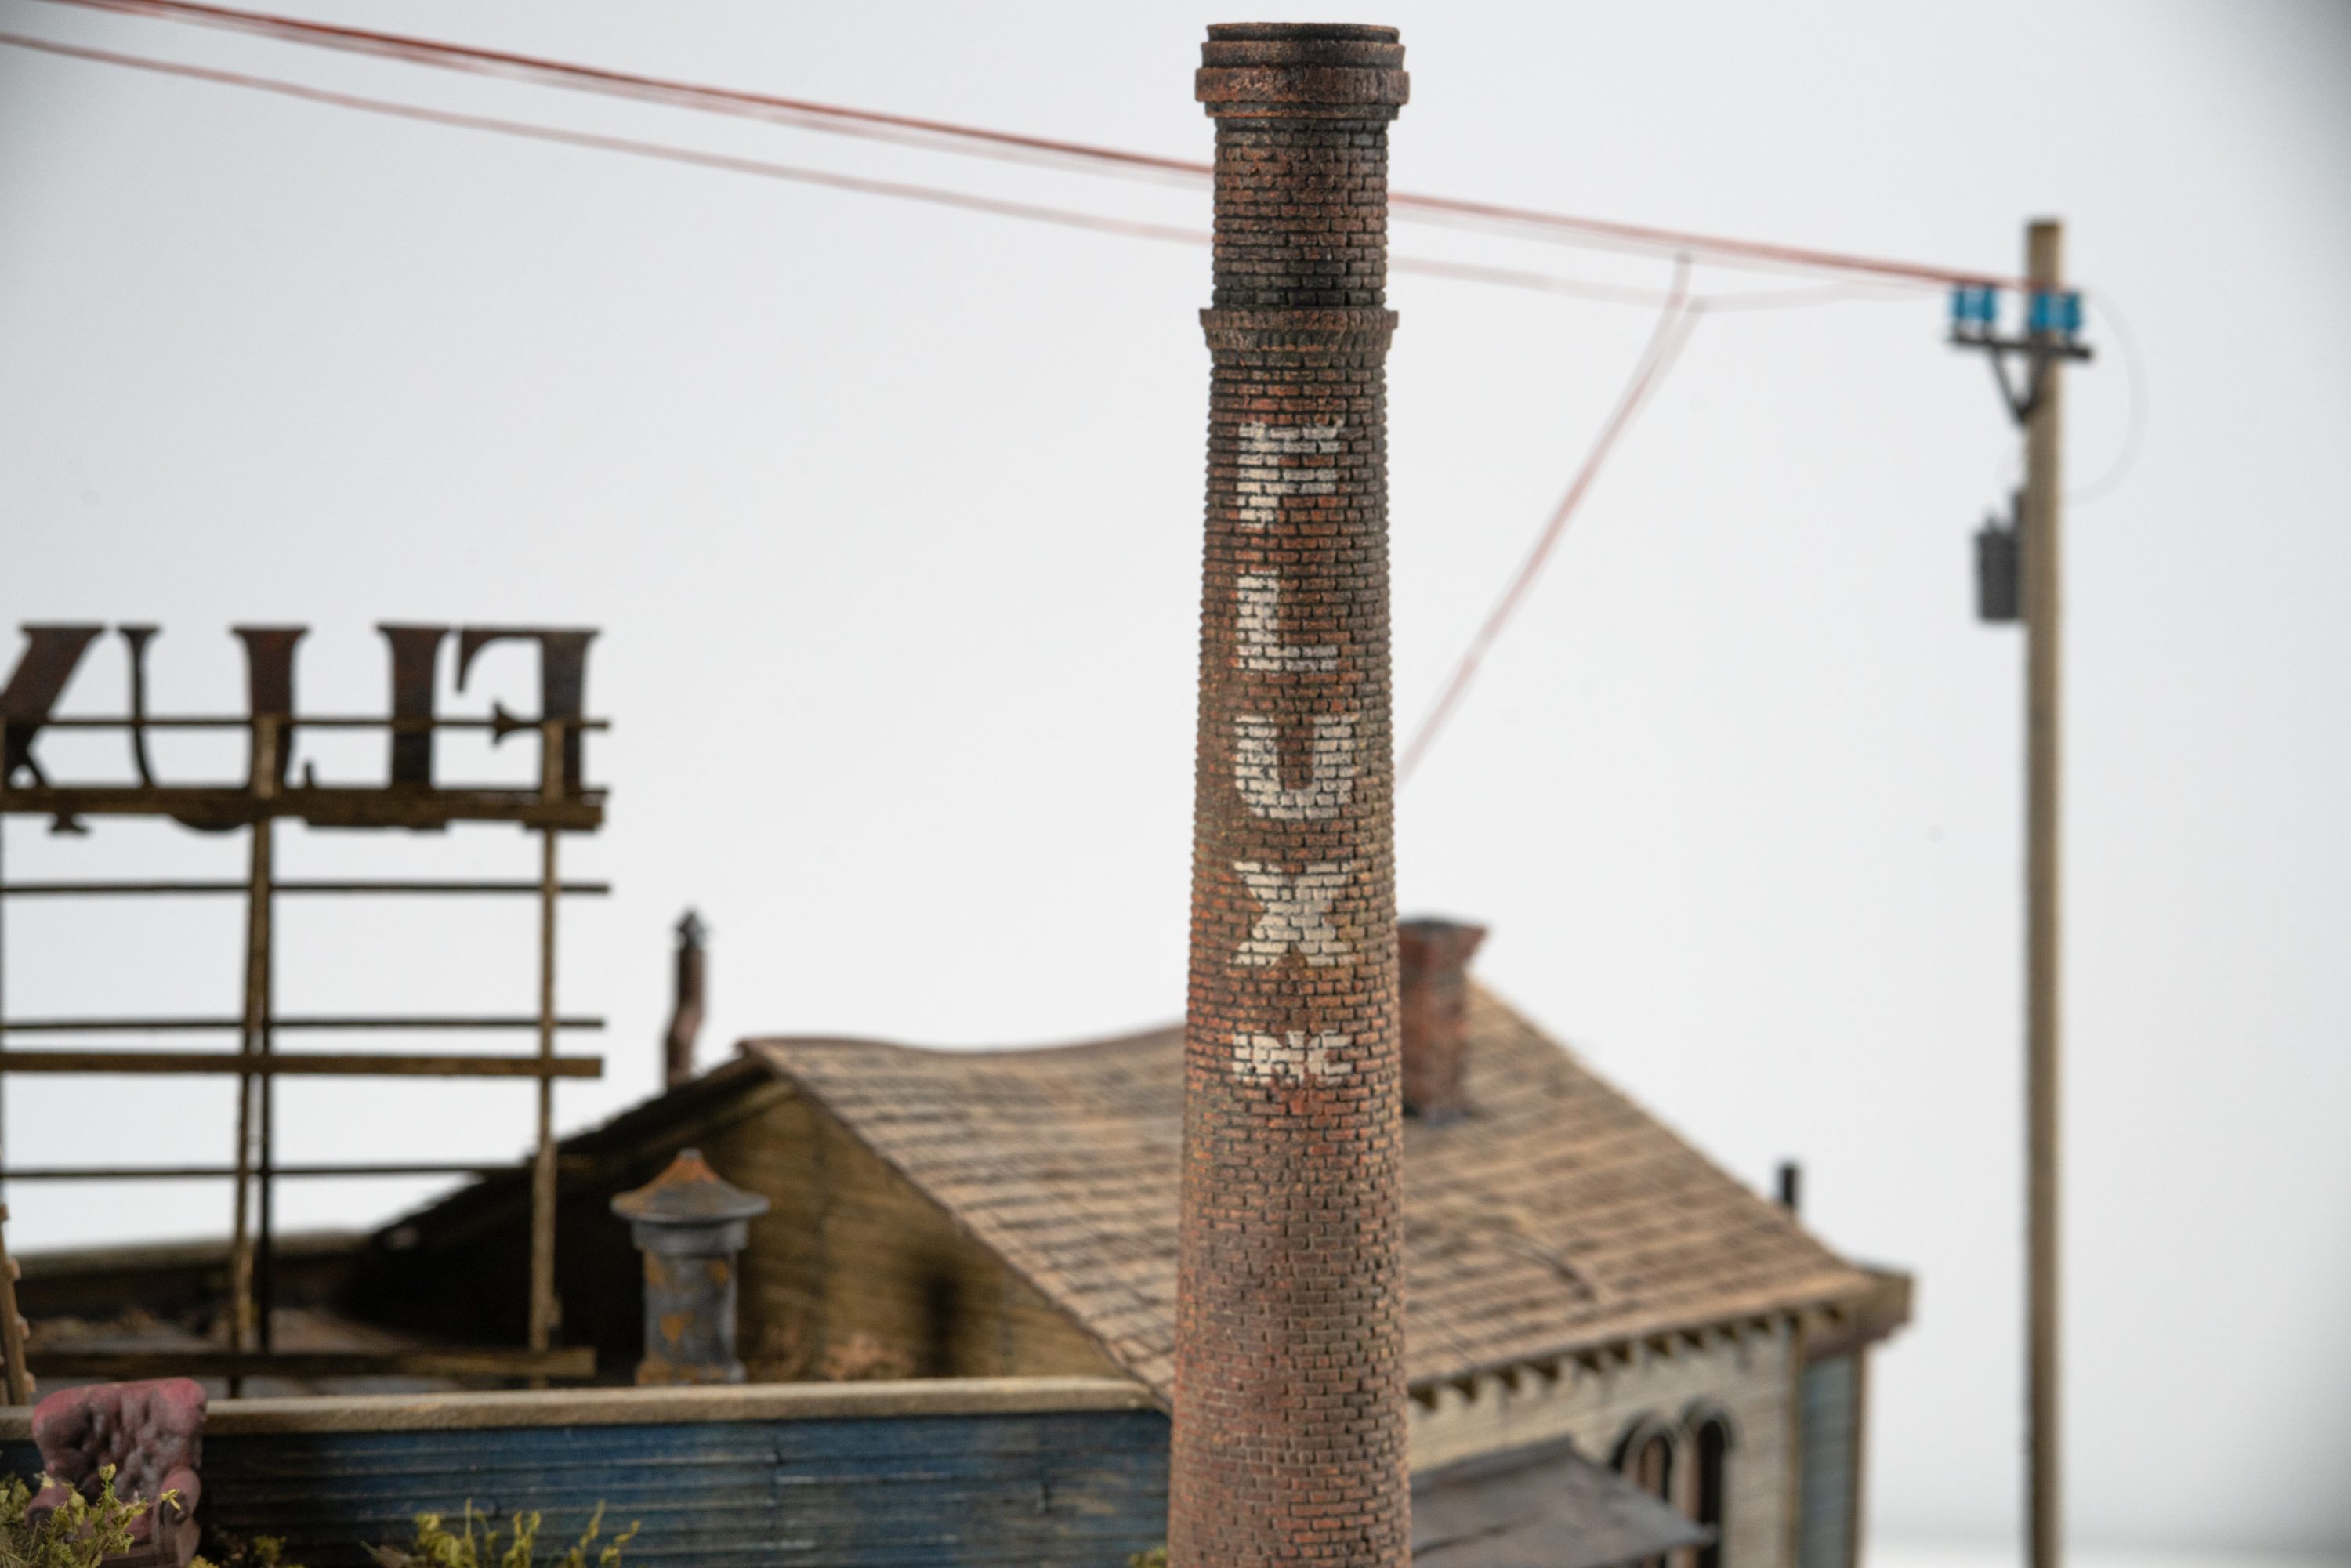
I knew I wanted the building to have a large billboard on top one of the roofs. This was made using HO scale, 2×6, 3×3, 4×4 and 8×8. I used 0.5mm chipboard for the main sign backing.
First, 3×3’s were laid vertically and evenly on one side of the chipboard. About 15 of them. You can see these below.
2×6’s were then laid atop the 3×3’s horizontally — top, middle and bottom.
8×8’s were then laid on top of the 2×6’s, running vertically this time. These are the main support legs and I used four of them. See them in the photo? They are the biggest stripwood sizes on the billboard.
The rear, angled support legs that keep the billboard upright were cut from 4×4. All the additional supports, small braces, and the framing on the front, were cut from 2×6’s. Small nail holes were added with a rivet tool.

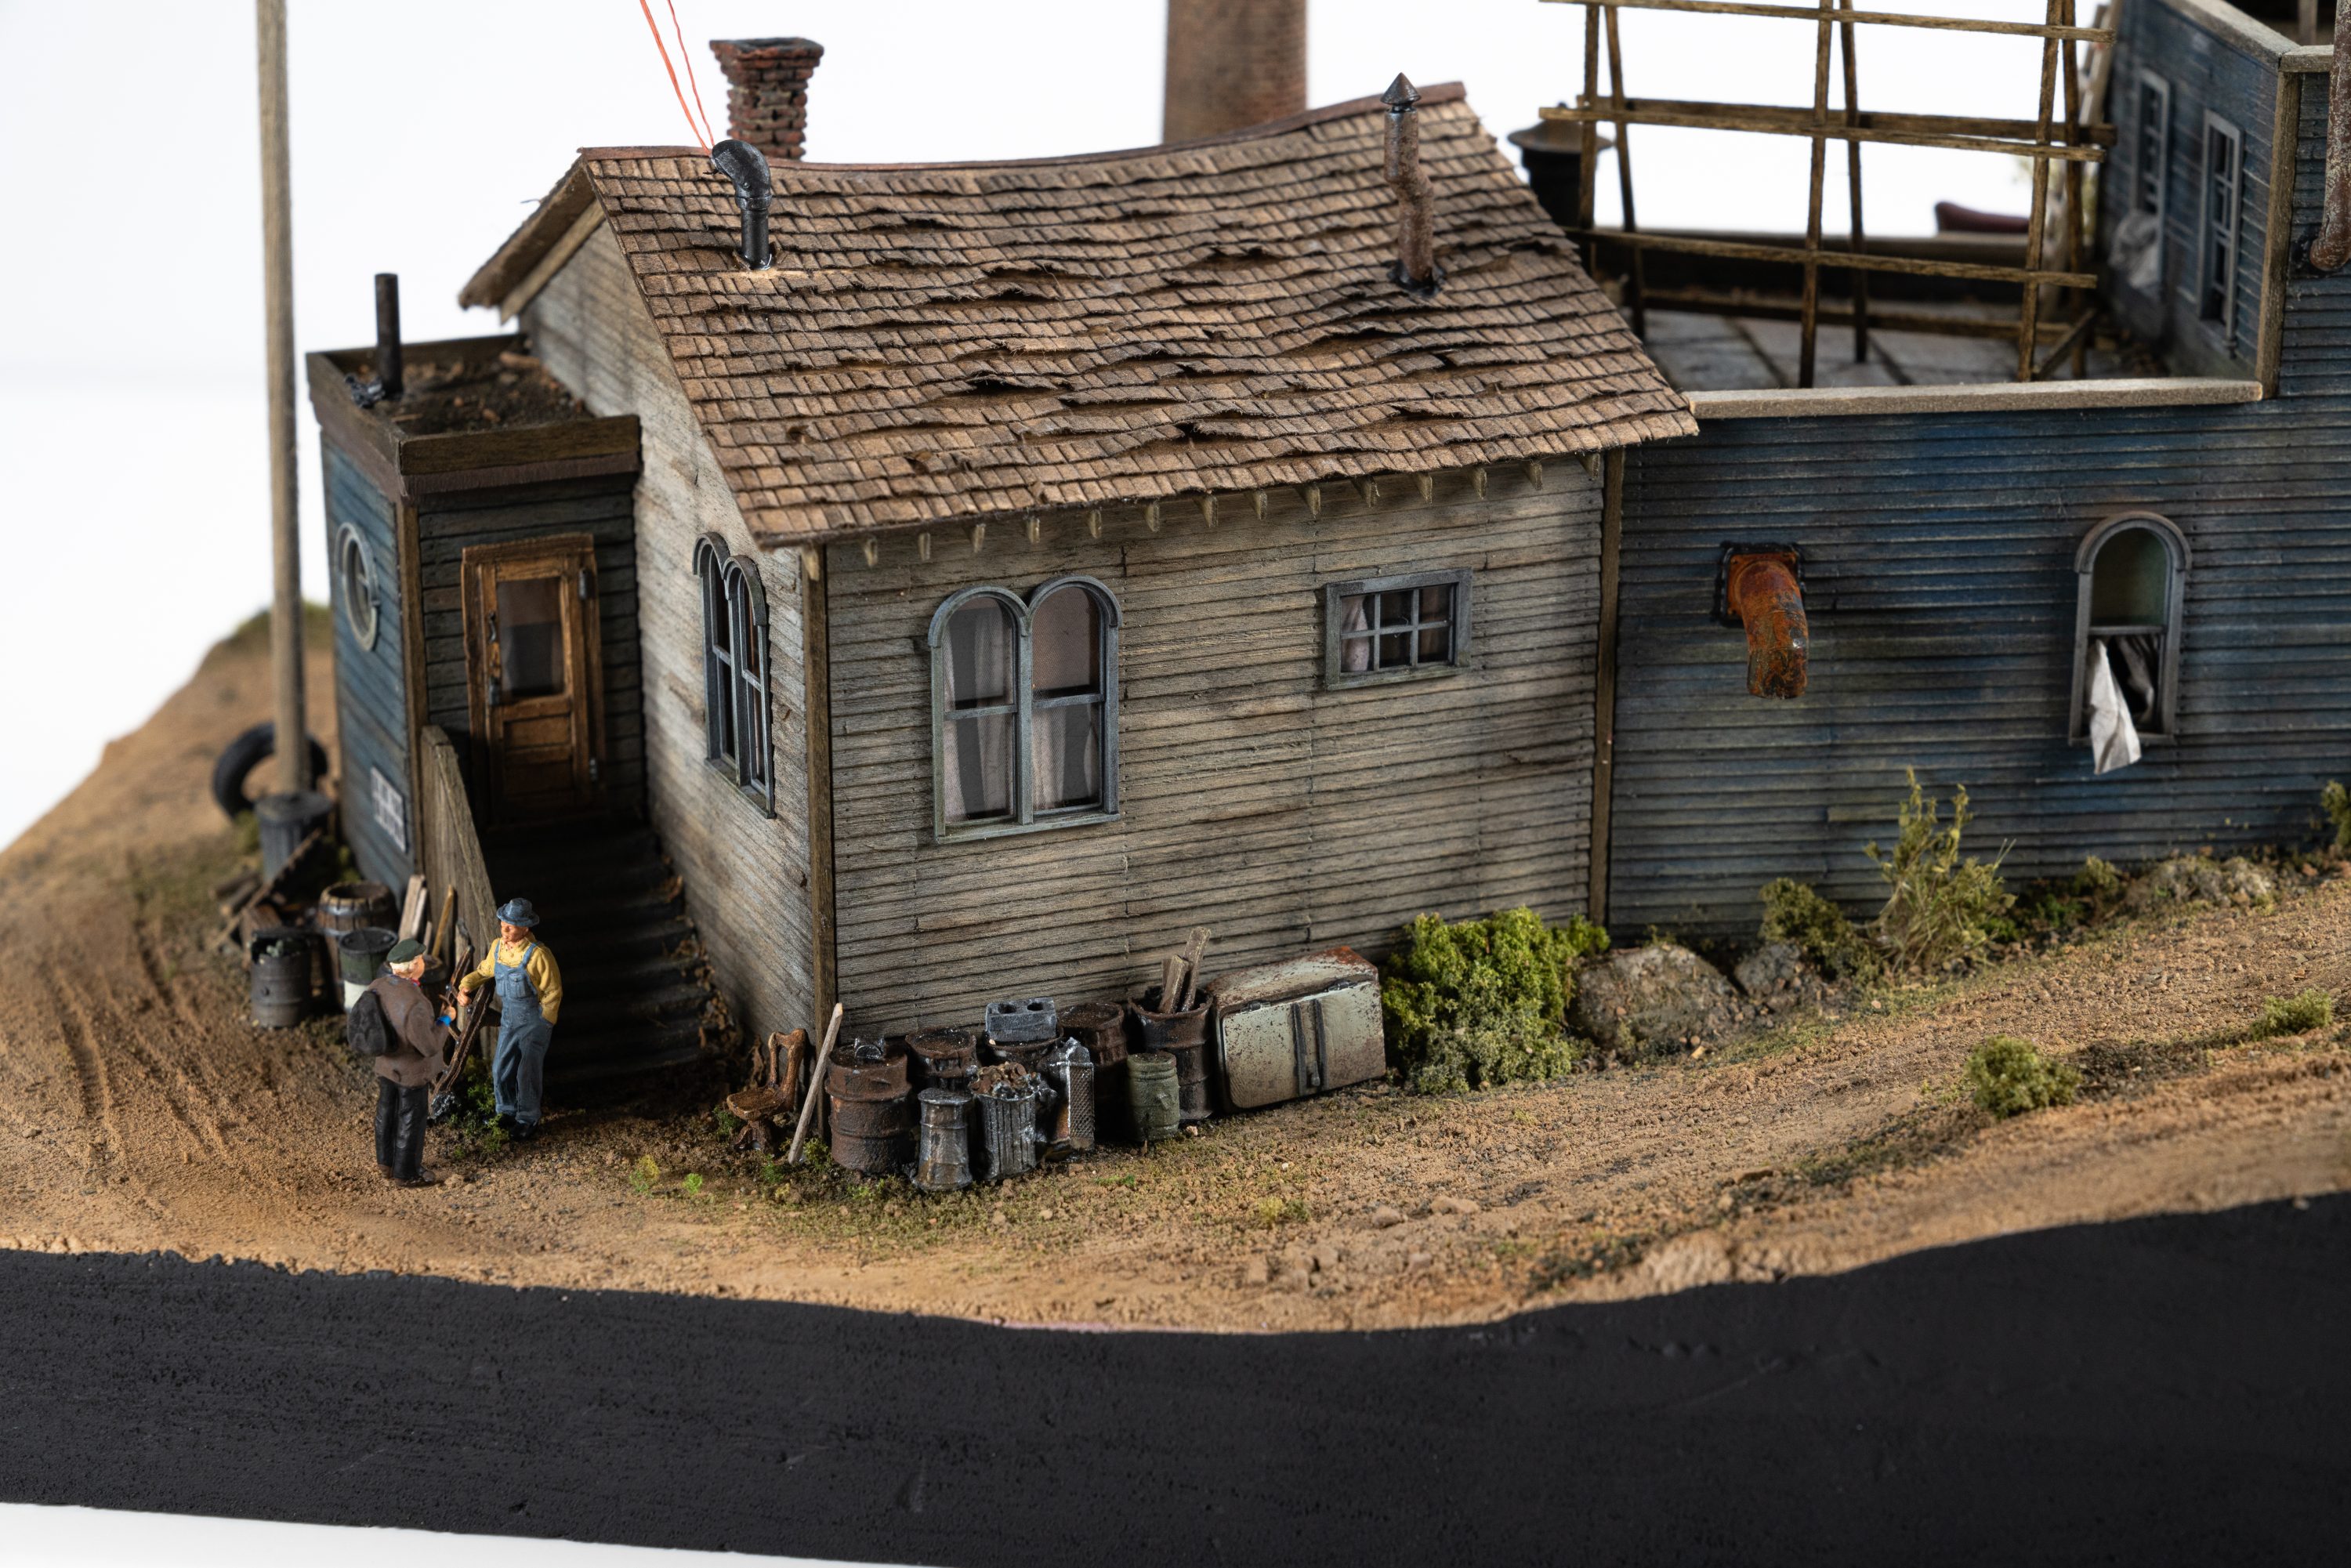
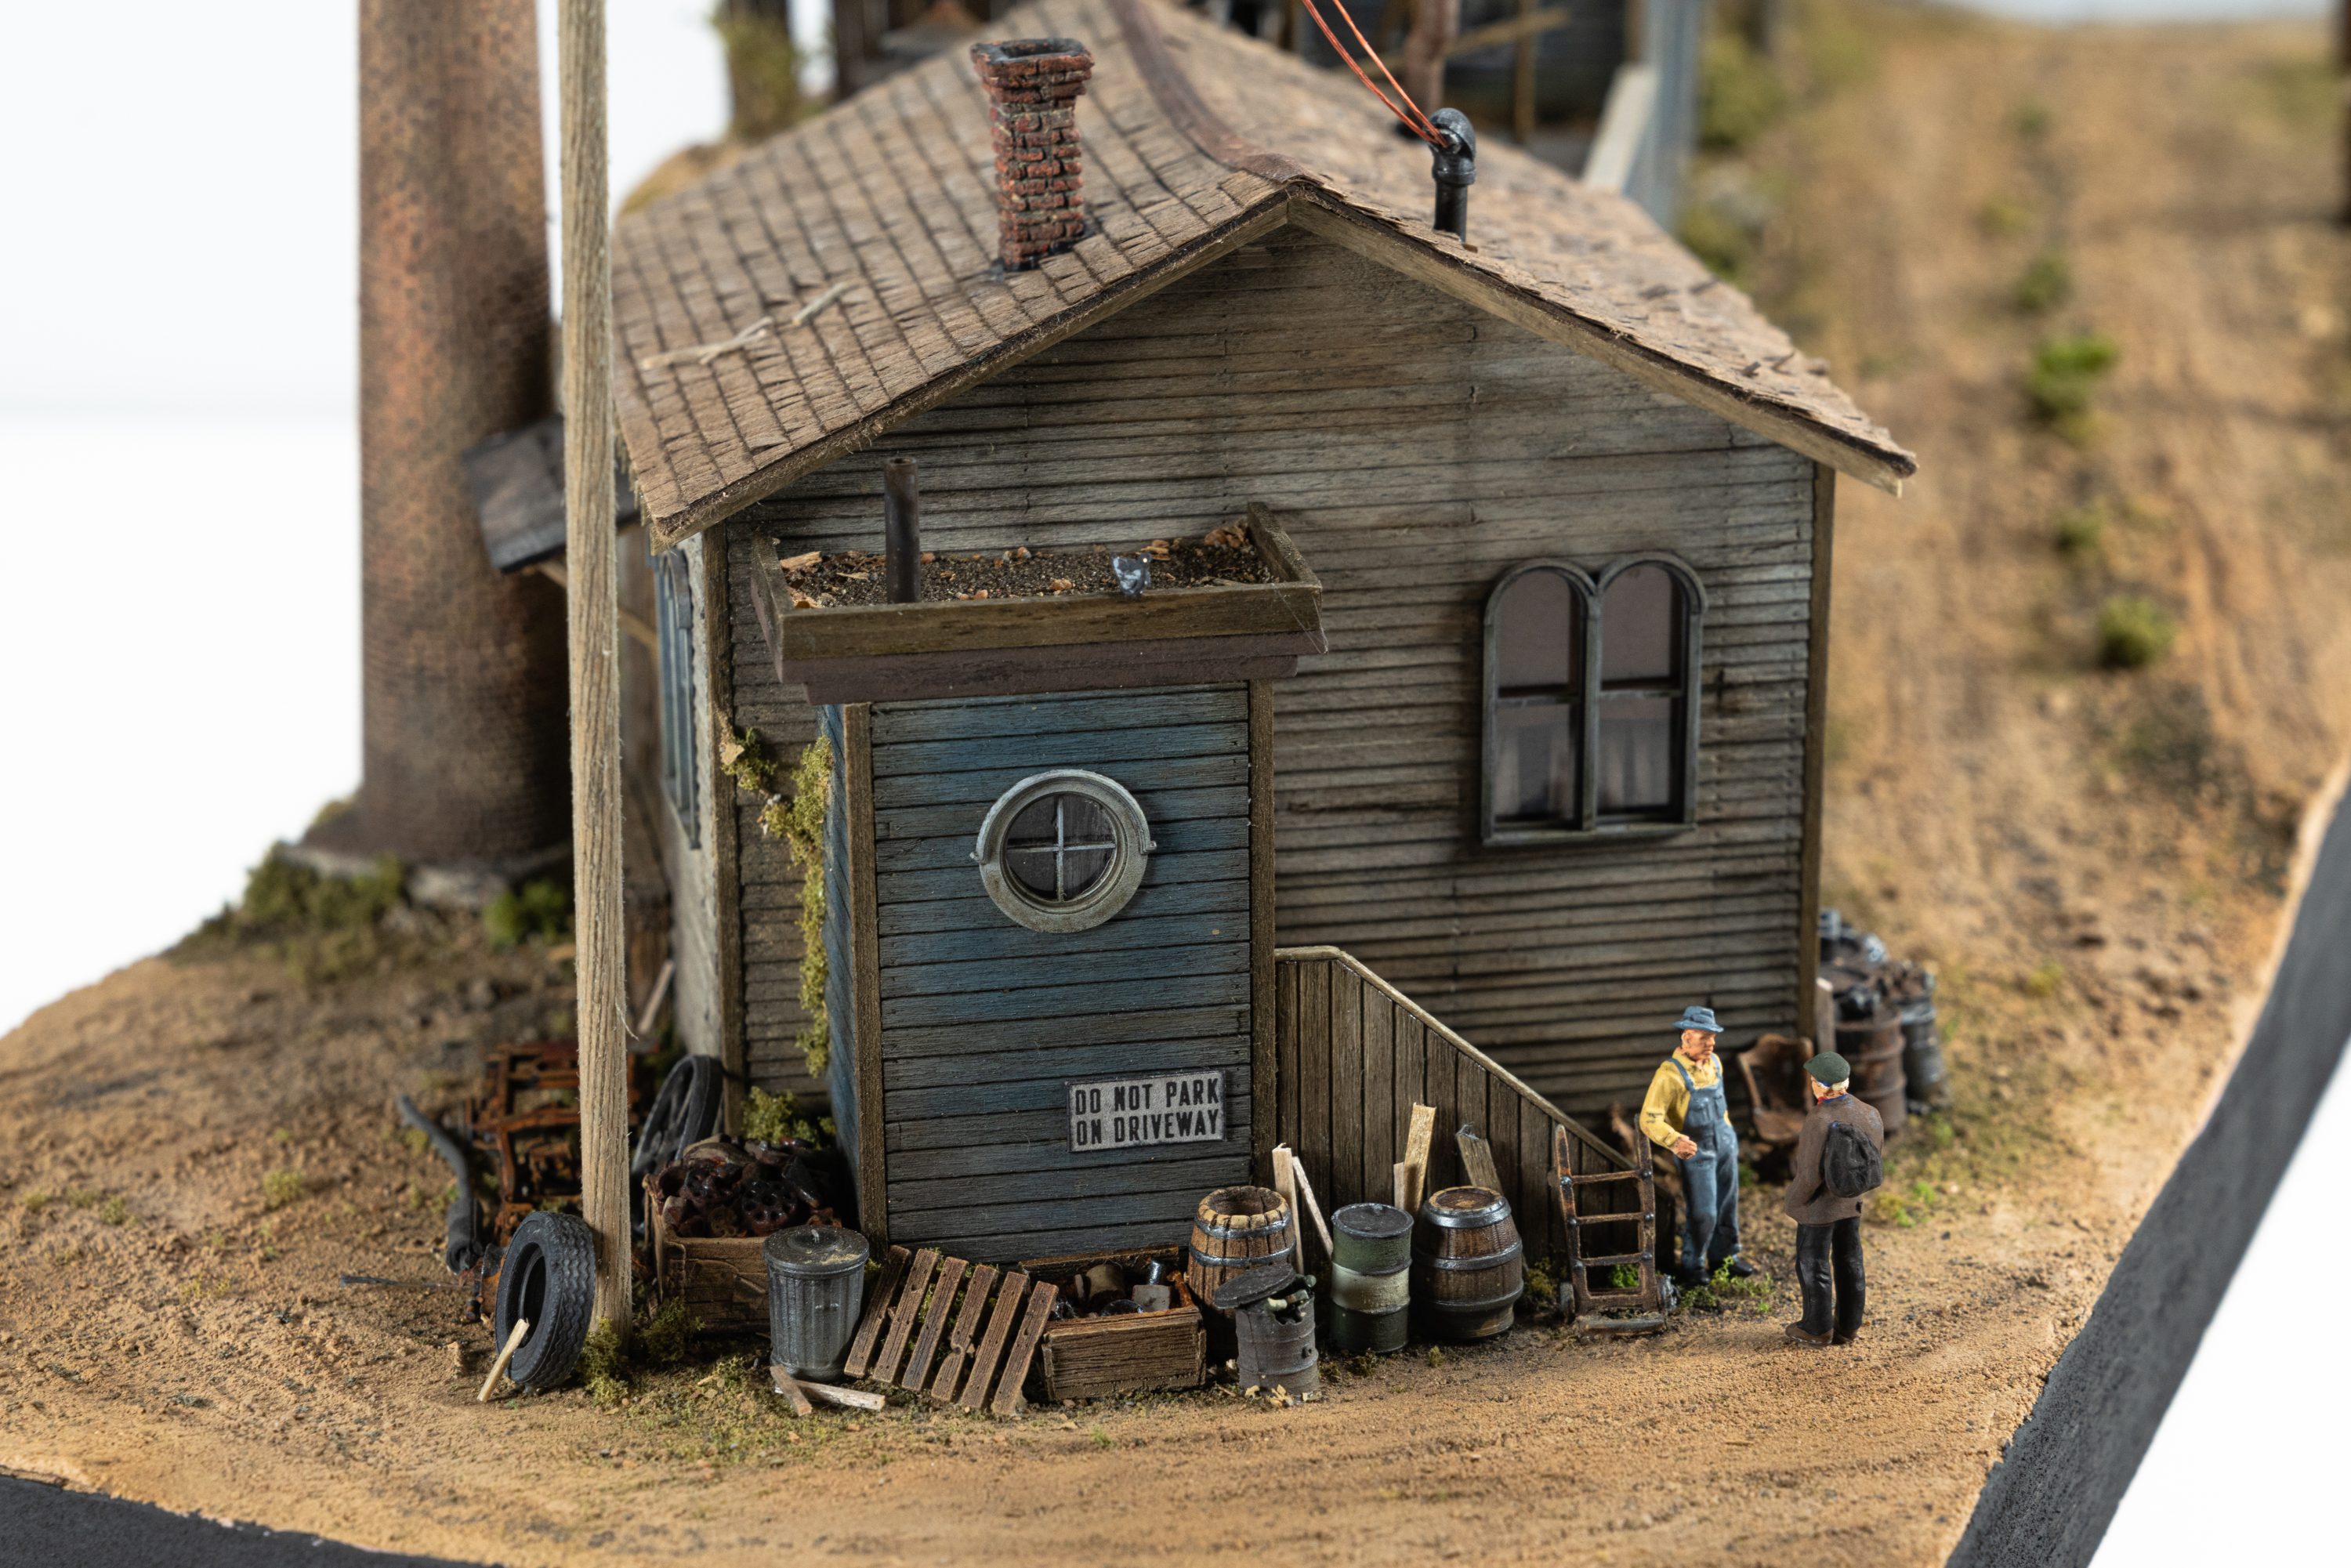
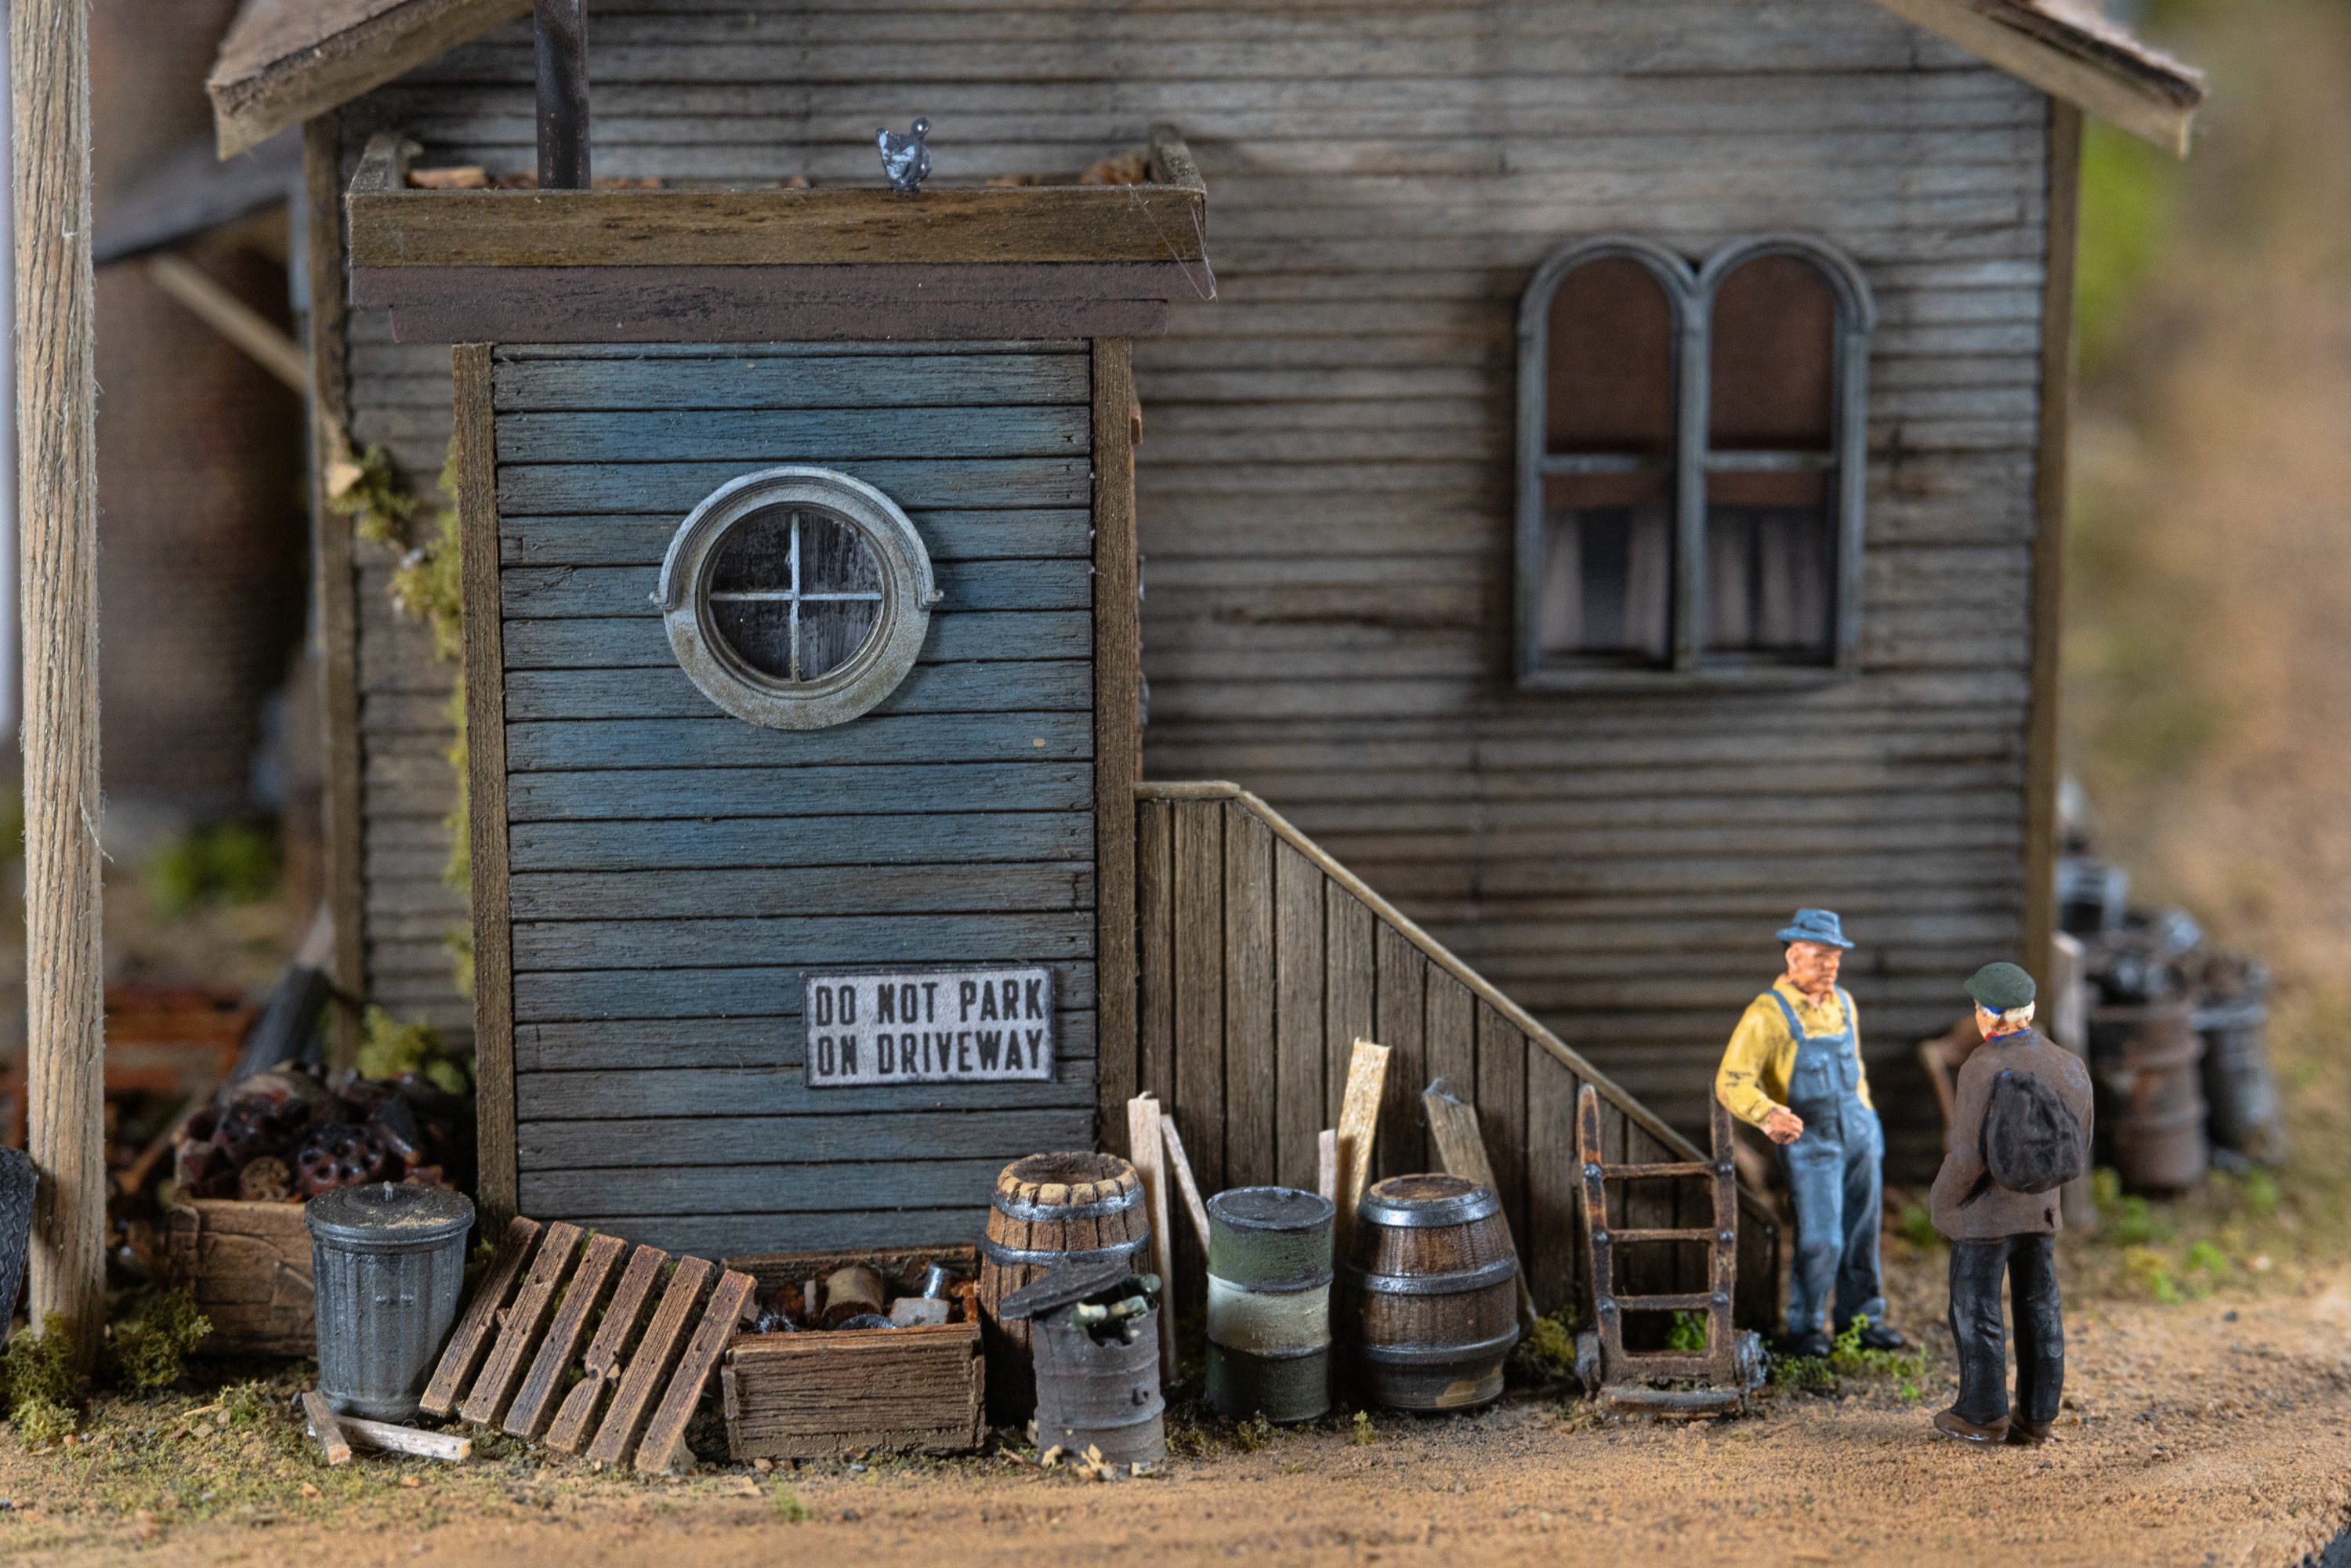
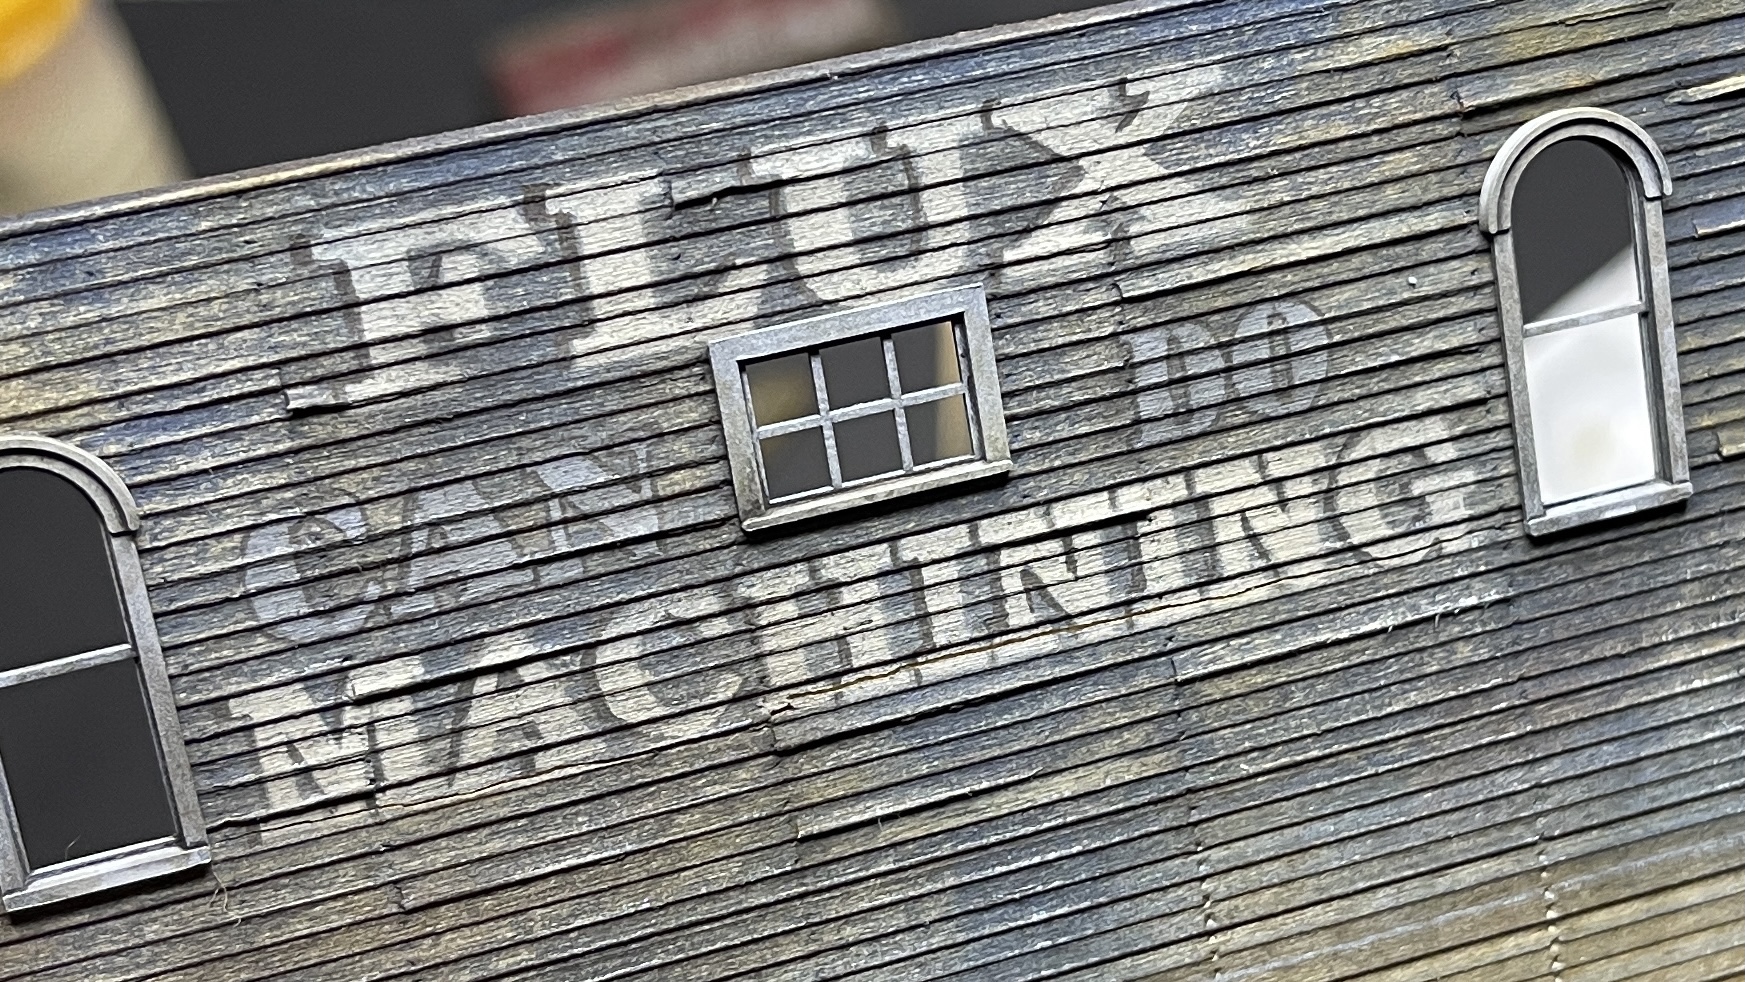
Then it was time for the walls. First up, as always, was aging the clapboard. For this, I always start by using a pounce wheel to make the nail holes. After that, I lift the boards using a chisel blade in my x-acto. Doing it this way allows you to lift boards that terminate at the nail holes. This adds to the realism, as it makes them appear board-by-board. Nifty.
This process is long but taking the time here pays dividends later on.
I knew I wanted a little bit of color for this build, but I still started by staining. Driftwood and standard A&I mix, mostly. I then airbrushed on Chipping Fluid from AK, all over the walls, soaking them. After drying, I airbrushed a pale blue. I was sure to keep this coat fairly thin and uneven. The object here was to create a finish that looked old and faded. Warm water was then used to activate the chipping fluid and “chip” the paint work. Here’s the result up close:
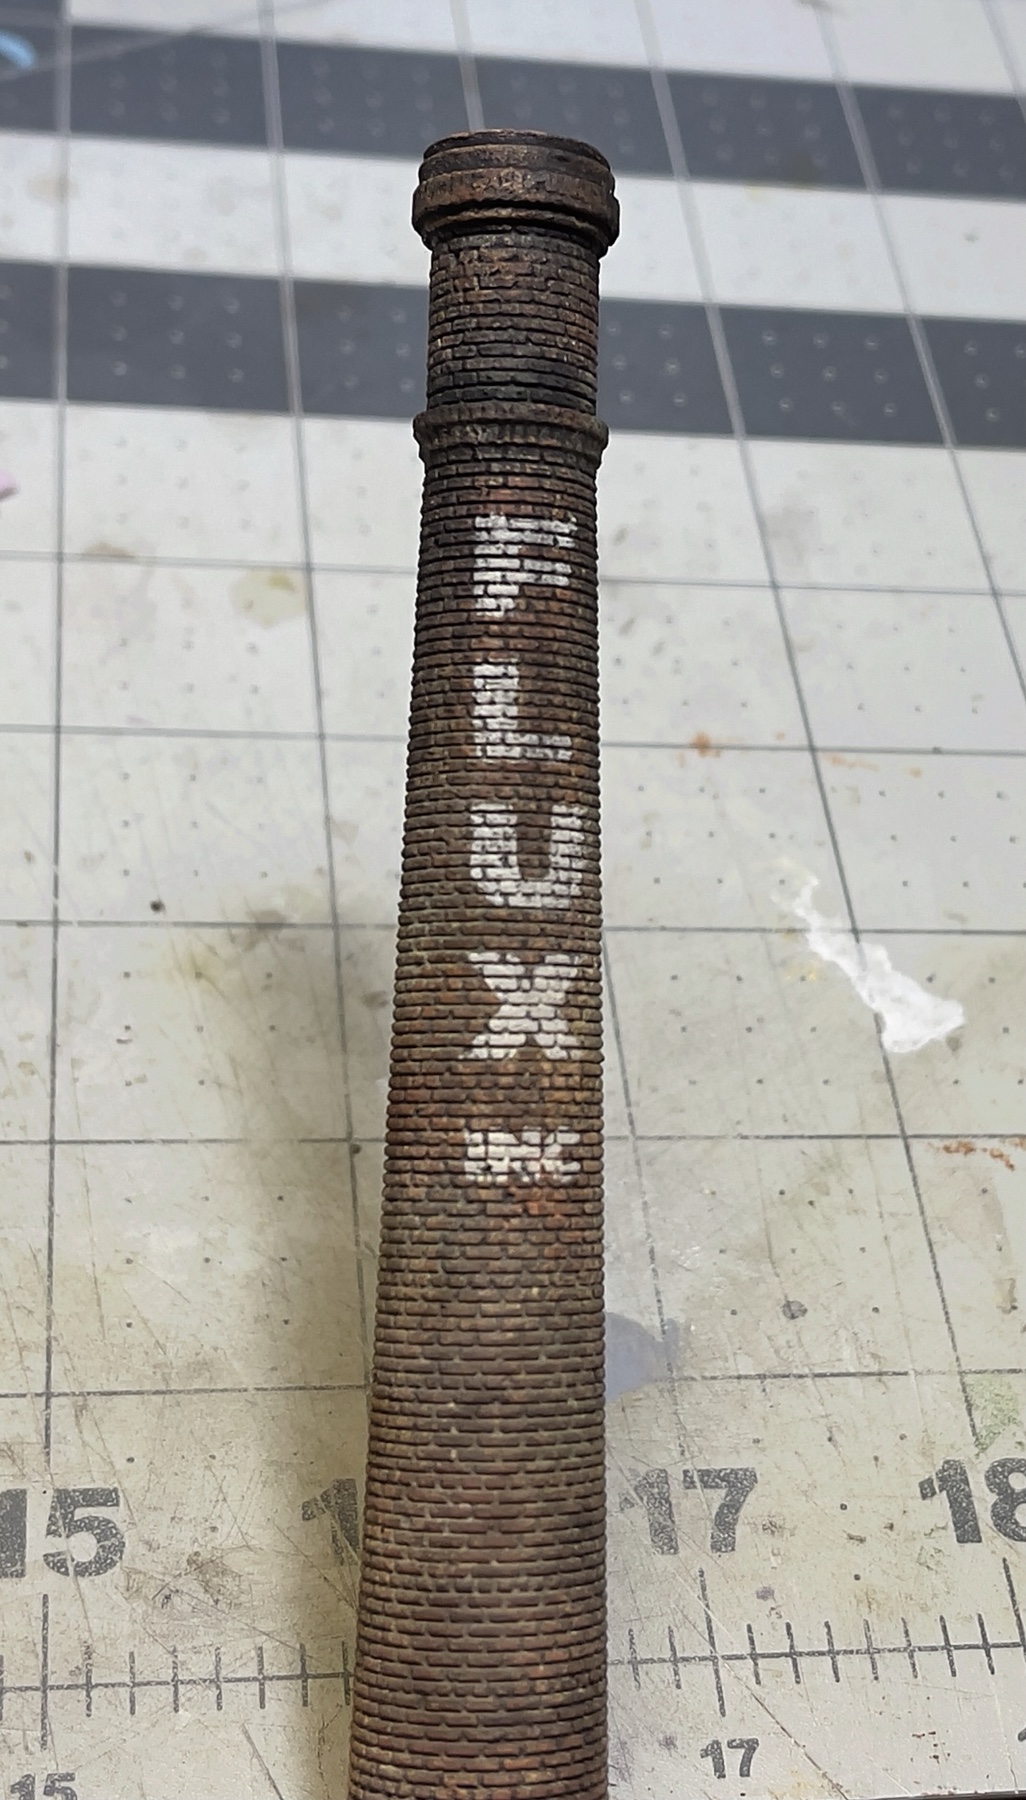
After the walls were done, I painted the smoke stack. This was painted using cheap craft paints. A dark brown first, then terra cotta, then a brick color. I even used a little faded yellow/off white. All of these were sponged on. For the mortar, I used an oil wash – grayish tan, in color. The oil wash, aided by thinners, wicked into all the joint lines. After it was dry, the stack was weathered with chalks for that old, dusty appearance.
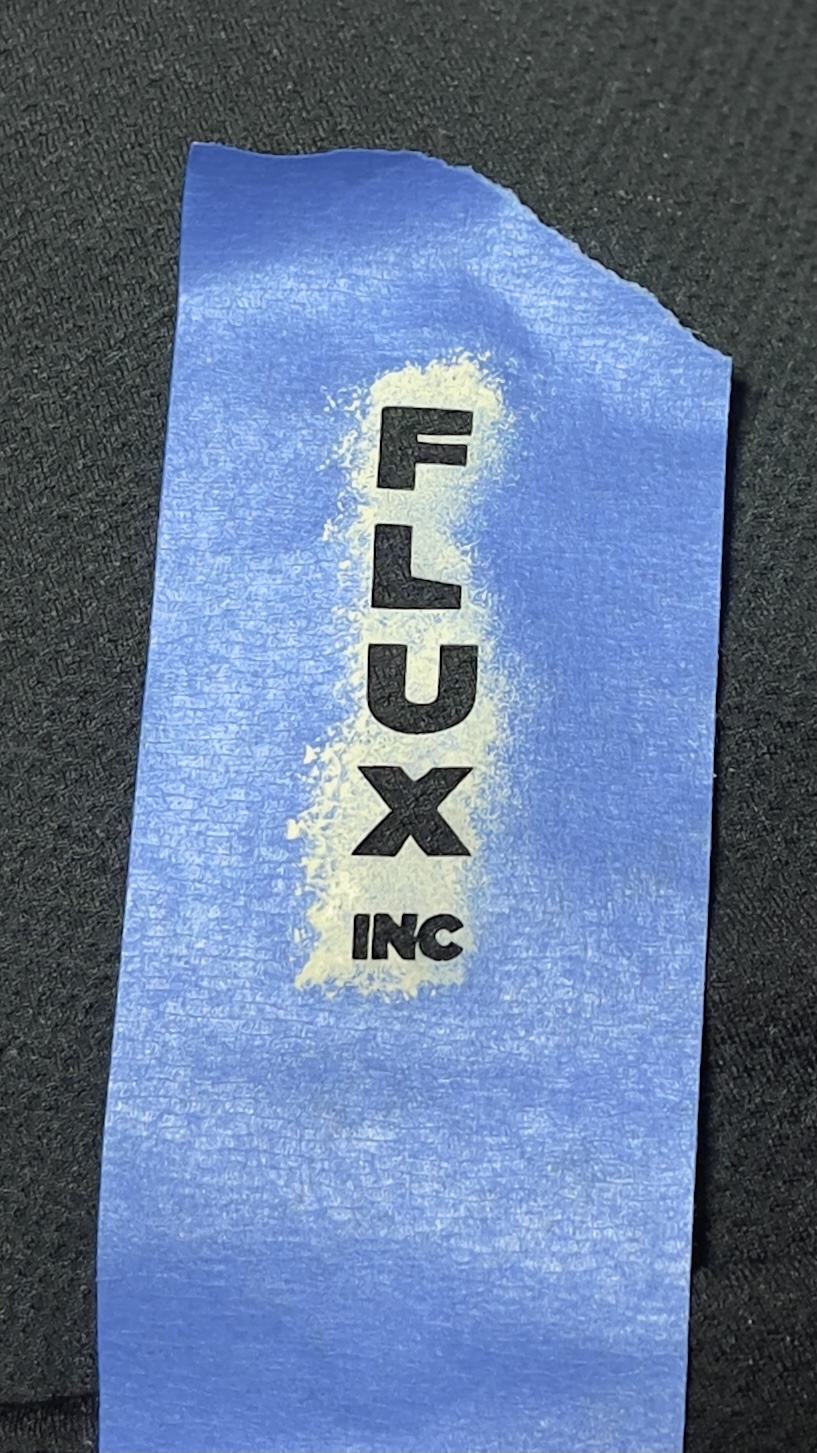
For the sign, I tried a new trick that worked out quite well. I laser cut blue painters tape. Doing this allowed the stencil to adhere and create a neat transfer, with little bleeding at the edges. I’ll be doing this again and again in the future.
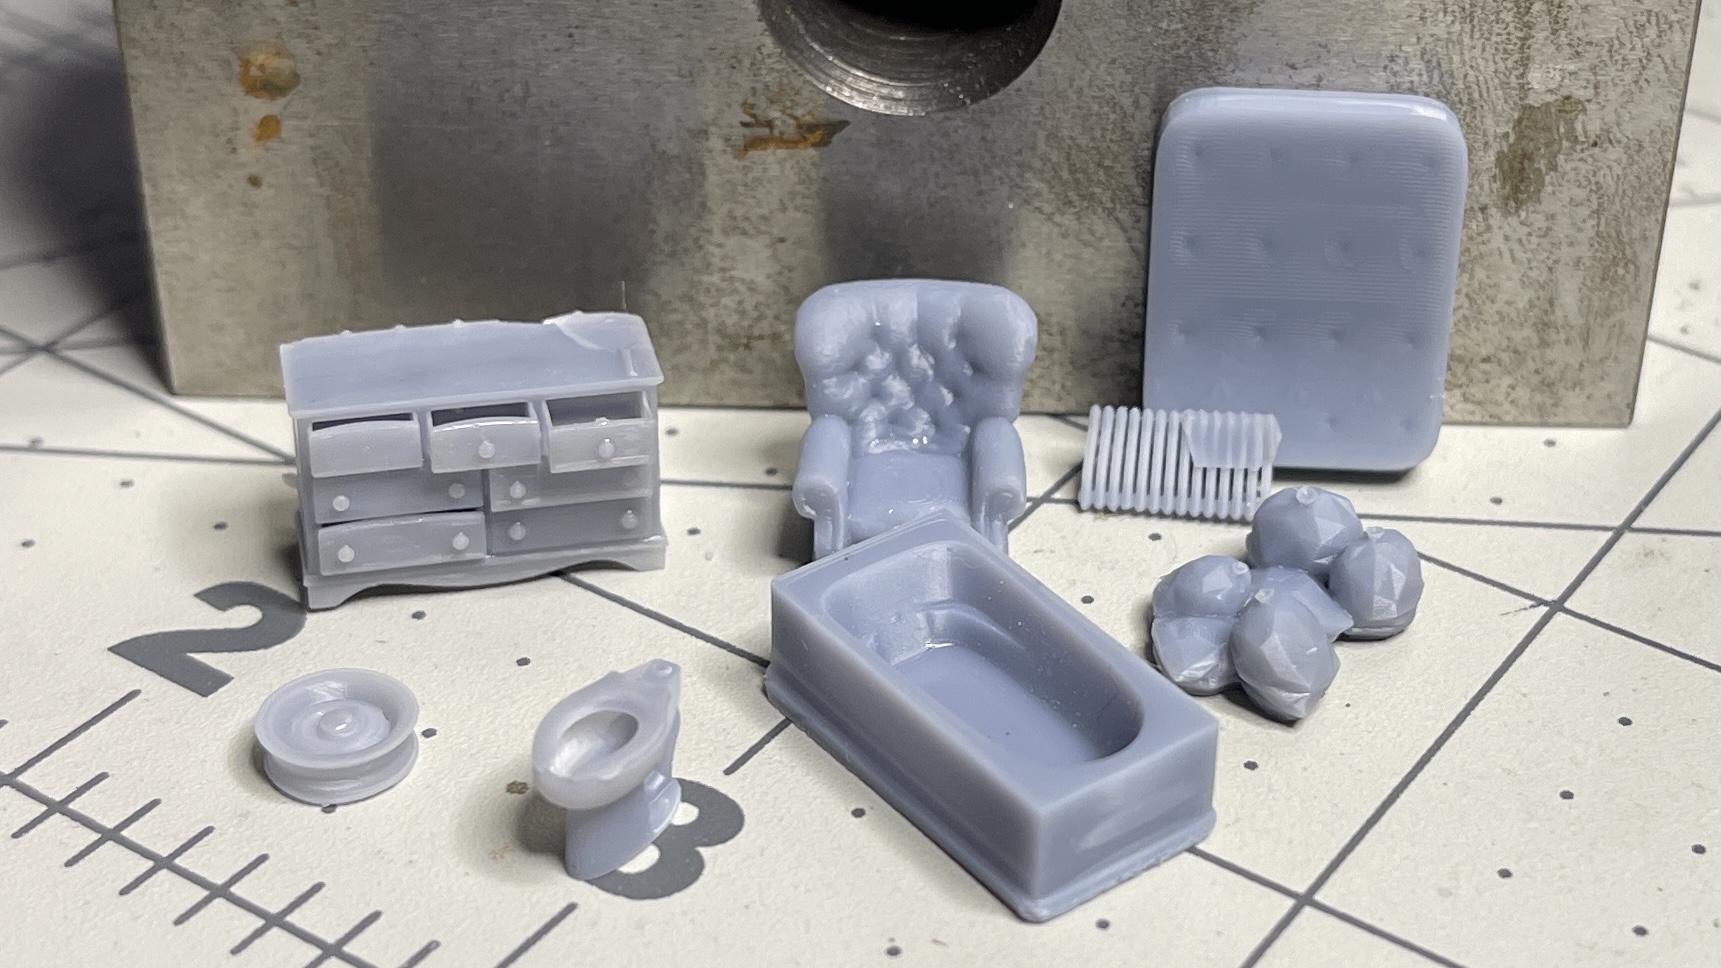
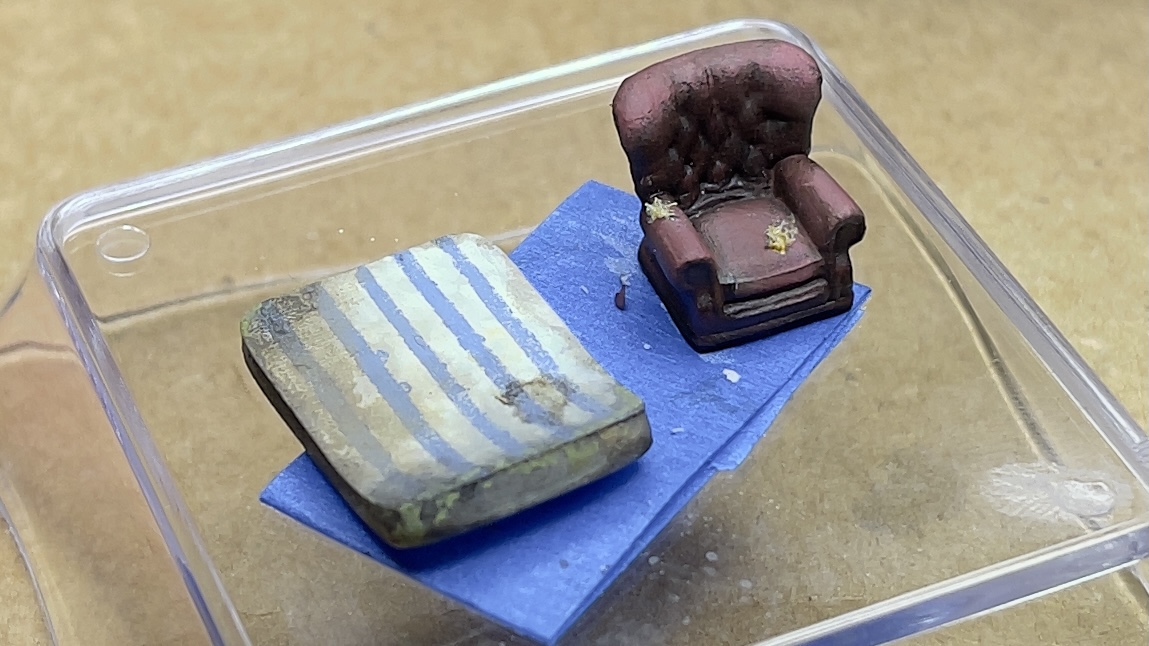
With the structure pretty much done, I painted all my details. I’ll show these two in particular to highlight the power of oils. Apart from the base coat, these are ENTIRELY oils. You want the base coat in acrylic so when you start using thinned oils, the base layer will remain undisturbed.
The weathering on the armchair and mattress was achieved with several thin layers of browns, blacks and a little green for mold. The stain on the mattress was created by dabbing thinned oil in single spot. After half-drying, a small dab of pure thinner was put in the center. The thinner will naturally pool outwards, creating the ring effect.
The same technique was employed to create the stress and wear on the arms of the chair.
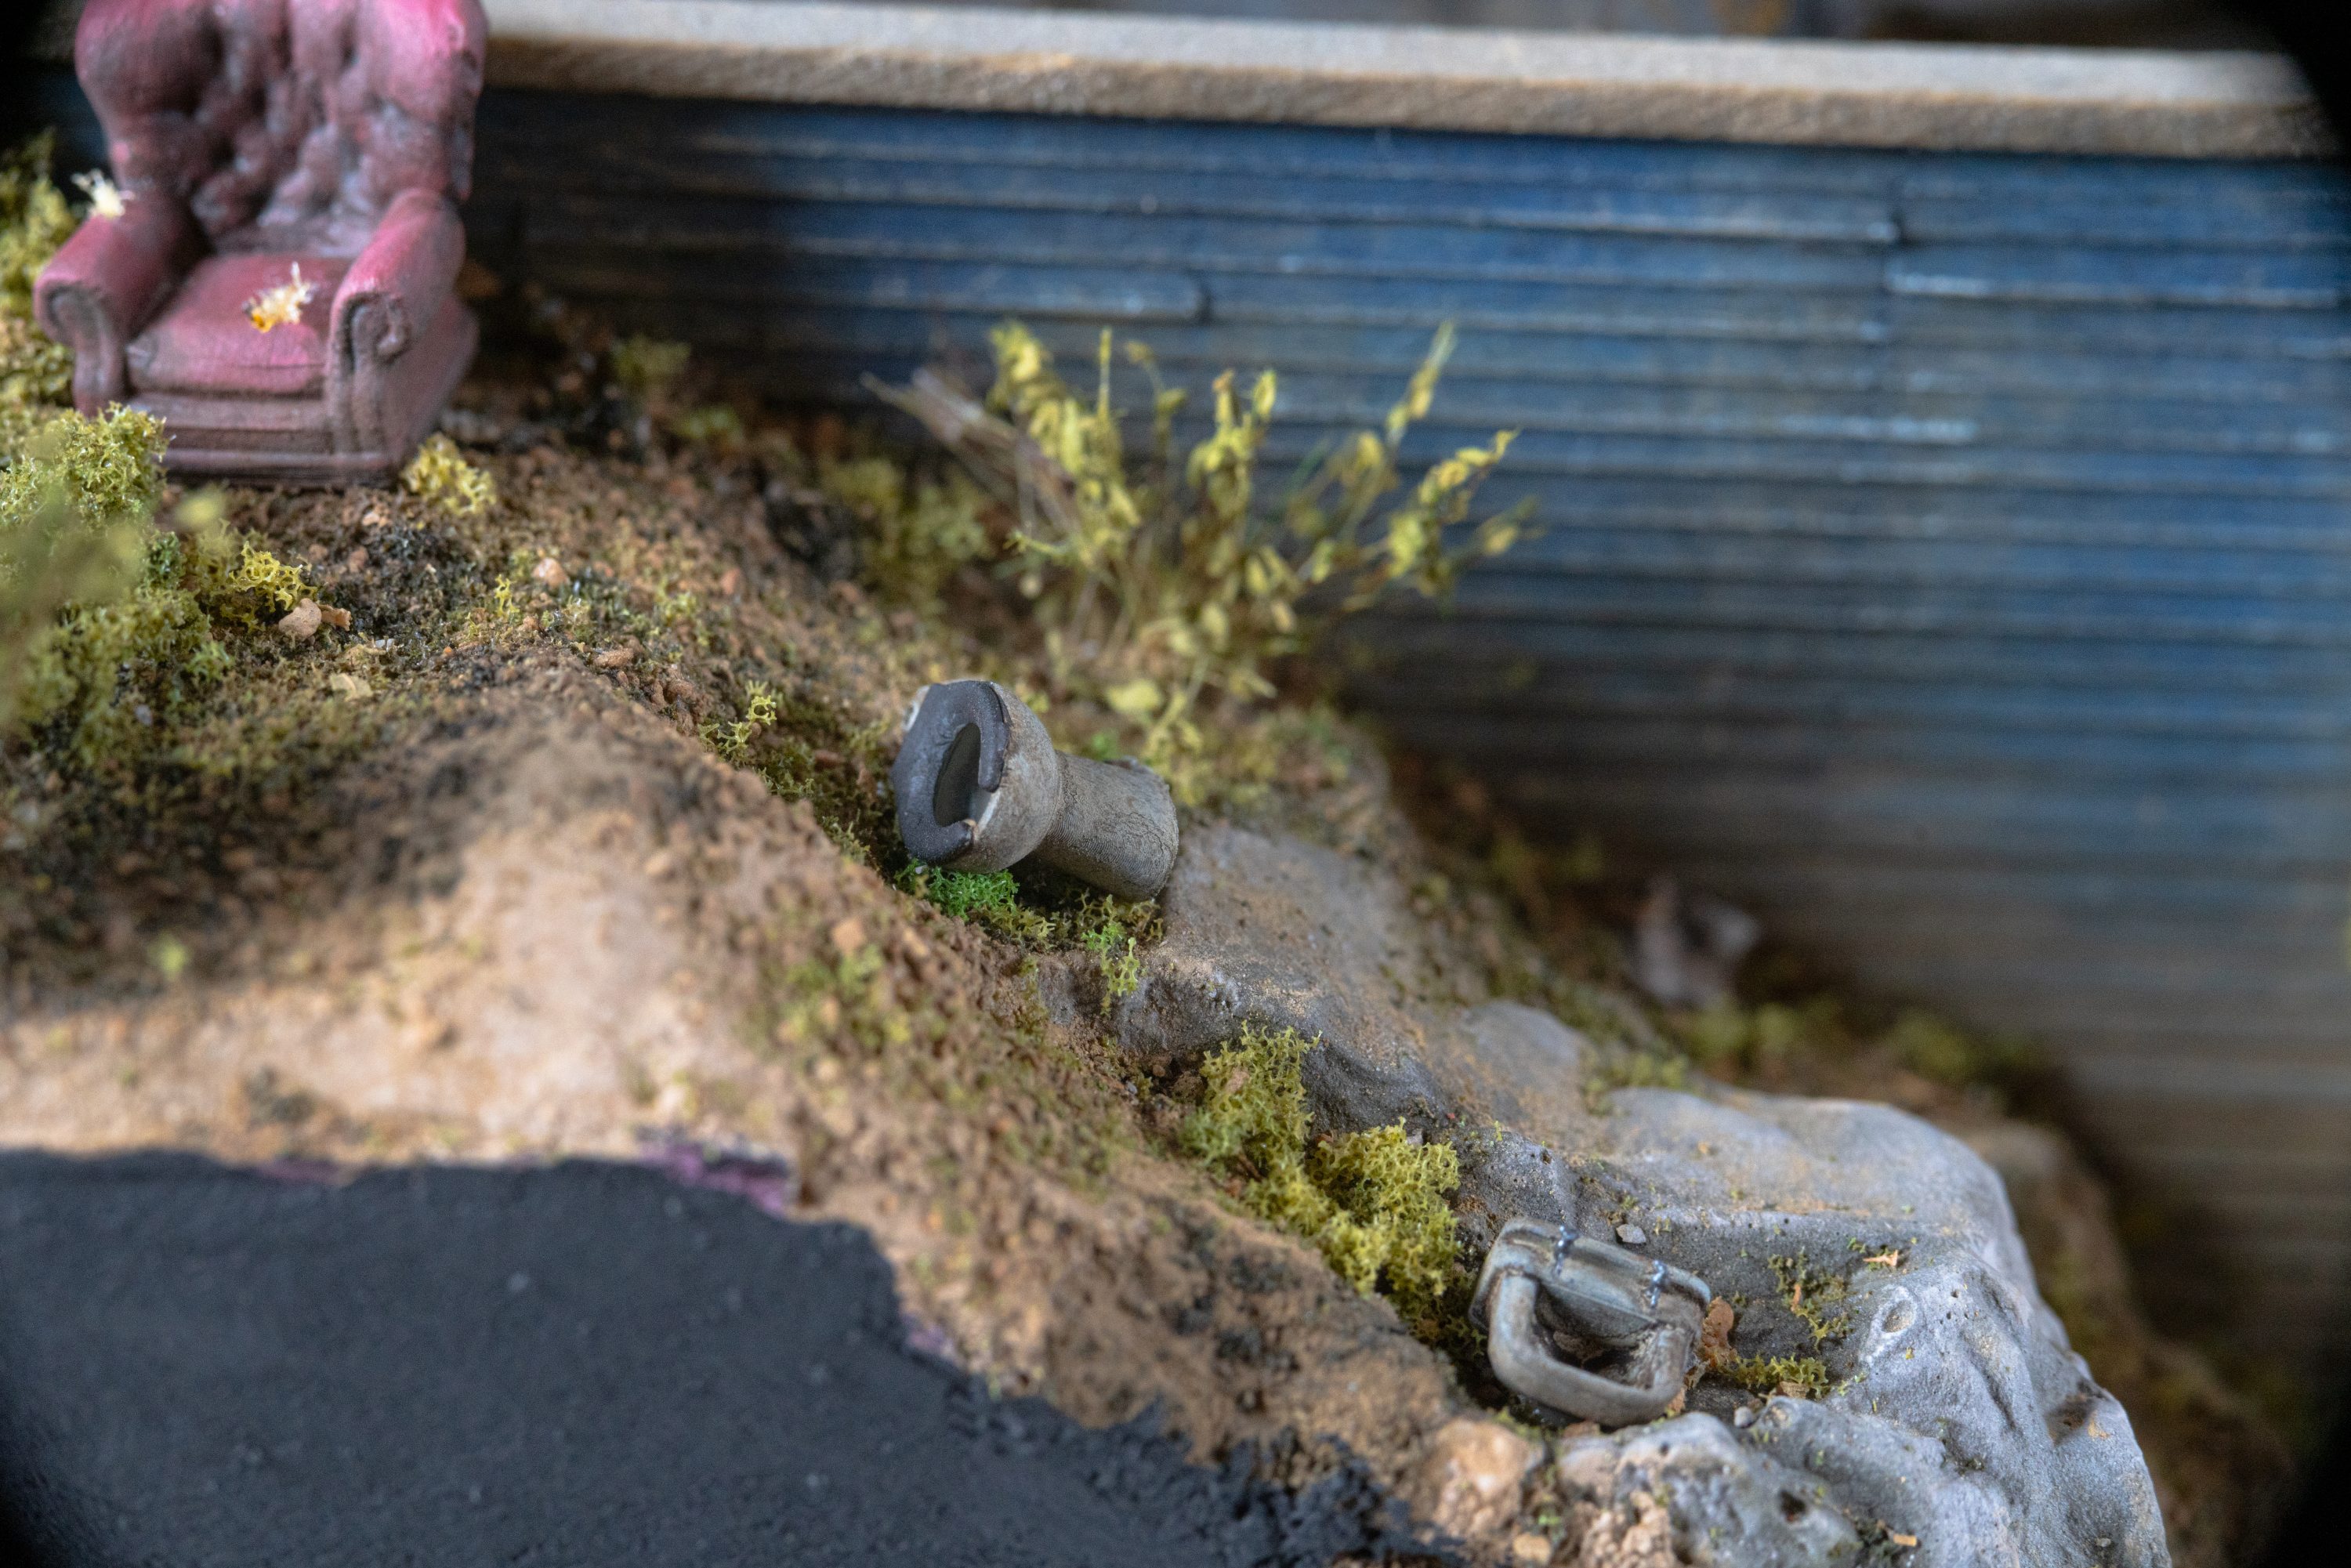
A combination of sponged-on acrylic paints and oil washes were used to paint this old fridge (which is a 3D print, by the way)
For the ground cover, I tried out another new trick. I used colored tile grout. I picked this bag up at Home Depot. It’s Polyblend’s “Haystack” color. There’s nothing particularly special about tile grout over, say, plaster, it’s just that this is pre-colored, inexpensive and dries hard as rock. This bag will last me many, many years.

After laying down a thick coat of this stuff, I sprinkled on my dirt mix and allowed to dry.
After that, I sprinkled on more dirt (varying the colors I have) and created a natural blend. The dirt was then fixed in place with glue/water mix (scenic glue).
While still wet, Woodland Scenics foams and turf blends were added. Same with weeds and tufts etc.
During this stage, I also took a moment to create the road surface, which was achieved using the same technique I used for Lamont Camera: modeling paste, dirt (for texture) and black paint (to make a grey when mixed with the white paste). This new mix was spread evenly and up to the curbs. After drying overnight, I sanded the whole road and then further colored with alcohol & ink, airbrushing (for tone variation), oils for fuel stains and finally chalks for a dusty, dirt appearance in the cracks.
Another secret with scenic cover is ground up leaves. Real ones that is, collected during Fall and blended in a coffee grinder. I use them to feather out and vary the ground cover when it all gets a little too… same-y.
When the ground cover is done, I immediately add the details to the still somewhat wet surface. And that’s why I have them painted and ready to go before-hand.
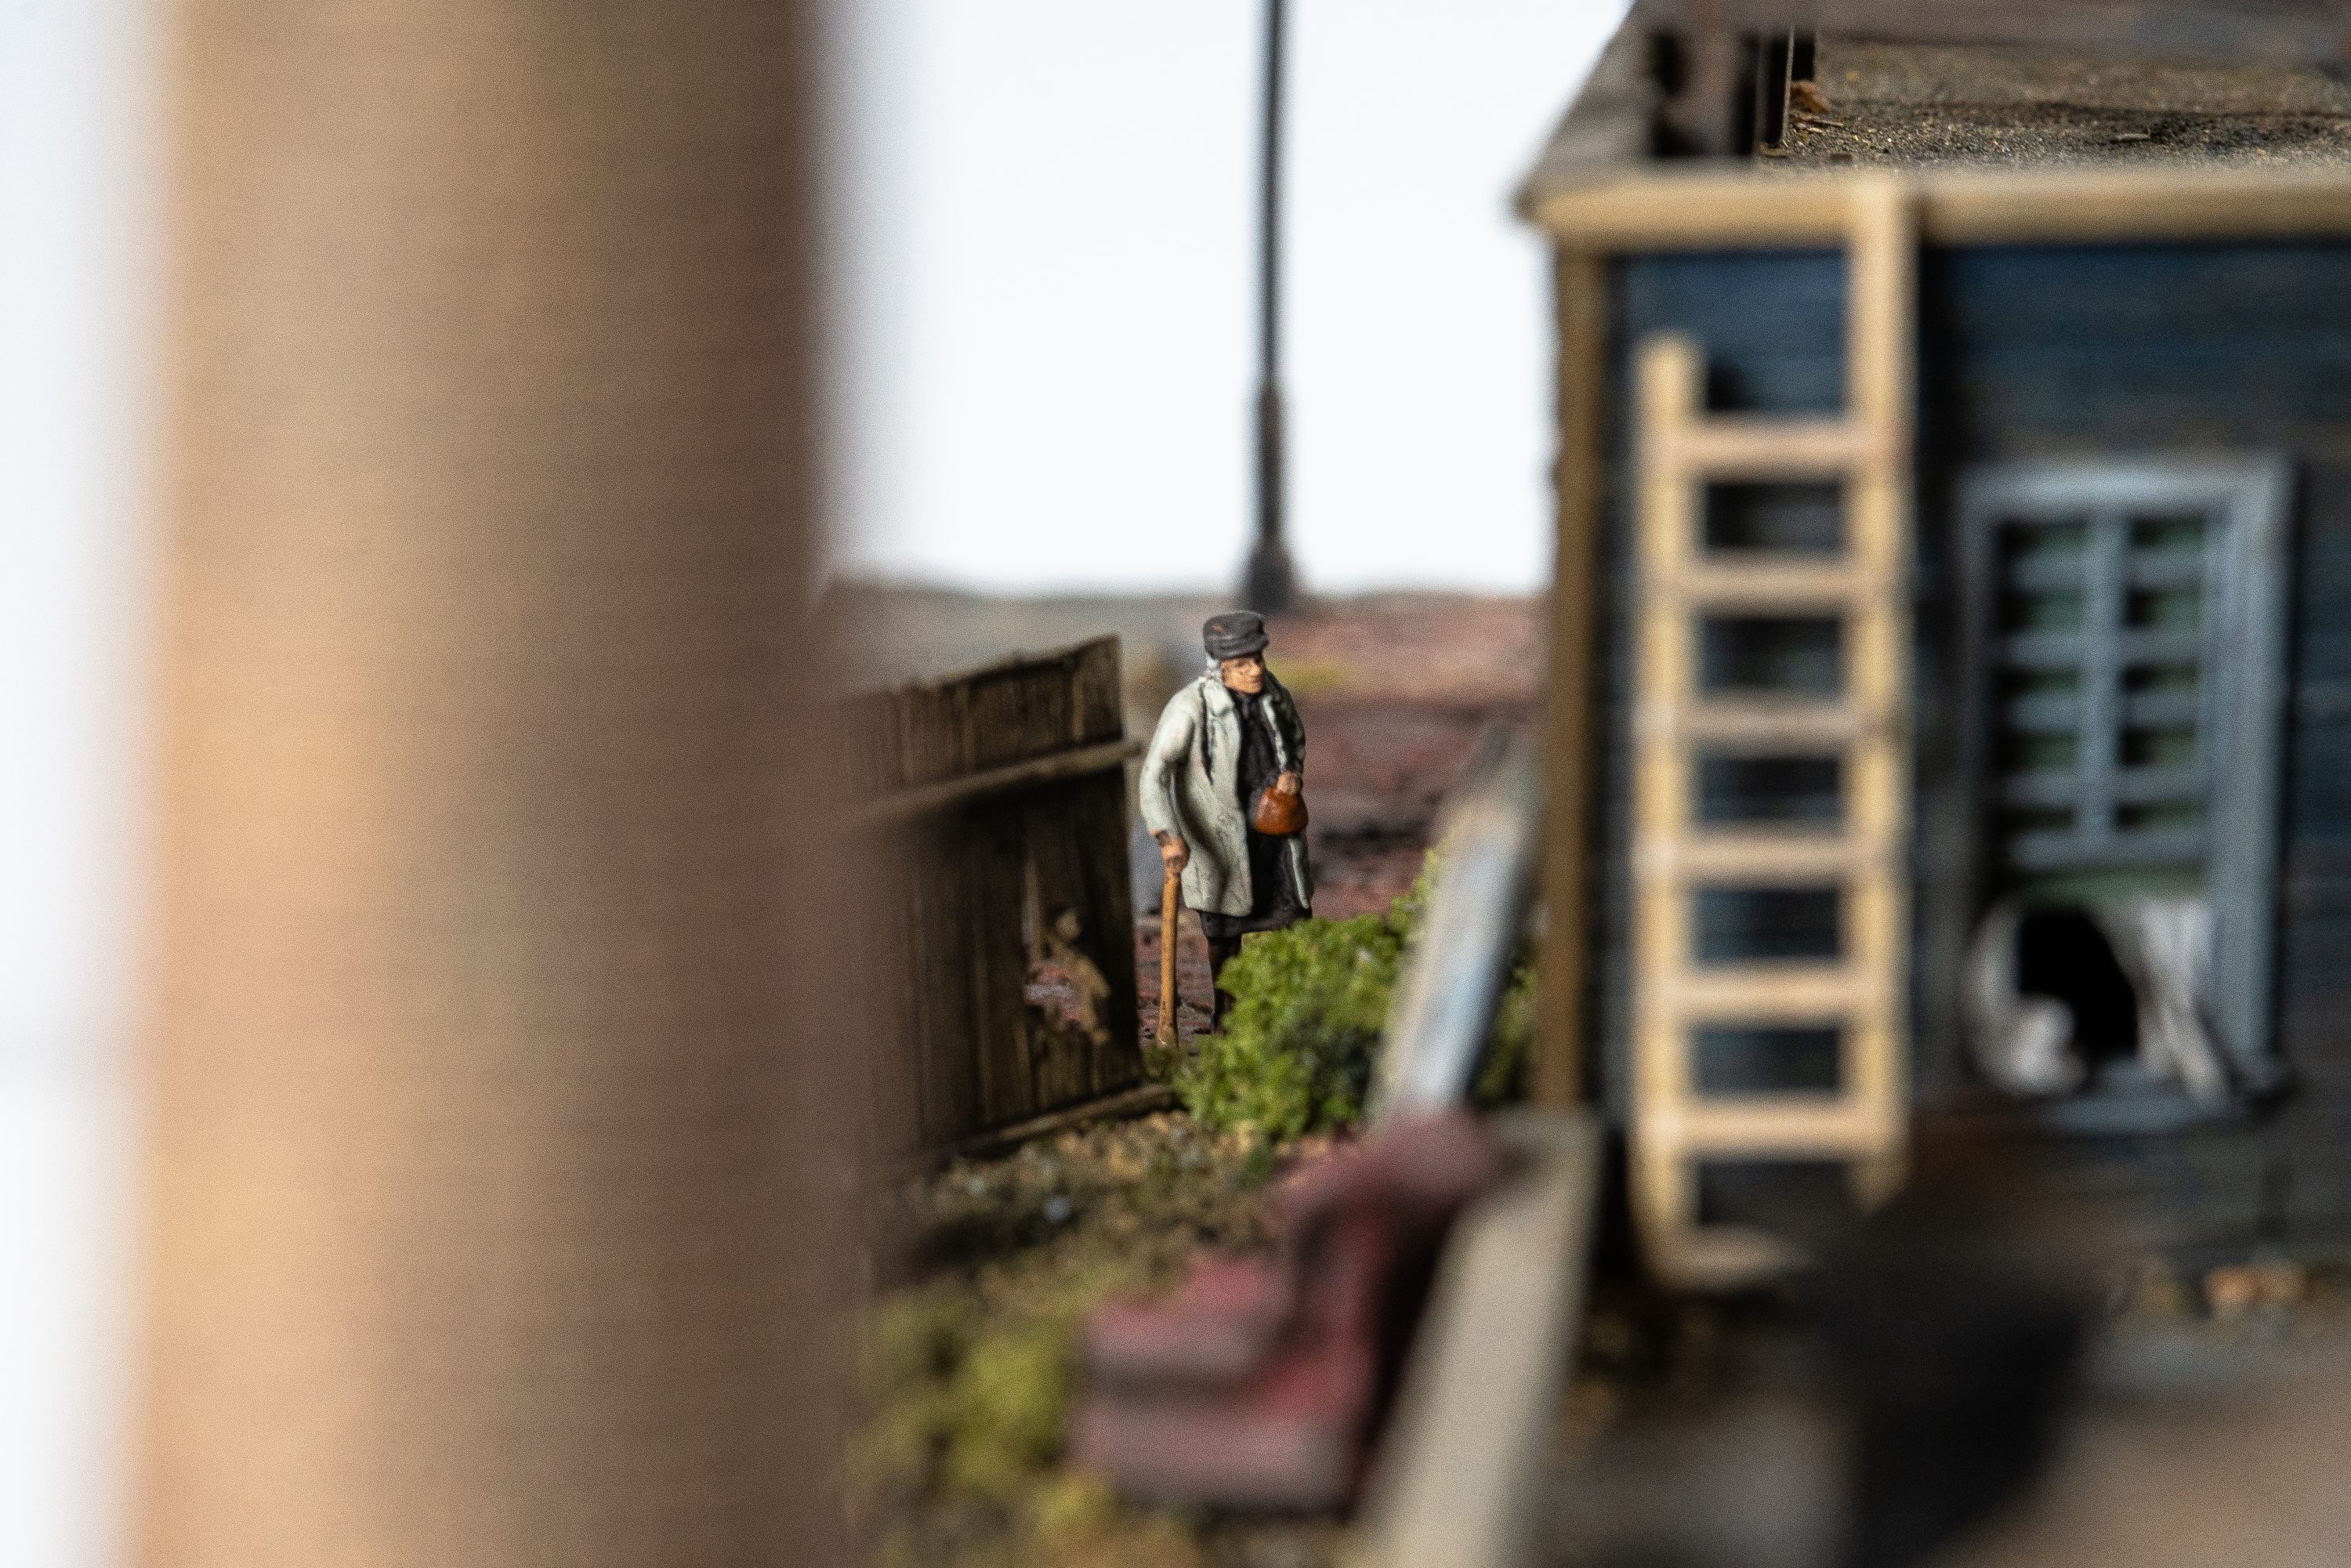
Once various extras are done (oil spills on the roads, bird droppings on roofs, dust on stairs etc) the last thing to be added are the Preisers (and vehicles, if being used). In fact, I did actually add a vehicle on the dirt road, but I removed it as it distracted from the building – the main attraction.
I always weather my Preisers to remove that freshly painting look. A lot of folks use A&I. That’s fine and works well, but I use oils (again). As with any other application, the oils add far more control and allow me to moderate what goes where. A must when dealing with these little folk.
And that’s pretty much it.
I LOVED building this diorama. I LOVED using the laser cutter to make it. Just like 3D printing, this has changed the hobby for me all over again.
Whilst the FLUX machines are the cheapest desktop lasers out there (the Beambox runs $3500), they are certainly several steps above a “Blue Laser”, that much is for sure!
by on August 1, 2021


