


Whilst I am in the midst of some resin nightmares (post coming soon) I have been working with weathering powders on bringing the groundwork to it’s fullest potential – and it’s finish.
Between the time I created “Lost” and now, I have discovered that using weathering powders on groundwork is almost as important as painting it. Especially in creating a dry dirt/dusty environment. Sand isn’t so small that you can’t see each grain if you look hard enough. At 28mm scale, sand is almost like driveway gravel. Almost 😉 Using weathering powders fills in all the gaps between the sand grains, making for a richer groundwork.
My process in creating groundwork is now:
Foam core cut and placed
Tetrion mix (water resistant wall filler + grit + PVA + water)
Grit sprinkled
Fine sand/dry Tetrion powder/little grit mix sprinkled
Details and debris pushed into still wet groundwork
– wait to dry –
PVA brushed on with fine sand sprinkled
– wait to dry –
PAINTED
Water effects added
Weathering powders
After the groundwork was painted and touched up (including all the details) the weathering powders is the last step, then. I made my own from pastels I bought from Tiger – a relatively new high-street-esque Ikea (almost), here in the UK. The whole box of varying colours cost £2.

This was a combination of light brown, yellow and black. You can still see trace amounts of each colour in the tub – ideally you don’t want to see individual colours – and in actual weathering powders you won’t. Using a mortar and pestle will cure this, if you have one.
Using a dry brush, I began dabbing the powder around the groundwork. Use as much or as little as you see fit. That said, as with painting, layering is key – especially with different coloured powders.
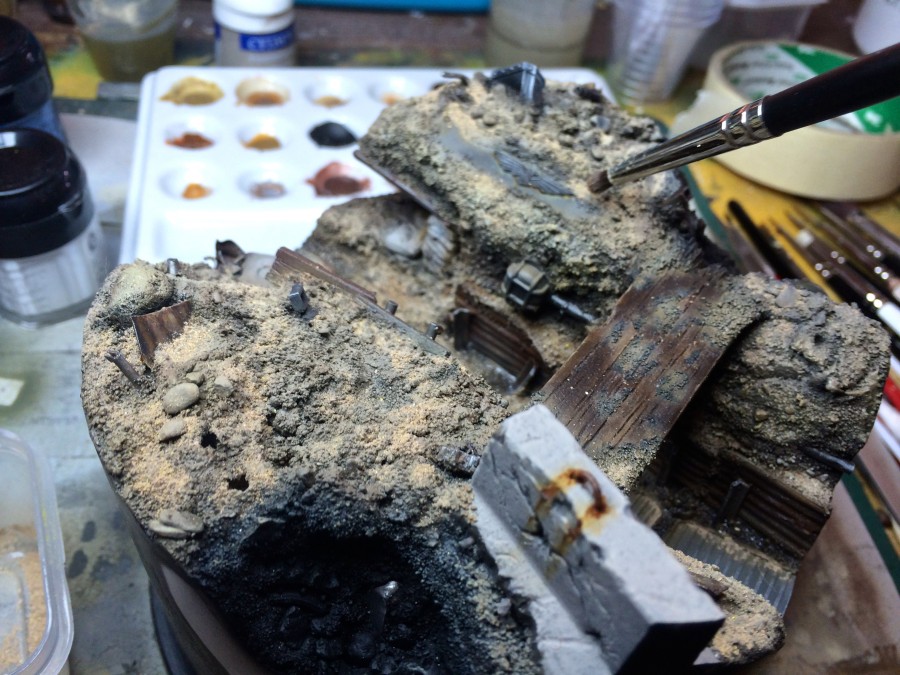
You can see the difference straight away. The nice thing about powders is, if you don’t like it, just blow it away and start again. When I was happy with the first layer, I fixed it in place with white spirit and a brush.
Tip: you have to use a brush with fixing powders in place. Even on sizeable areas like diorama groundwork. Airbrushing won’t work as you’ll just blow all the powder away. Having the brush heavily saturated with white spirit is also best, as when you touch the area it’ll wick into the pigment without disturbing it too much.
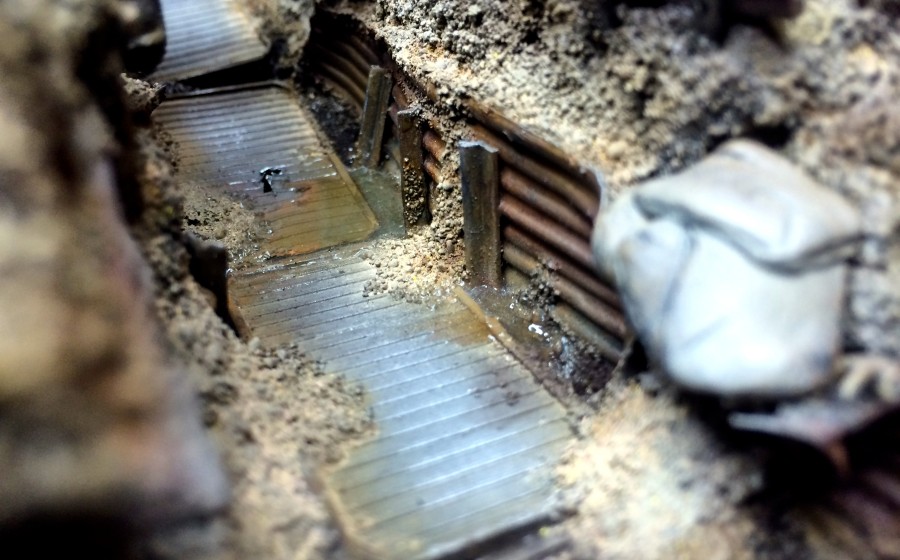
After it was all fixed, I waited for it to dry naturally. Using a hairdryer is risky, as you’ll likely disturb the powder as it dries. White spirit evaporates reasonably quickly anyway. After it was dry, I proceeded with more layers and varying colours slightly, including using a darker brown powder for dry mud. In the areas around the duckboards, a very dark brown (almost black) powder was used to simulate wet, fresh mud.
Here is a snippet of the results (more soon, when diorama is finished!):
by on May 16, 2014


